Category: Desserts

Recipes for cookies, cakes, brownies, fudge and other treats that are easy to make yet still impressive

  • Apple Pie Ballot Bites: An Election Day Recipe Even Kids Can Tackle

    Apple Pie Ballot Bites: An Election Day Recipe Even Kids Can Tackle

    Four years later, this recipe—and the sentiment behind it—remains strong. On the eve of the next election, I couldn’t resist sharing it with a quick update, just in case you, too, could use a post-voting baking project as you await the final polling results.

    I have a tendency to bake through whatever’s on my mind (grief, nostalgia, sheer ridiculousness), so as I started researching everything that’s on the ballot in this presidential election, my thoughts started swirling. There’s something methodical about baking; it keeps my hands busy as my brain processes things. Plus, I thought it might be nice to have a good snack on hand as I waited in line at the polls. Or as I watched the debates (because chewing on caramelized pie dough is a whole lot better than my fingernails).

    Mini apple pies or "ballot bites" in honor of Election Day on Nov. 5, 2024
    Photos: Candace Braun Davison

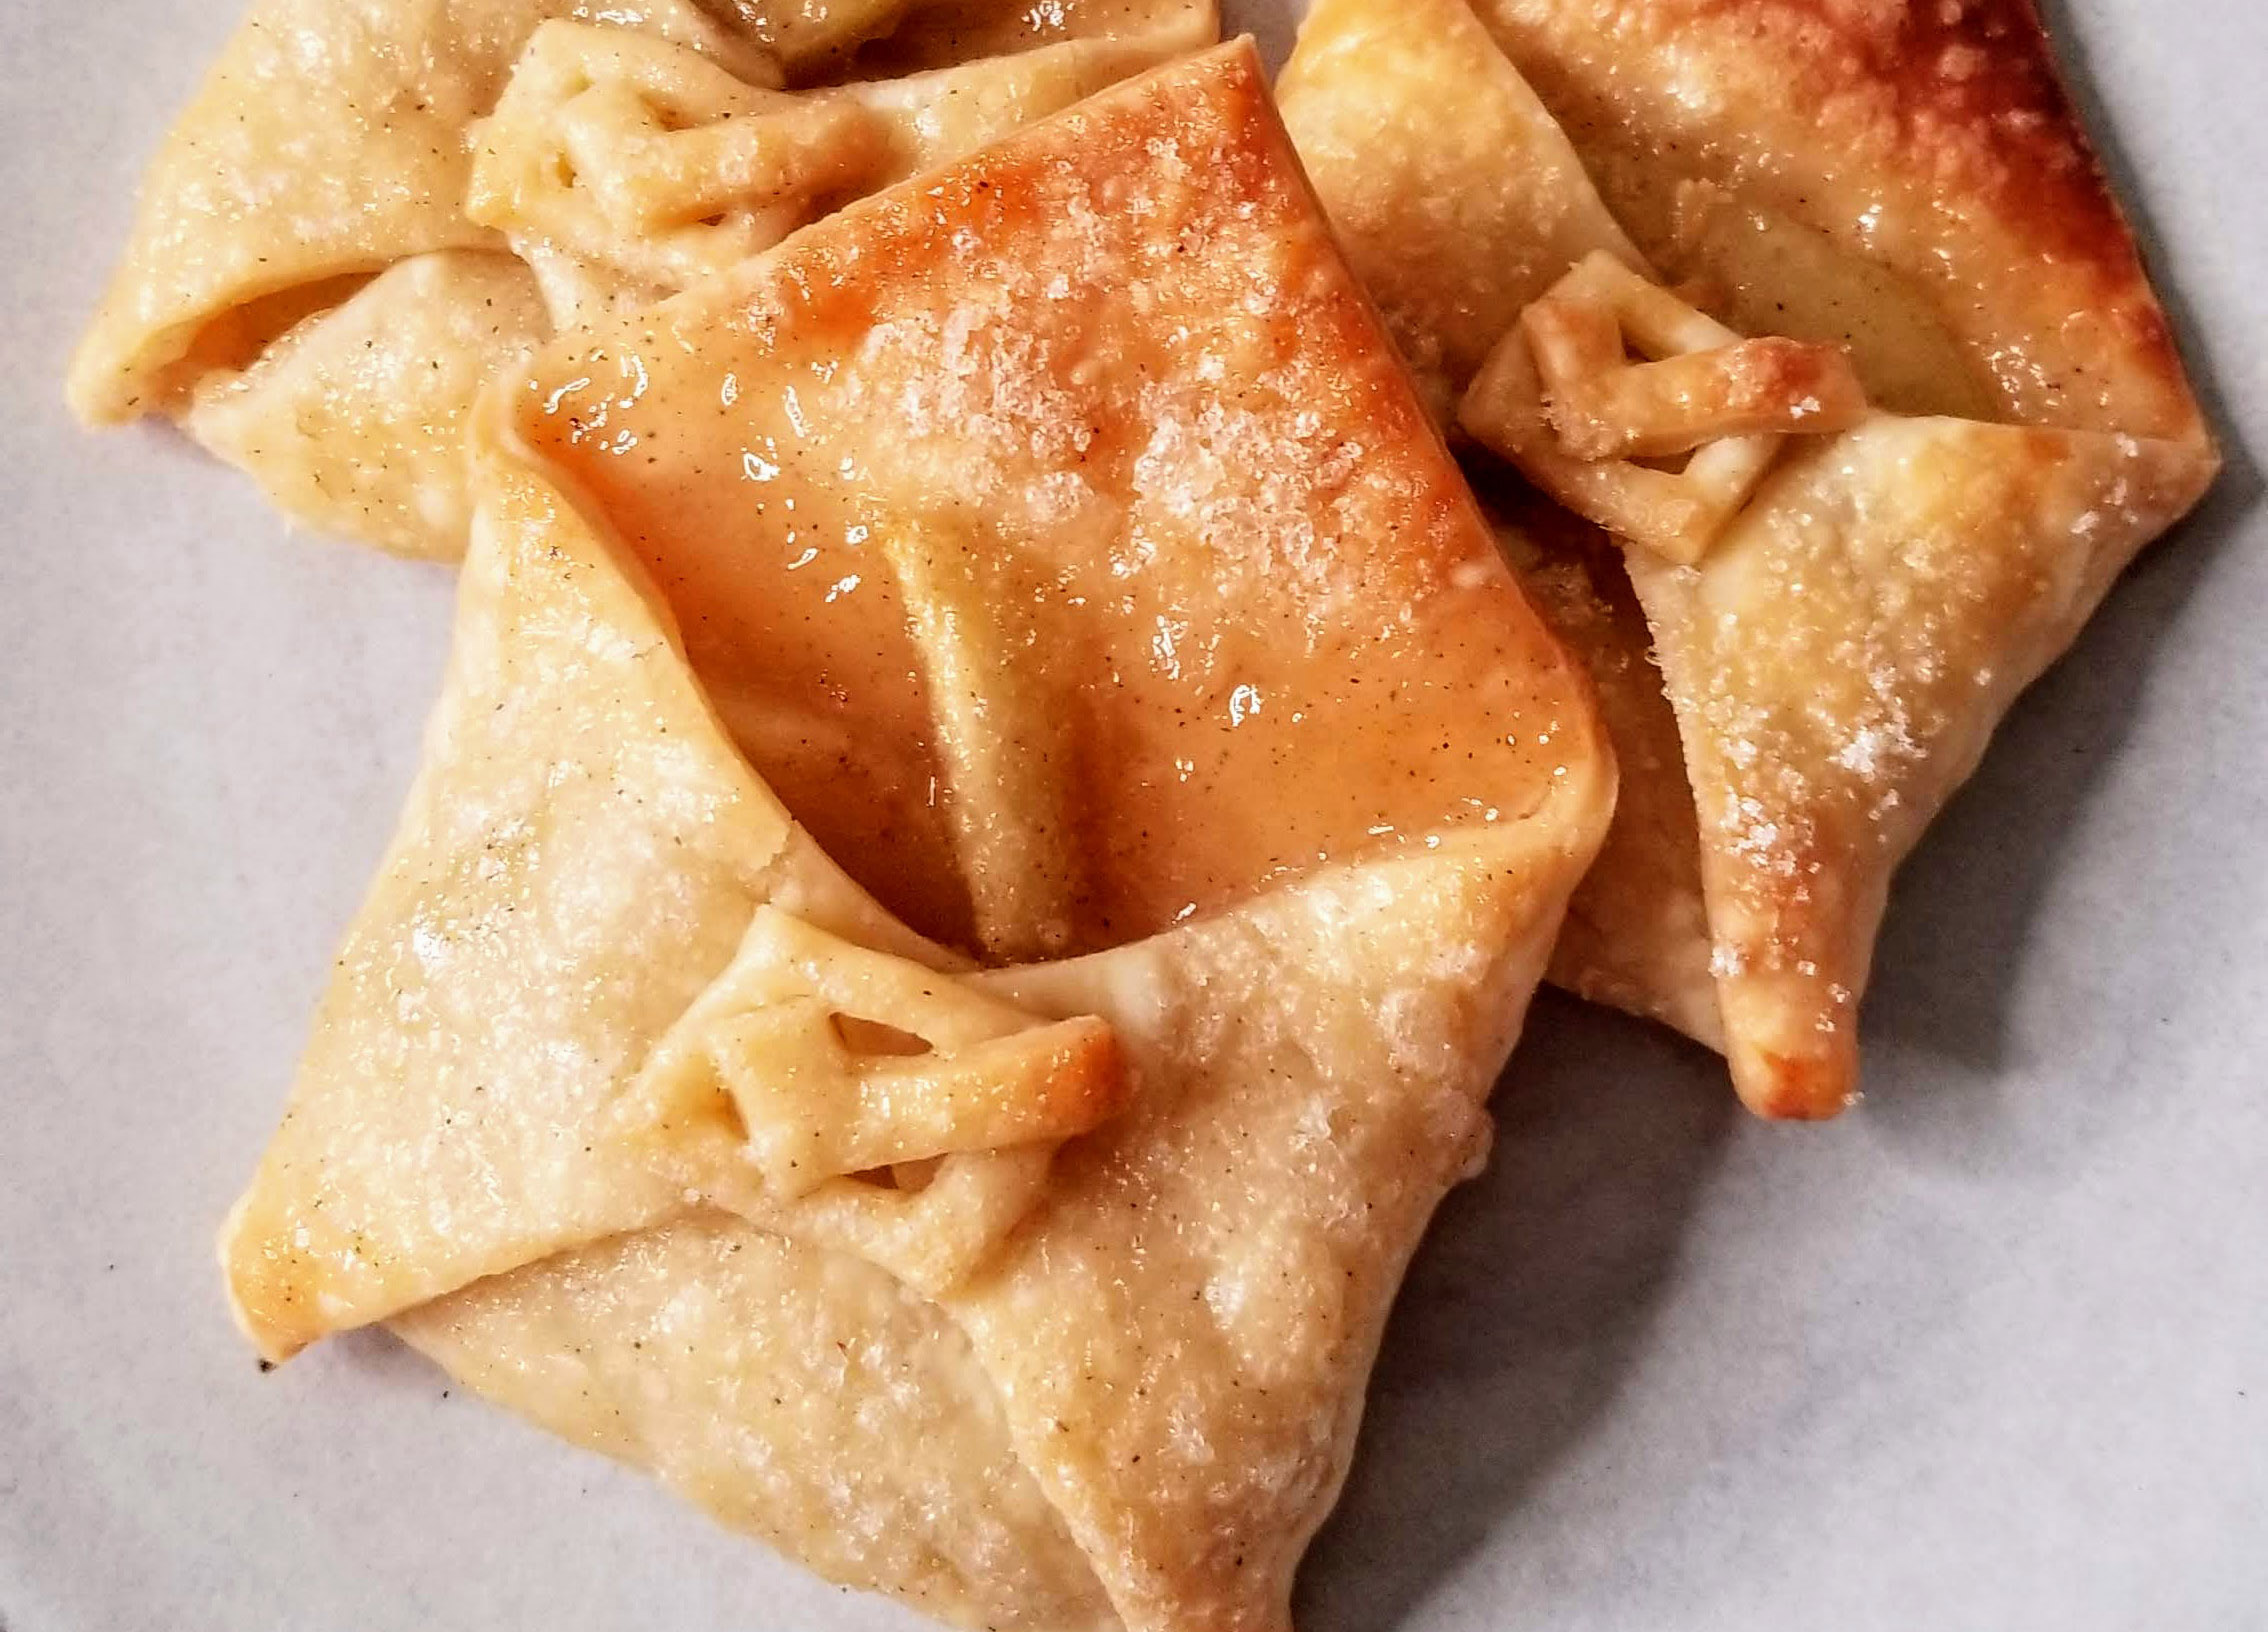
    These Apple Pie Ballot Bites are an Election Day riff on the Love Notes pies you see everywhere online. The filling is a twist on my all-time favorite apple pie, Grandma Ople’s, only simplified, so this project doesn’t take over your whole afternoon. I freehand-cut the boxes and check marks with a paring knife.

    If you’re baking with kids, let them try cutting checkmarks with a butter knife instead. You could also use a tiny flag-shaped cookie cutter (Etsy sells ’em for $1.69!) to trick out your envelopes. (Though I’m sharing this a bit too late for it to ship to you in time; maybe it’s something to consider for 2028?!)

    what they look like before putting 'em in the oven

    Whatever you do, exercise your right to vote on Nov. 5—or skip the lines and vote early, if your state allows it, or vote by mail. The National Conference of State Legislatures has a great state-by-state guide as to when you can vote in your area. You can also use USA.gov to find your local election office and see exactly what’s on the ballot where you are.

    Mini apple pie ballot bites, fresh out of the oven, a fun election day treat
    Apple Pie Ballot Bites: Mini apple hand pies for Election Day

    Apple Pie Ballot Bites

    What's more American than apple pie? Exercising your right to vote! Here's an easy snack you can take to the polls.
    Prep Time 30 minutes
    Cook Time 15 minutes
    Course Dessert
    Cuisine American
    Servings 8 pies

    Ingredients
      

    • 1/4 cup unsalted butter (1/2 stick)
    • 3 tbsp flour
    • 1/4 cup water
    • 1/2 cup sugar, plus more for dusting
    • 1/4 tsp cinnamon
    • 2 Granny Smith apples, peeled, cored and sliced into thin wedges
    • refrigerated pie crust dough (2 nine-inch rounds)

    Instructions
     

    • Preheat oven to 375 degrees F. In a large saucepan over medium heat, melt butter. Add flour, stirring to form a paste. Add water, sugar and cinnamon. Bring the mixture to a boil, reduce heat, then let it simmer for about 5 minutes. The mixture will turn glossy and less gritty as the sugar breaks down, forming a caramelized sauce. Toss apples in sauce. Let sit.
    • Roll out the refrigerated pie dough. Cut off edges, forming a large square. (You'll use the rounded edges to make the check boxes.) Cut the large square into four squares total. Repeat with other crust.
    • Place the pie dough squares on a baking sheet, turning them 90 degrees so they look like diamond shapes on the sheet. Place 3 to 4 apple slices in the center of each piece of pie dough. Flip up the bottom of the dough, then the sides, so all three points meet in the center. It should look like an open envelope. Using the pie scraps and a paring knife, cut out a checkmark and a check for each mini pie. Lightly brush pie crusts with remaining sauce from the pie filling. Sprinkle with sugar, if desired. Bake for 13 to 15 minutes, or until pies are lightly golden.
    Keyword easy baking, pie

    Editor’s Note: This article originally ran in October 2020. It has since been updated to reflect the 2024 election and to ensure accuracy. The recipe remains the same.

  • How to Make A Lattice-Crust Apple Pie (Gif Tutorial Included!)

    How to Make A Lattice-Crust Apple Pie (Gif Tutorial Included!)

    Fall means apple-picking season, which honestly means one thing to me: apple pie. And not just any apple pie, but one with a gooey, caramelized apple filling and a solid crust-to-filling ratio. That calls for a latticeLattice crusts seem simple in theory, but it’s easy to trip them up as you start weaving all of those loose threads of pie dough together. At least that’s what happens to me. Before I know it, the dough’s a little slick and gooey from resting on the apples, and it’s fused together in weird ways, and—oh!—I missed that over-under maneuver in the third row.

    Before I know it, the crust’s a jumbled mess. Ah well.

    Nate, however, is a lattice-crust pro, and once he broke down the technique for me, everything became crystal clear.

    Here’s How to Create an Easy Lattice Crust for Your Apple Pie:

    lbw-pie-lattice-branded
    Gif: Nathan Davison

    Premade, pre-rolled-out pie crust works just as well as (and, in some cases, better than) homemade crust, so don’t feel like you have to do everything from scratch. If you’re just starting out, I recommend this shortcut—particularly using Pillsbury Refrigerated Pie Crust, which is stretchy (not crumbly) and fairly foolproof to use.

    How to Make a Lattice Crust, Step by Step:

    1. Place the bottom crust on the pie plate and top with the filling, leaving about 1/4-inch of crust around the edge.
    2. Take the top crust and slice it into 1/2-inch strips. Take half and place them in vertical stripes atop the pie. Then, peel back every other one and lay a strip of pie crust horizontally across the bottom of the pie (the end closest to you). Flip the peeled-back vertical stripes back across the pie.
    3. Now, grab the vertical stripes you didn’t peel back last time and peel those back. Lay a strip of pie crust horizontally across the pie, leaving a little space between it and the previous horizontal stripe. Flip the peeled-back vertical strips of pie dough back across the top of the pie.
    4. Go back to the first set of vertical strips you peeled back, and peel them back just enough so they expose the top half of the pie (and are resting, folded over, atop the horizontal strips you’ve just added). Add a horizontal strip of dough, and flip the peeled-back strips over it.
    5. Repeat this process until you’ve reached the top of the pie—you may have to adjust your spacing, if you put them too close together early on—and when done, crimp the edges of the pie to seal everything together.
    6. Brush the lattice with an egg wash and sprinkle with sanding sugar.

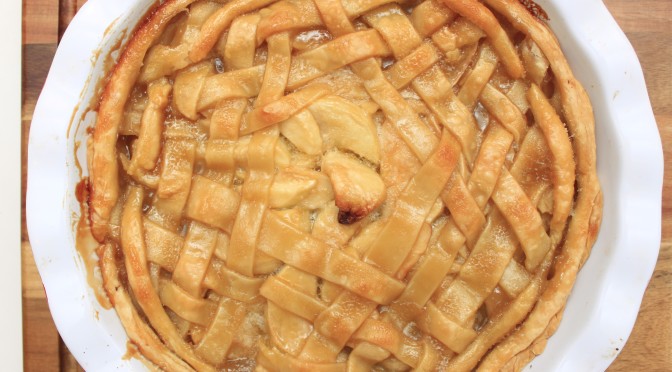
    Once you’ve mastered the basics, you can start experimenting with more complex designs, like when Nate schooled me with this five-point lattice pattern (faaancy).

    Lattice-Topped Apple Pie, Photo: Nathan Davison
    Photo: Nathan Davison

    What’s the Best Apple Pie Recipe to Go With a Lattice Crust?

    If you’re going to put in the effort to make lattice-crust pie, you’ve got to make Grandma Ople’s Apple Pie. I add a little cinnamon to my version of the recipe, but either way, it creates a caramelized crust that will have people raving. Even store-bought crusts suddenly seem blue ribbon-worthy. Promise.

    How to Make a Perfect Lattice-Topped Pie
    How to Make a Perfect Lattice-Topped Pie

    Note: This article originally ran in October 2015, but it has since been updated to ensure its accuracy. Nine years later, the tutorial holds up—even if my Pinterest pin’s fonts are (admittedly) a little dated.

  • How to Make Bingo & Bluey-Inspired Cupcakes at Home

    How to Make Bingo & Bluey-Inspired Cupcakes at Home

    Like our cultural obsession with Taylor Swift, there is no peak Bluey. The universe cannot get enough, though in my household, sometimes I wonder whether the adults love the show even more than the kids. (What else can make you laugh, then cry, then laugh again in 7 minutes flat?!) If your home’s under a similar spell, these Bingo- and Bluey-inspired cupcakes make for a fun rainy day activity—or edible arts and crafts project.

    They make for a great birthday party activity too—simply bake a batch of cupcakes in advance, along with a big batch of vanilla frosting that you color ahead of the party and separate into resealable sandwich bags. Then, you can give each kid a cupcake (or two) and let them share bags of frosting and go to town. Don’t like what you make? Eat it. Everybody wins. (Except for maybe the parents who take home sugared-up kids, particularly the Muffin Heeler at the party who guzzles frosting straight outta the bags. You know that’s going to happen.)

    Oh, and if you want to make one big Bluey-inspired cake instead, I’ve got a tutorial for that too.

    @candacebd

    Bingo & Bluey cupcakes: because the best crafts are ones you can eat. You’ll need: *vanilla frosting *gel food coloring *mini Hershey’s bars (optional, for the ears; frosting works too) *mini chocolate chips *chocolate cupcakes, baked and cooled Outlining the characters in blank frosting made a big difference in the end! #desserttiktok #blueytok #bingocake #blueycupcakes #birthdaypartyideas #blueyparty #kidscrafts #kidsbaking

    ♬ sonido original – bluey

    How to Make Bingo- and Bluey-Inspired Cupcakes

    You’ll need:

    • 1 batch of 18 cupcakes, baked and cooled
    • 6 cups buttercream or cream cheese frosting, homemade or store-bought
    • gel food coloring (red, yellow, blue, black)
    • mini chocolate chips (optional, for their noses)
    bluey and bingo inspired cupcakes in a cupcake tin, all homemade
    Photos: Candace Braun Davison

    Directions:

    1. Prep Your Colors

    For All Cupcakes:

    You need one base cupcake color (I chose pink, for contrast). One 16-ounce container (or 2 cups of homemade) should get the job done.

    Then, take one container (or 2 cups homemade frosting) and divide it into three bowls for Bingo & Bluey’s details:

    • White (plain vanilla/cream cheese frosting)
    • Light tan (mix in half a drop of yellow and a scant spoonful of the light-orange frosting, adding more until you have the shade you want)
    • Black (add black gel frosting, a drop at a time, until it’s as dark as you like it)

    Now, with that final 2 cups of frosting, you’ll set aside 5 bowls for Bingo’s orange-y coloring and Bluey’s blue tones.

    For Bingo cupcakes:

    • Light orange (start by mixing in 1 drop yellow, 1/2 drop red, adding gradually to achieve desired color)
    • Dark orange (start with 1 drop yellow, 1 drop red; add more if needed)

    For Bluey cupcakes:

    • Light blue (add a drop of blue gel coloring at a time, mixing until you have a pale sky blue)
    • Medium blue (add twice as much blue)
    • Dark blue (add the same amount as medium blue, then a drop of black)
    Make a Bluey-inspired Bingo cupcake by drawing a tan oval and orange ears

    2. Draw an arch in light orange (for Bingo) or light blue (for Bluey).

    Color it in. Then use dark orange (or dark blue) to draw two triangle ears on top, and two ovals for the patches around their eyes.

    How to make a bluey-inspired bingo cupcake: adding tan details for depth and define the snout

    4. Add a tan snout and a mini chocolate chip nose.

    (You can skip the chocolate chip and use black frosting if you want. There are no rules here!)

    adding white oval eyes and brows to the bingo-inspired cupcake

    5. Use white frosting for the stomach, eyes and brows for Bingo.

    For Bluey, use light blue for the brows/stomach.

    bingo cupcake tutorial: adding the eyes and smile with black frosting

    6. Draw in the eyes and smile in black frosting, then outline the whole thing.

    Cut the tiniest hole possible in your resealable bag of black frosting, or use a #2 Wilton piping tip, so it doesn’t come out blobby or blotchy.

    Feel free to riff on this; my 5-year-old daughter and I had a blast experimenting with the whole Heeler fam (before moving on to self-portraits and other designs). Next up, I’m making Muffin muffins!

    Editor’s Note: I’m not affiliated with Bluey/Disney+/BBC. I’m just a fan, sharing a tutorial for other parents looking to add a little joy to their kids’ day.

  • Cadbury Mini Egg Magic Cookie Bars

    Cadbury Mini Egg Magic Cookie Bars

    Jump to Recipe

    Whether you’re gearing up for Easter or looking for ways to use up leftover candy, magic cookie bars are the answer. They’re endlessly versatile, so you can chop up just about any chocolate—Milky Ways, Snickers, Rolos, M&M’s, you name it—and wind up with a winning treat.

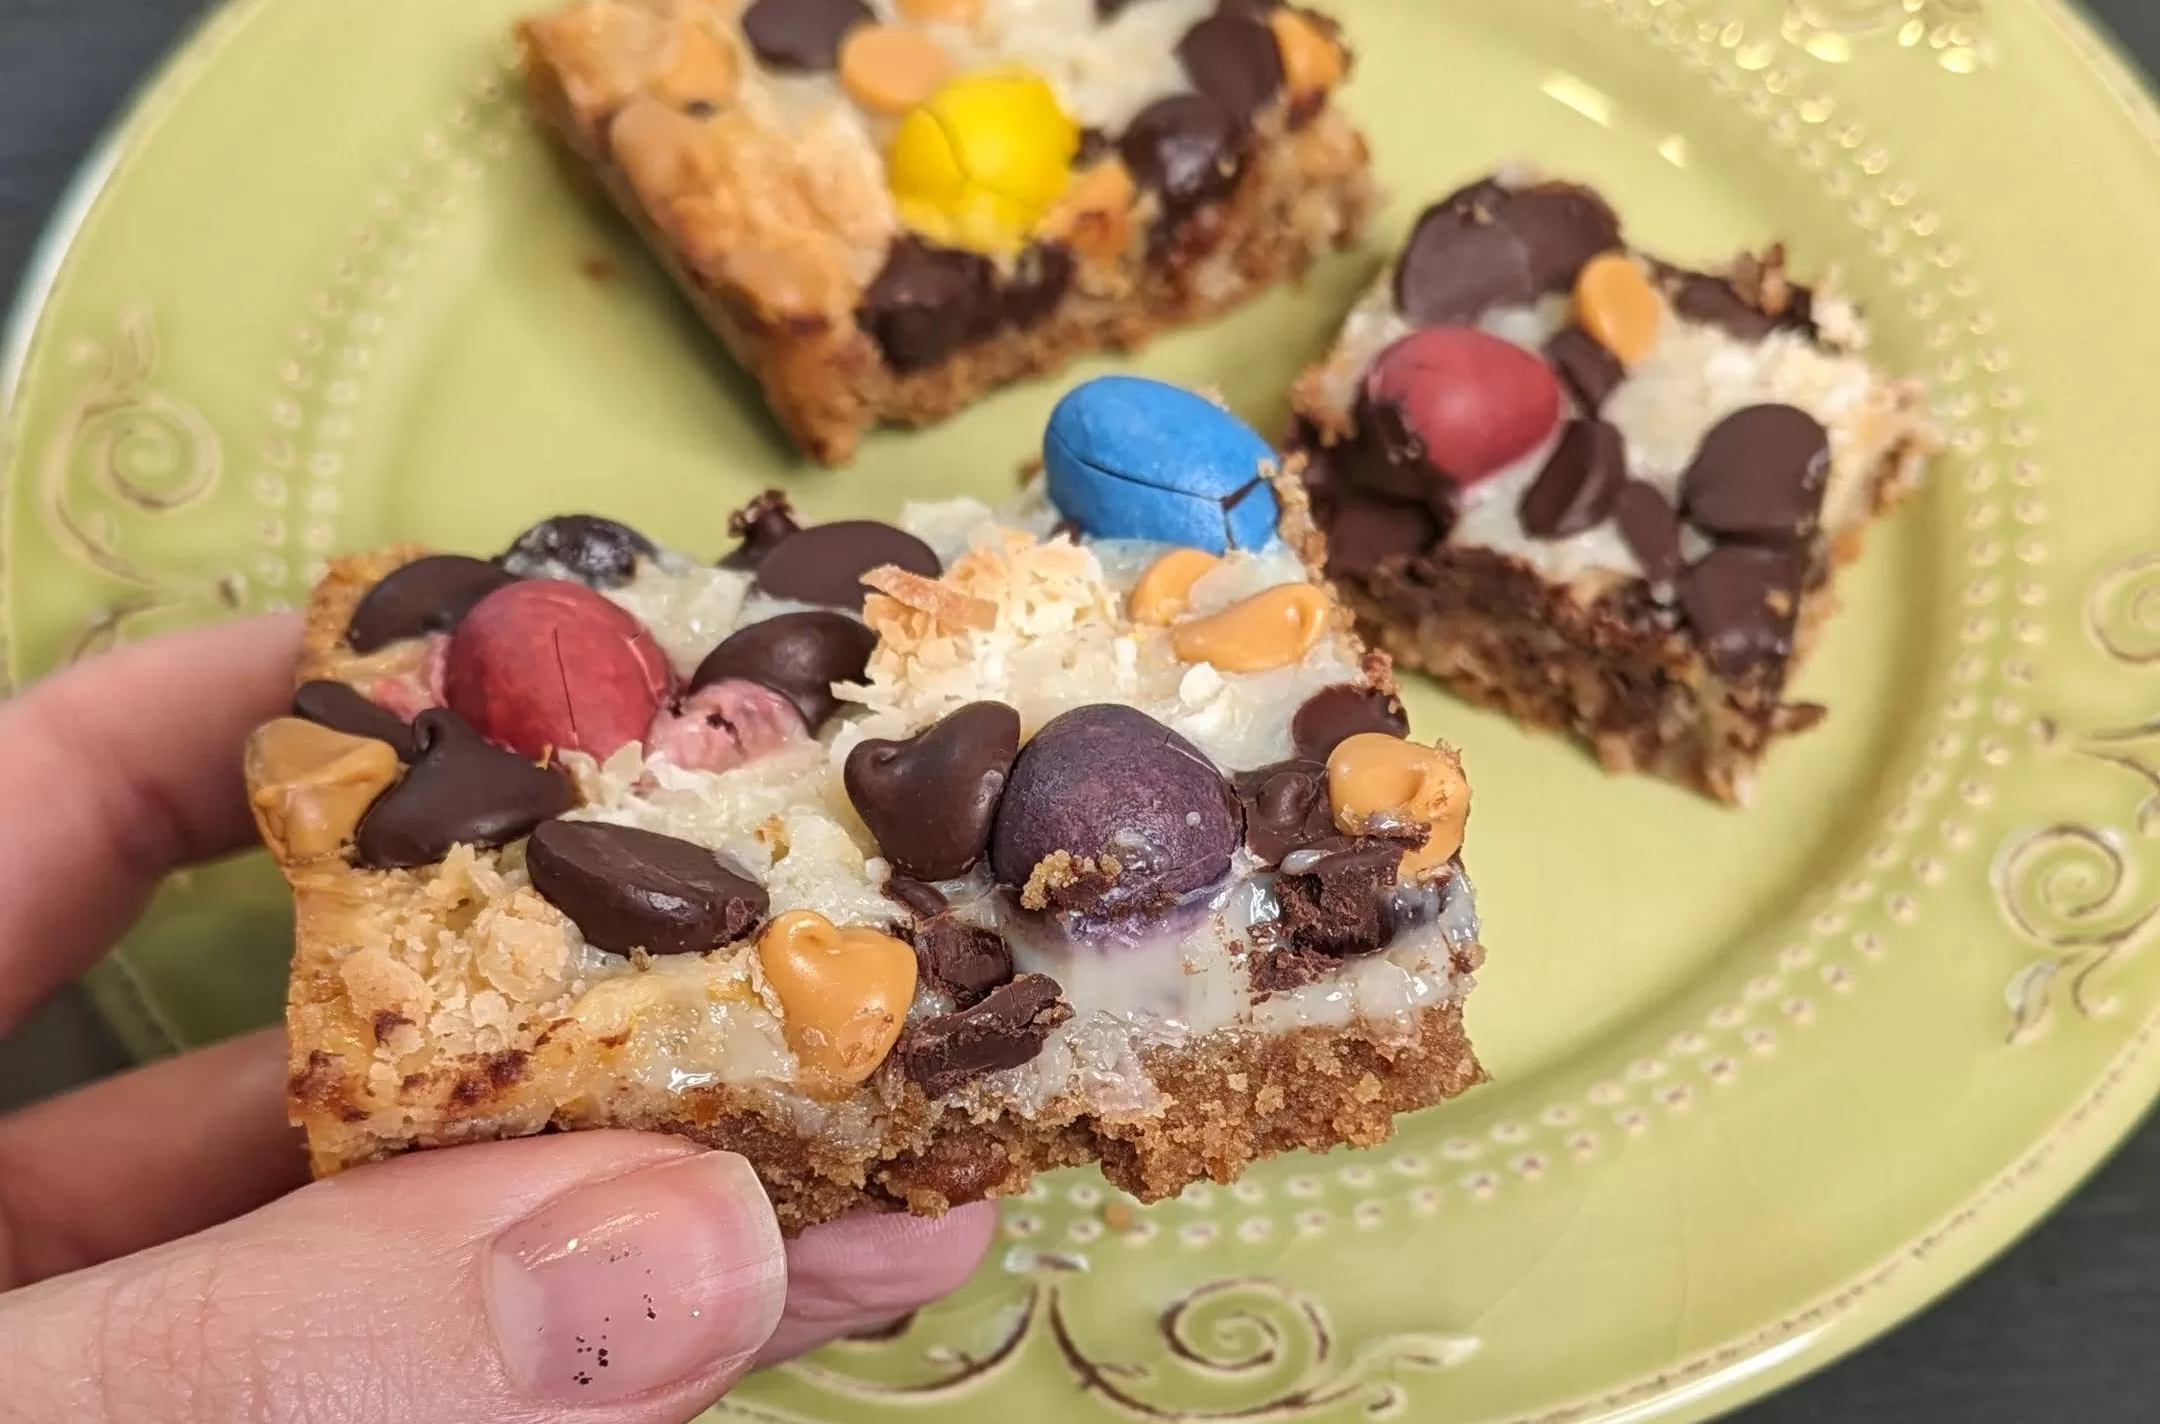
    I’m partial to Cadbury mini eggs, with their rich cocoa filling and powdery candy coating, which is why I’ve dubbed these Cadbury Mini Egg Magic Cookie Bars. But honestly, you can swap them out—and the chocolate chips and butterscotch chips, for that matter—with treats of your choosing. Just maybe not Sour Patch Kids. Or Warheads.

    What’s in a Typical Magic Cookie Bar?

    Also known as Seven Layer Bars and Hello Dollys, these treats in their most classic form feature a graham cracker crust, sweetened condensed milk, coconut flakes, butterscotch chips, semisweet chocolate chips and nuts. The recipe’s most often attributed to Eagle Brand, which makes sweetened condensed milk, but it appeared as Hello Dollys way back in the ’60s, per Southern Living.

    mini cadbury egg magic cookie bars from the side
    Photos: Candace Braun Davison

    What Sets This Magic Cookie Bar Apart (Aside from the Cadbury Mini Eggs):

    It features a half graham cracker, half pretzel crust and no nuts. The pretzels lend a little saltiness to this very gooey, very sweet treat, helping to balance it out. (For an even saltier take, try our riff on Chrissy Teigen‘s Oreo-Potato Chip Seven Layer Bars.)

    mini cadbury egg magic cookie bars on a plate

    Mini Cadbury Egg Magic Cookie Bars

    Also known as Hello Dollys, the classic treat gets an Easter update with mini Cadbury eggs and a half-pretzel crust.
    Prep Time 10 minutes
    Cook Time 30 minutes
    Total Time 40 minutes
    Course Dessert
    Cuisine American
    Servings 12

    Equipment

    • 1 9"x9" pan
    • cooking spray
    • Oven
    • oven mitts

    Ingredients
      

    • 1 sleeve graham crackers
    • 1 cup pretzels
    • 1 stick butter, melted
    • 2/3 (14-oz) can sweetened condensed milk
    • 1 cup sweetened coconut flakes
    • 1 1/2 cup dark or semisweet chocolate chips
    • 1/2 cup butterscotch chips
    • 1/4 cup mini Cadbury eggs (or chopped candy of your choosing)

    Instructions
     

    • Preheat oven to 350 degrees F (325 if using a glass pan).
    • Pulse graham crackers and pretzels in a food processor or blender until finely ground. (Or place them in a resealable plastic bag and mash with a spoon. Place in a large mixing bowl and stir with melted butter to combine.
    • Spray the bottom and sides of a 9"x9" pan with cooking spray or grease with butter. Press graham cracker mixture in an even layer along the bottom of the pan. Top with sweetened condensed milk, then cover with coconut flakes, chocolate chips and butterscotch chips. Finish with a sprinkling of mini Cadbury eggs.
    • Bake for 25 to 30 minutes, or until the coconut flakes and sweetened condensed milk have turned lightly golden in spots. Let cool completely—at least 20 minutes—before removing from pan, slicing and serving.
    Keyword chocolate chips, cookie bars, easy dessert, graham crackers, sweetened condensed milk
  • Gideon’s Bakehouse-Inspired Dark Chocolate Banana Bread

    Gideon’s Bakehouse-Inspired Dark Chocolate Banana Bread

    Jump to Recipe

    I dream of the Gideon’s Bakehouse Banana Bread Chocolate Chip cookie. It’s worth a multi-hour virtual queue; it was the last stop I made on my last road trip from Florida to New York. Even though the treat is so popular it earned a spot on the store’s permanent menu, I’m rarely near Orlando to try it.

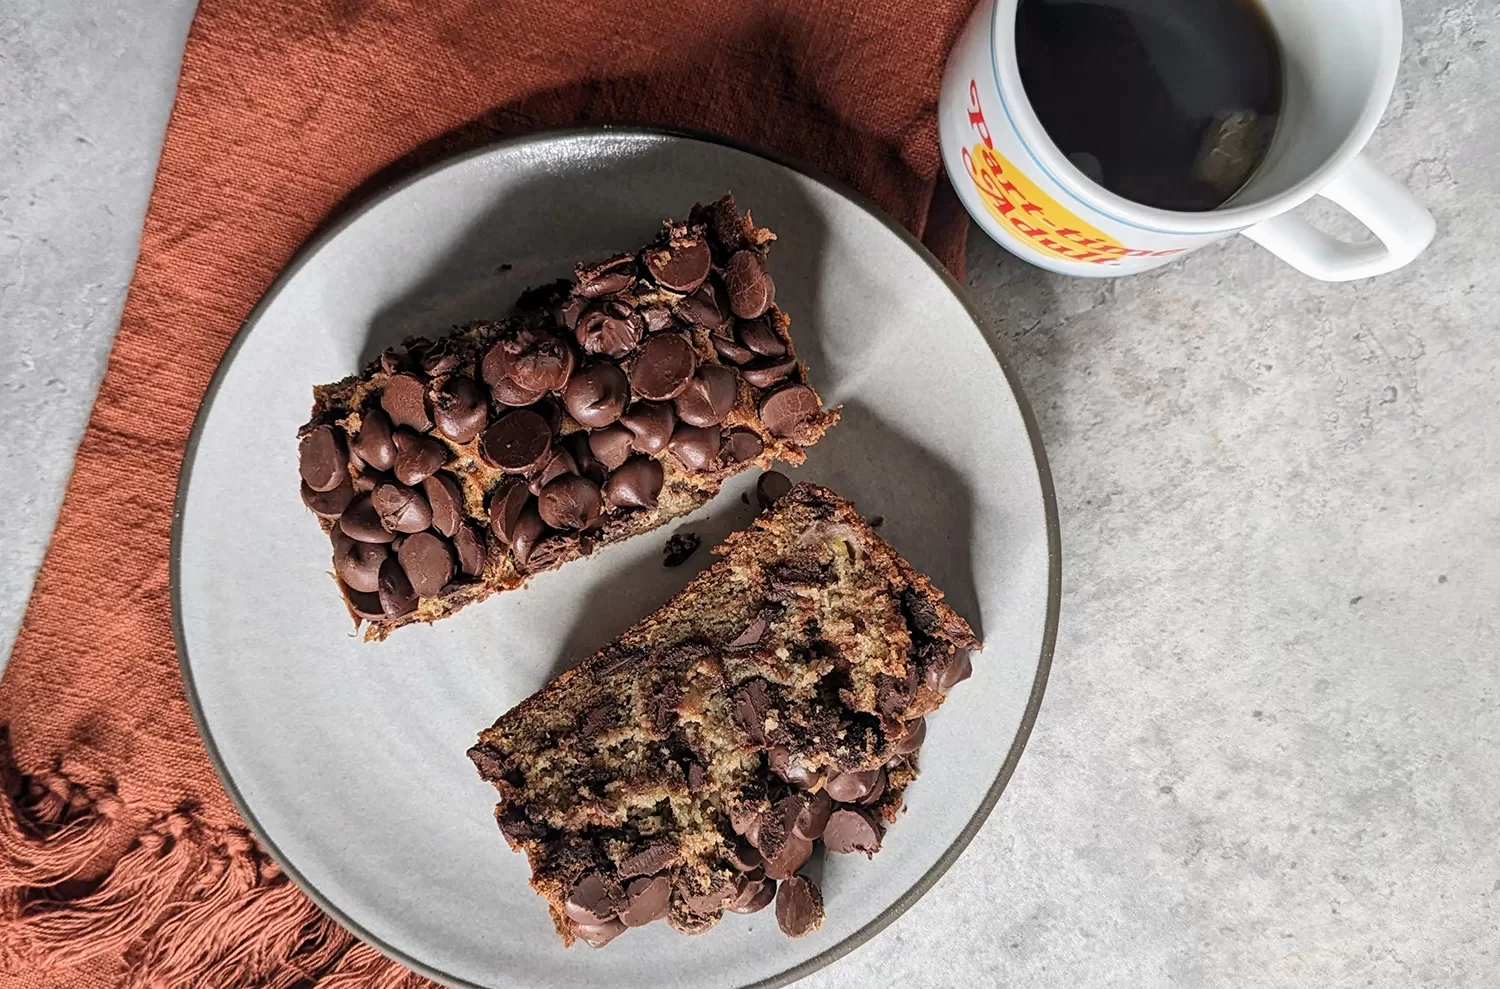
    While my attempts at recreating the famed cookie haven’t been up to par (yet), I have come up with a dense, almost fudgy, chocolate-chip-covered banana bread that feels totally in line with the treat itself, especially when topped with a smattering of crumbled banana chips and a little sea salt.

    gideon's bakehouse-inspired chocolate chip banana bread baking in oven
    Photos: Candace Braun Davison

    You may be wondering…

    What Makes This Chocolate Chip Banana Bread Gideon’s-Inspired?

    It’s not just that the top is covered with an insane amount of chocolate chips. It’s the balance of flavors, the chewy exterior and the soft, almost gooey core. Like the famous Gideon’s cookie, the banana bread combines dark and semisweet chocolate chips, a hearty dose of vanilla and very ripe bananas. To take it to the next level, crush walnuts and banana chips on top, and garnish with a little sea salt. (My family doesn’t love the crunch of the nuts and chips, so we typically omit it, but I enjoy it.)

    chocolate chip banana bread next to cup of coffee, inspired by gideon's bakehouse
    Shown without the crushed chip and walnut portion of the topping, but seriously, try it.

    What Does It Taste Like?

    This dessert is rich more so than sweet. Decadent over sugary. There are multiple chocolate chips in every bite, which melt and turn into ribbons of cocoa. You still get great banana flavor, and the salt helps balance things out.

    chocolate chip banana bread next to cup of coffee, inspired by gideon's bakehouse

    GIdeon’s Bakehouse-Inspired Chocolate Chip Banana Bread

    Inspired by the famous Banana Bread Chocolate Chip cookie from Gideon's Bakehouse, this decadent bread will leave everyone begging for the recipe
    Prep Time 10 minutes
    Cook Time 50 minutes
    Total Time 1 hour
    Course Breakfast, Dessert
    Cuisine American
    Servings 8 slices

    Equipment

    • 1 mixing bowl
    • 1 hand or stand mixer
    • 1 9"x5" loaf pan
    • 1 silicone spatula
    • measuring cups
    • Oven
    • oven mitts

    Ingredients
      

    Chocolate Chip Banana Bread

    • 1 stick unsalted butter, softened
    • 2/3 cup granulated sugar
    • 2 large eggs, room temperature
    • 3 medium bananas, very ripe
    • 1 tsp vanilla extract
    • 1 1/2 cups all-purpose flour
    • 1 tsp baking soda
    • 1 tsp salt
    • 3/4 cup semisweet chocolate chips
    • 3/4 cup dark chocolate chips

    Chocolate Chip-Banana Chip Topping

    • 3/4 cup dark chocolate chips
    • 1/4 cup crushed banana chips
    • 1/4 cup crushed walnuts
    • flaky sea salt, for garnish (optional)

    Instructions
     

    Make the Banana Bread:

    • Preheat oven to 350 degrees F. Grease 9"x5" loaf pan and set aside.
    • In a large mixing bowl or bowl of a stand mixer, cream butter and sugar, beating until light and fluffy, about 3 minutes.
    • Add eggs and vanilla, beating until included. Mix in banana until only small lumps remain, about 1-2 minutes.
    • Add flour, baking soda and salt, mixing on the lowest setting until just combined. Fold in chocolate chips. Pour into loaf pan.

    Make the Crumble Topping:

    • In a small bowl, combine remaining dark chocolate chips, crushed banana chips and walnut pieces. Sprinkle liberally atop banana bread batter.
    • Bake banana bread for 45 to 50 minutes, or until the top is golden and a toothpick inserted into the center comes out gooey with chocolate, not batter. Let cool for 15 to 20 minutes before serving.
    Keyword banana bread

  • Bread Flour: Secret to Absurdly Fudgy, Chewy Brownies

    Bread Flour: Secret to Absurdly Fudgy, Chewy Brownies

    For months, I’ve been testing brownie recipes, searching for a homemade recipe that doesn’t require a double boiler and $15 worth of chocolate. I mean, if Ghirardelli can create a box brownie mix using cocoa powder that’s so rich, fudgy and chewy it seems divinely inspired, why can’t I make something similar from scratch?! Oh, I don’t possess a lab or dark magic, and that may be my hindrance, you say? Hmm. I refuse to believe it.

    So, naively, I’ve tested everything from Fat Witch’s recipes to Alton Brown’s, all to no avail. Until fate—er, Nate—intervened. We ran out of all-purpose flour, and he refilled our flour jar with—*gasp!*—bread flour. Bread flour in brownies?! In a fit of desperation, I tried it—and now I may never bake brownies with all-purpose again.

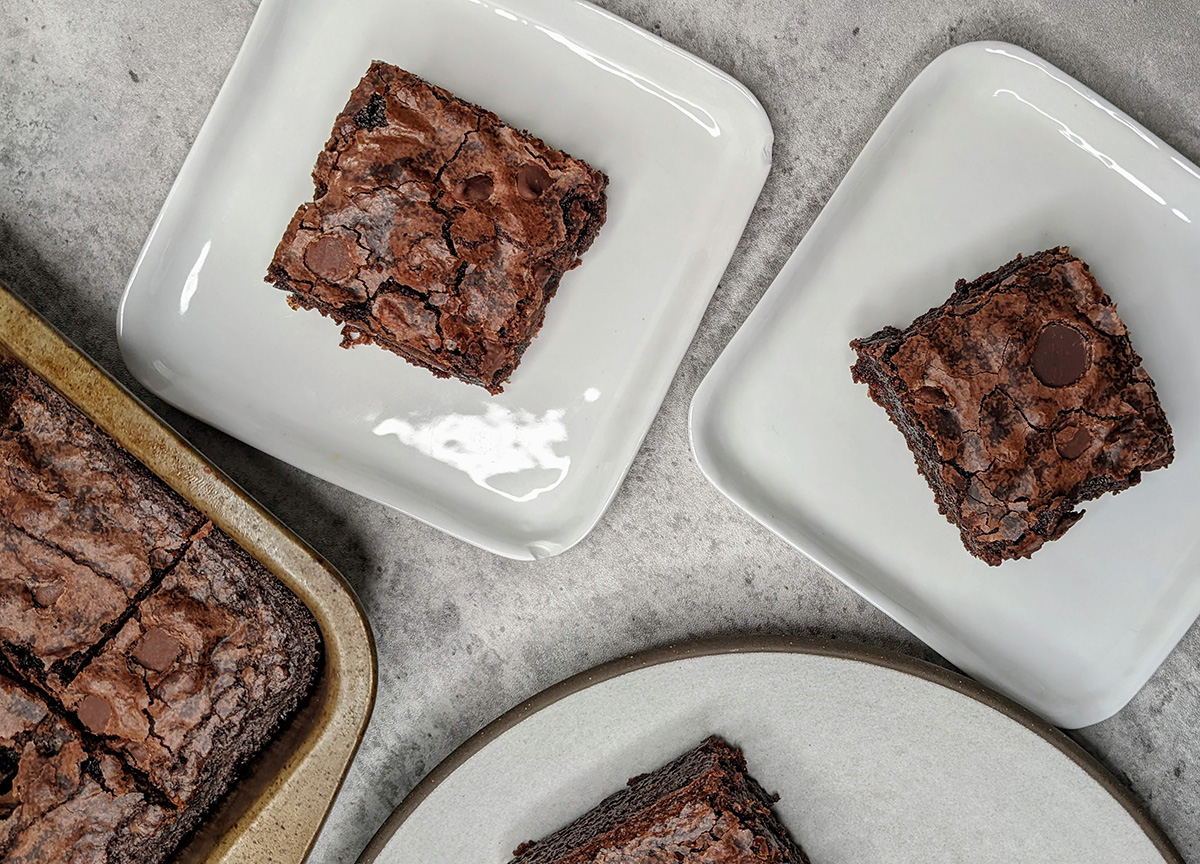
    a stack of chewy, fudgy brownies using bread flour
    Photos: Candace Braun Davison

    So, What Happens When You Use Bread Flour in Brownies?

    Bread flour has higher protein content—11 to 13 percent, as Bon Appetit informed me—than the 9 to 11 percent found in all-purpose flour. This creates more gluten, creating a stretchier dough, which makes for a chewier brownie. And, when underbaked, a gooier, fudgier-tasting one.

    A close-up of our fudgy brownies using bread flour

    How Do You Substitute Bread Flour for All-Purpose Flour in Brownies?

    For brownies, like most dense baked goods, you can use a 1:1 swap, so no math skills needed. It wouldn’t work so well in light, airier treats, like cakes, but for brownies, bread flour is the way to go.

    A side angle showing just how fudgy they are

    What’s a Good Recipe for Bread Flour Brownies?

    Well, well, well. I like to use a modified version of Katie Gets Creative’s recipe, using just 1/2 cup of vegetable oil and warm water, adding 1/2 teaspoon of espresso powder to amp up the cocoa flavor (which is totally optional!) and mixing in 1/2 cup of semisweet chocolate chips or chopped dark chocolate chunks to make them as decadent as possible. (I also swear by Hershey’s Special Dark Cocoa Powder for a richer chocolate flavor, a hack Baked by Melissa founder Melissa Ben-Ishay introduced me to at a Delish shoot years ago.)

    If you try ’em, let us know what you think! And if you have any modifications or recipes we should try, we’re all ears.

  • How to Make ‘Peppa Pig’-Inspired Cupcakes

    How to Make ‘Peppa Pig’-Inspired Cupcakes

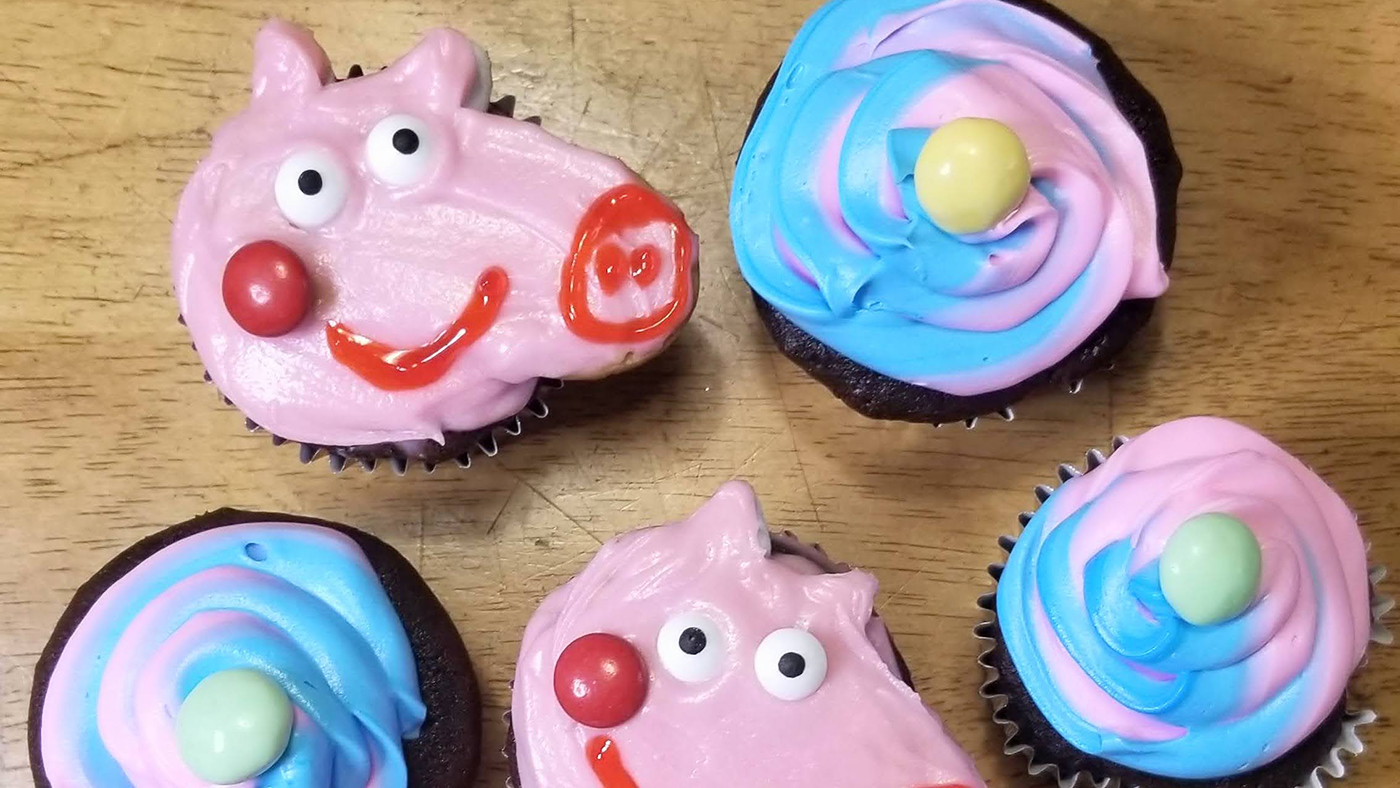
    “She’s Peppa Pig! Peppa Pig! My name is Peppa Pig.” At some point, it seemed like every toddler I knew was addicted to the show about a cheeky little pig. But it turns out that Peppa Pig-inspired cupcakes aren’t just a treat for the under-four set. When I first made this simple dessert in 2020, I didn’t realize it’d take on a life of its own, becoming equally popular with my Gen Z friends (largely thanks to this viral scene)—and millennial parents in search of an easy birthday treat for their kids.

    peppa pig-inspired cupcakes anyone can make; showing two peppa cakes next to five pink and blue ones
    Photos: Candace Braun Davison

    And honestly, these Peppa cakes are incredibly simple to whip up. In fact, you could put out the ingredients, make a display cupcake, then have a group of kids decorate them themselves. (Hey, it’s a party dessert and craft! Win-win!) Nutter Butters are key to creating her snout, though you could probably use Vienna Fingers or Keebler Elf Cookies.

    Check out this video for the full demo, and be sure to tag me if you make them, so I can see your creations!

    What You’ll Need:

    • One batch cupcakes, any flavor (I made 24)
    • Roughly 2 cups (16 ounces) vanilla buttercream frosting
    • 5-6 drops pink food coloring
    • 12 Nutter Butters
    • 12 marshmallows
    • 48 candy eyes
    • 24 red M&M’s
    • Red gel frosting

    How to Make Peppa Pig-Inspired Cupcakes:

    1. Mix the pink food coloring with the vanilla buttercream, adding just 2-3 drops at a time until you reach the peachy-pink shade of Peppa’s skin. Dollop a little on the cupcake.
    2. Twist a Nutter Butter apart so it’s in two halves. Place one half on the cupcake, with about a third of the Nutter Butter hanging off the edge, forming her snout. Save the other Nutter Butter half for the next cupcake.
    3. Cut a marshmallow diagonally, forming two triangles. These will be Peppa’s ears. Stick them close together, but not touching, atop Peppa’s “head.”
    4. Coat the Nutter Butter and marshmallow halves in more pink frosting. Add two candy eyes and a red M&M for her rosy cheek, then draw a snout and smile using red gel frosting.
    peppa pig-inspired cupcakes shown next to Peppa figurines

    Note: We are not affiliated with Peppa Pig, Paramount Networks or Nick Jr. We’re just fans of the show, paying homage to the series. This tutorial originally ran in April 2020. It has since been updated to ensure accuracy and adhere to SEO best practices.

  • How to Make a ‘Bluey’-Inspired Cake (An Easy, No-Fondant DIY)

    How to Make a ‘Bluey’-Inspired Cake (An Easy, No-Fondant DIY)

    Jump to Recipe

    When it comes to hosting a Bluey-inspired birthday party, you could pop a few figurines onto a store-bought sheet cake and call it a day. That works. But I like the challenge of baking pop culture-inspired treats (see: Baby Yoda, Sesame Street, Winnie the Pooh and the like), so I couldn’t resist trying my hand at recreating the star of what’s arguably the most delightful kids’ show on TV for my daughter’s third birthday. It was time to bake a Bluey cake!

    And after a few people asked me to share how I did it, I’m posting it here for you. I hope it helps, if you’re considering baking one too.

    First, a Few Things You Should Know Before Baking:

    While some Etsy sellers make Bluey-inspired cake pans, you don’t need one for this recipe. A simple, 9″x13″ pan will do. There’s no fondant in this either; just a simple, crowd-pleasing buttercream. (Go ahead and use store-bought; I don’t judge!)

    The cake can be any flavor, straight from a box mix or from scratch. (Confession: I went boxed, using King Arthur Confetti Cake Mix.) You’ll just want to pour the batter into a 9″x13″ pan, cooking according to the recipe’s instructions (it should be springy to the touch, and a toothpick inserted into the center should come out clean, or with a couple crumbs; no goo). Let it cool completely.

    Follow the instructions below for a basic walkthrough of what to do. If you’d like more exact instructions, down to how much food coloring I used, jump all the way to the bottom of this story for the recipe card. It’s more detailed.

    How to Make a ‘Bluey’-Inspired Cake:

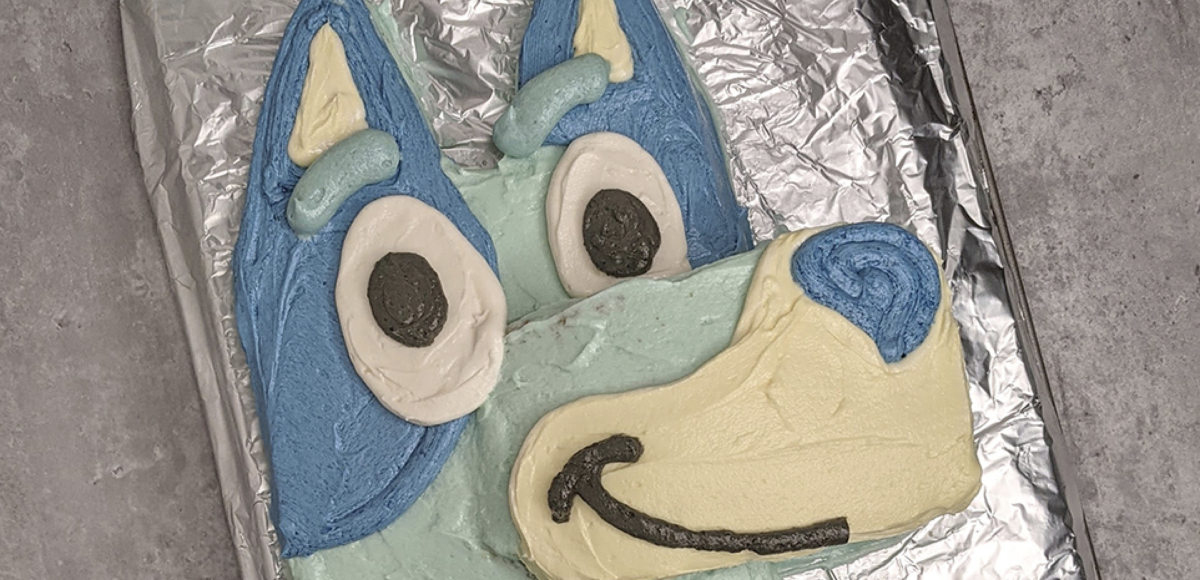
    A 9"x13" confetti cake was cut into four pieces to form Bluey's head, snout and ears in this Bluey-inspired cake
    It’ll take some trial and error to get the sizes just right. Start a little big, then trim it down. (Photos: Candace Braun Davison)

    1. Cut the Cooled 9″x13″ Cake in Half

    You’re creating two 9″ by 6.5″ rectangles. One will be the base of Bluey’s head; the other will be chopped up to form the snout and ears.

    2. Trim & Fit the Snout

    The snout should be about 3″ wide (so it takes up about a third of Bluey’s face)—you’ll want to create two 3″ strips, so the snout sits a bit taller than Bluey’s head, creating a more 3-D effect. Place one piece to the right of the 9″x6.5″ rectangle, then add the other on top. You may need to trim these pieces a bit to look proportionate. (I shaved the top piece on one side, so the snout starts out flush with Bluey’s head and gradually protrudes, so it didn’t look so abrupt and blocky.)

    The Bluey cake has been covered in a base layer of light blue frosting

    3. Make Your Frosting

    Store-bought or homemade frosting works here! I used vanilla buttercream. You’ll want to have six colors on hand: white, tan, light blue, medium gray-blue, dark blue and black. I divided a batch of frosting into four bowls: a little for white, a few spoonfuls for the black frosting, about 1/3 cup for the tan, and the rest went into a bowl for creating the shades of blue.

    For the blue frosting, I added a tiny bit of food coloring at a time, until I got the right sky blue. Since that’s used first, I covered the cake with it. I set aside about 1/4 cup for the medium blue (which was tinted with a tiny drop of black, to give it a more subdued, gray-blue tone), then used the rest to create the vibrant, dark blue.

    4. Frost the Cake, Color by Color

    I used a piping bag with a large circular tip to outline the dark blue frosting (a resealable bag with an end snipped works too!) and smoothed it out with a butter knife.

    I used a similar method with the white frosting to create Bluey’s big, eager eyes, then filled in his tan snout and ears.

    After that, I added the medium blue stomach and eyebrows. (You could go truer to character, adding white instead of black and making this the palest blue, but I liked that the eyebrows/belly didn’t distract from Bluey’s face.)

    The completed Bluey cake, including a frosting face

    5. Add that Signature Smirk

    Using a smaller round piping tip, I added Bluey’s smiley and pupils.

    Annnnd that’s it! You’re ready to pop on the candles and surprise the birthday boy or girl (or full-grown adult with a healthy appreciation for the kookier things in life).

    Bluey birthday party - cake reveal

    Show me your Bluey cake!

    One of the things that keeps me updating this site—and honestly, truly makes my week—is when people DM me the treats they’ve made. I’ve received half a dozen photos of people’s Bluey-inspired cakes, and it’s such a gift. If you made it, please send it my way! You can DM it to me via Instagram (@lifebetweenweekends).

    how to make a bluey cake

    Bluey-Inspired Cake

    Using a 9"x13" pan and plenty of buttercream frosting, you can make your own Bluey-inspired cake that looks just like the cartoon blue heeler.
    Prep Time 2 hours
    Cook Time 30 minutes
    Total Time 2 hours 30 minutes
    Course Dessert
    Cuisine American
    Servings 8

    Equipment

    • 1 serrated knife (for cutting/carving cake)
    • 3 small bowls
    • 1 mixing bowl
    • 4 spoons
    • 1 butter knife or small offset spatula
    • 5 piping bags or resealable plastic bags with a corner snipped

    Ingredients
      

    • 1 cake, baked in a 9"x13" pan and cooled
    • 4 cups vanilla buttercream frosting (any recipe or store-bought)
    • 1 yellow gel food coloring
    • 1 red gel food coloring
    • 1 blue food coloring
    • 1 black food coloring

    Instructions
     

    • Prep the Frosting: You'll need to create six colors: white, black, tan, light blue, medium gray-blue and dark blue. Reserve 3 cups for the blue details; the other cup can be divided first in half—with half going to the tan color, and the remaining half split to become the white and black shades.
    • Place the white frosting into a piping bag or resealable bag and set aside.
    • Create the Black Frosting: In a small bowl, add vanilla frosting and a couple drops of black food coloring at a time, stirring until you reach the shade you want. Place in a piping bag or resealable bag and set aside. If you have a small round piping tip—with a hole about the size of a Magic Marker—use that for the black icing, or try cutting a hole about that size into your plastic baggie when the time comes.
    • Create the Tan Frosting: In another small bowl, combine the vanilla frosting with half a drop of yellow and the tiniest smidge of red—I dipped a toothpick into red to get the tiniest amount at first—stirring to create a tannish orange color. (You may need to add vanilla if it turns out too orange-y at first.) Gradually add color until you get the hue you want, then bag it up. (NOTE: You can skip the mixing and get a very reliable tan if you use tan or copper gel food coloring instead; it can just be harder to find.)
    • Create the Pale Blue Frosting: Place the 3 cups of frosting for the blue tones in a large mixing bowl. Add 2-3 drops of blue, stirring until you have a light sky blue. After you've used this to frost the head, we'll return to this bowl and the remaining frosting within it to create the darker shades!
    • Shape Bluey's Head: Take the 9"x13" cake and cut it widthwise, creating two 9"x6.5" rectangles. Set one on a cake stand or large plate to be the base of Bluey's head. We'll use the other to create the snout and ears.
    • Create Bluey's Snout and Ears: Cut two 3" strips to form the snout, and use the remaining piece to cut out two triangles for the ears. You'll place one snout piece next to the rectangular cake, frosting the whole thing in pale blue, then place the second snout piece on top and frost that. This gives the snout a more 3D effect. (Before placing the top piece, I also carved the left side, so it looked more like a wedge. That way it'd be more flush with Bluey's head, gradually sloping upward once frosted.)
    • Frost Bluey's whole head pale blue. With the remaining frosting, set aside about 1/4 cup for the medium blue, placing it in another small bowl. Add a tiny drop of black gel food coloring—or squirt a tiny bit of black frosting—and stir together to create a slightly darker, almost grayish-teal shade. Place in a piping or resealable bag.
    • Use the rest to create the dark blue shade right in the mixing bowl, adding a couple drops of blue food coloring, stirring in between, until you reach your desired shade. Place in a piping or resealable bag.
    • Decorate Bluey's Face: I started with her dark blue ears, patches around her eyes and nose, piping the color on and then smoothing it with a butter knife. (An offset spatula works too!) Then, I added large white eyes, then filled in the tan inner ears and snout, before drawing Bluey's medium-blue stomach and eyebrows.
    • Add Bluey's smile and pupils with black frosting. That's it! You did it!
    Keyword cake

    Want Even More Bluey Birthday Cake Ideas?

    Other bakers (and stores) have put their own riffs on the look as well. Here are some of our favorites:

    • If you’re not a baker: Try adding a custom Bluey-inspired cake topper
    • If you’re a newbie baker: Frost a classic round cake with blue icing and crushed graham cracker sand, then add cocktail umbrellas and Bluey figurines for a Bluey at the beach theme, like this cute cake
    • If you’re an advanced baker: Enjoy dabbling with fondant? Bluey’s official website offers a tutorial for making a fondant-covered, two-tier cake that resembles Bingo and Bluey’s faces

    This article originally ran in June 2022. It’s been updated to include more inspo & ideas for fellow Bluey fans. (Also, a quick disclaimer: I have no affiliation with Bluey, its creators or the BBC/Disney+. This is purely an homage.)

  • Review: Janie’s Life-Changing Baked Goods Makes Epic Pie Crust Cookies

    Review: Janie’s Life-Changing Baked Goods Makes Epic Pie Crust Cookies

    Calling your baked goods “life changing” is a bold claim, but Janie Deegan has solid evidence to back that claim up. She founded the company as a way to rebuild her life after struggling with drinking and homelessness, and now, Janie’s Life-Changing Baked Goods is paying it forward, providing second-chance jobs to those in need and donating treats to local community centers and homeless shelters.

    And, on top of all that, are the pie crust cookies. Yes—pie crust cookies. The unexpected mashup of a buttery crust base, classic pie filling and streusel topping—all packaged in a four-bite size—put Janie’s business on the map. (It was so popular, in fact, that when she presented the treats to a panel of culinary experts, they all insisted she ditch her cakes and other goods just to focus on ’em.)

    Janie’s Life-Changing Baked Goods has three bakeries in New York City, though the company also ships nationwide via its website, JanieBakes.com, and after sampling one of literally everything on the menu (at least the day I was there), I can honestly say it’s a must-visit. Especially for anyone who loves (1) gooey chocolate chip cookies and/or (2) pie crust more than the actual pie filling.

    Photo: Candace Braun Davison

    Here’s Everything You Should Know Before Planning a Visit to Janie’s Life-Changing Baked Goods:

    How Much Are Pie Crust Cookies?

    At $2.75 apiece, Janie’s Pie Crust Cookies are one of the best deals in NYC (especially since most buzzy cookies in the city cost upwards of $4 or $5). Her other cookies, which are larger (like s’mores), cost $3.50—still pretty reasonable, and a cold brew will set you back $4.

    What Do the Cookies Taste Like?

    • Pie Crust Cookies — You don’t need to be a pie person to appreciate these cookies, but you’ll be obsessed with them if you are one. Every flavor, from apple to triple berry, stands out. You get actual chunks of fruit, and it isn’t gloppy, like some fillings can be. The crust is soft and buttery, never too crunchy, and the streusel adds a nice texture and sweetness. That said, some of our favorite flavors are…
      • Fruit-Filled Pie Crust Cookies — Triple berry and peach had just the right jammy notes and had us dreaming of seconds
      • Cream & Other Fillings — Kids go wild for the soft, pillowy birthday cake-filled pie crust cookie, which is like enjoying Confetti cake batter and a pie at the same time. The adults I shared the treats with fought after the pecan, which was nutty, caramel-y and sweet without being cloying.
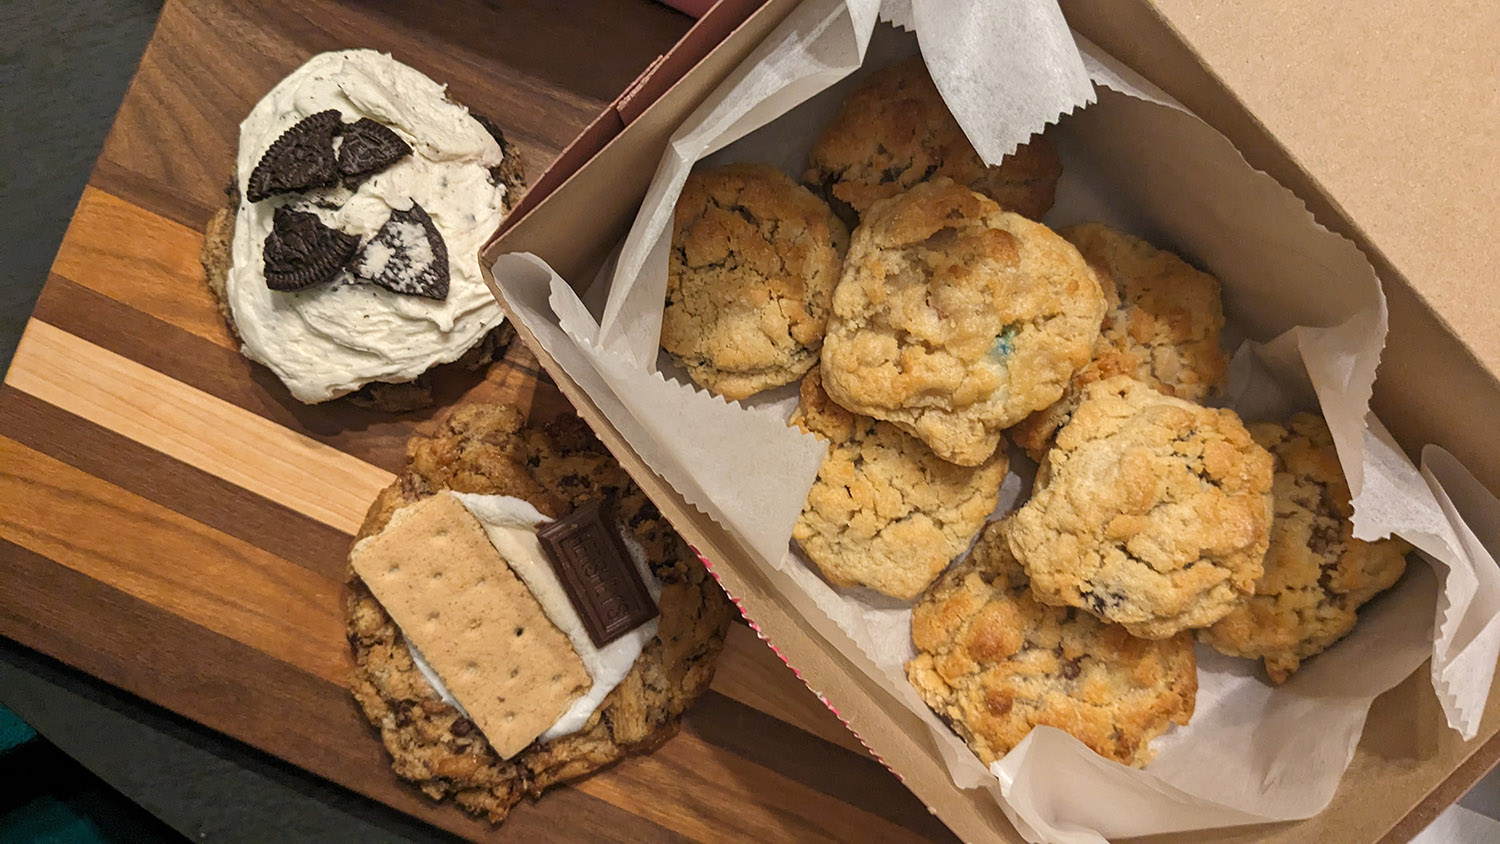
    • Half-Baked Chocolate Chip Cookies — If you love gooey, fresh-out-of-the-oven, practically molten cookies (as I do), these are for you. The outer edges are slightly crisp and caramelized, giving way to a soft, dense mound of what amounts to as close to cookie dough as you can get. In a word, they’re glorious.
    • Cookies & Cream Cookies — These frosting-topped chocolate cookies are an Oreo lover’s dream. They were a bit too sweet for my taste, but my daughter loved them.
    • S’mores Cookies — This type of cookie has been popular at bakeries, but the marshmallow can easily go stale and hard, or the graham crackers can overpower the cookie, drying it out. Not so here—Janie’s are well balanced, with all three elements (‘mallow, chocolate and graham) coming through in a soft, chewy cookie.
    janie's cookies and creme cookie

    How Often Do New Cookies Come Out?

    In 2024, Janie’s is releasing a new cookie—or bringing back one from its “vault” of former flavors—every week, the brand announced on Instagram.

    janie's life-changing baked goods storefront

    What Should I Order?

    You can’t leave without trying at least one kind of pie crust cookie (though we recommend going for two—one fruit-filled and one pecan, chocolate or birthday cake) and a half-baked chocolate chip cookie. Wash it all down with a cold brew, and you’ve got a great day ahead.

  • Shortcut, Copycat Starbucks Pumpkin Scones (No Kneading!)

    Shortcut, Copycat Starbucks Pumpkin Scones (No Kneading!)

    Hold up—did Starbucks discontinue the pumpkin scone?! I know I’m not the only one wondering this when, yet again, the coffee chain unveiled its fall lineup…sans vanilla-glazed treat. Heartbreakingly, it’s at least off the shelf for a second year, a fact Starbucks confirmed via tweet, while recommending grabbing a pumpkin cream cheese muffin instead.

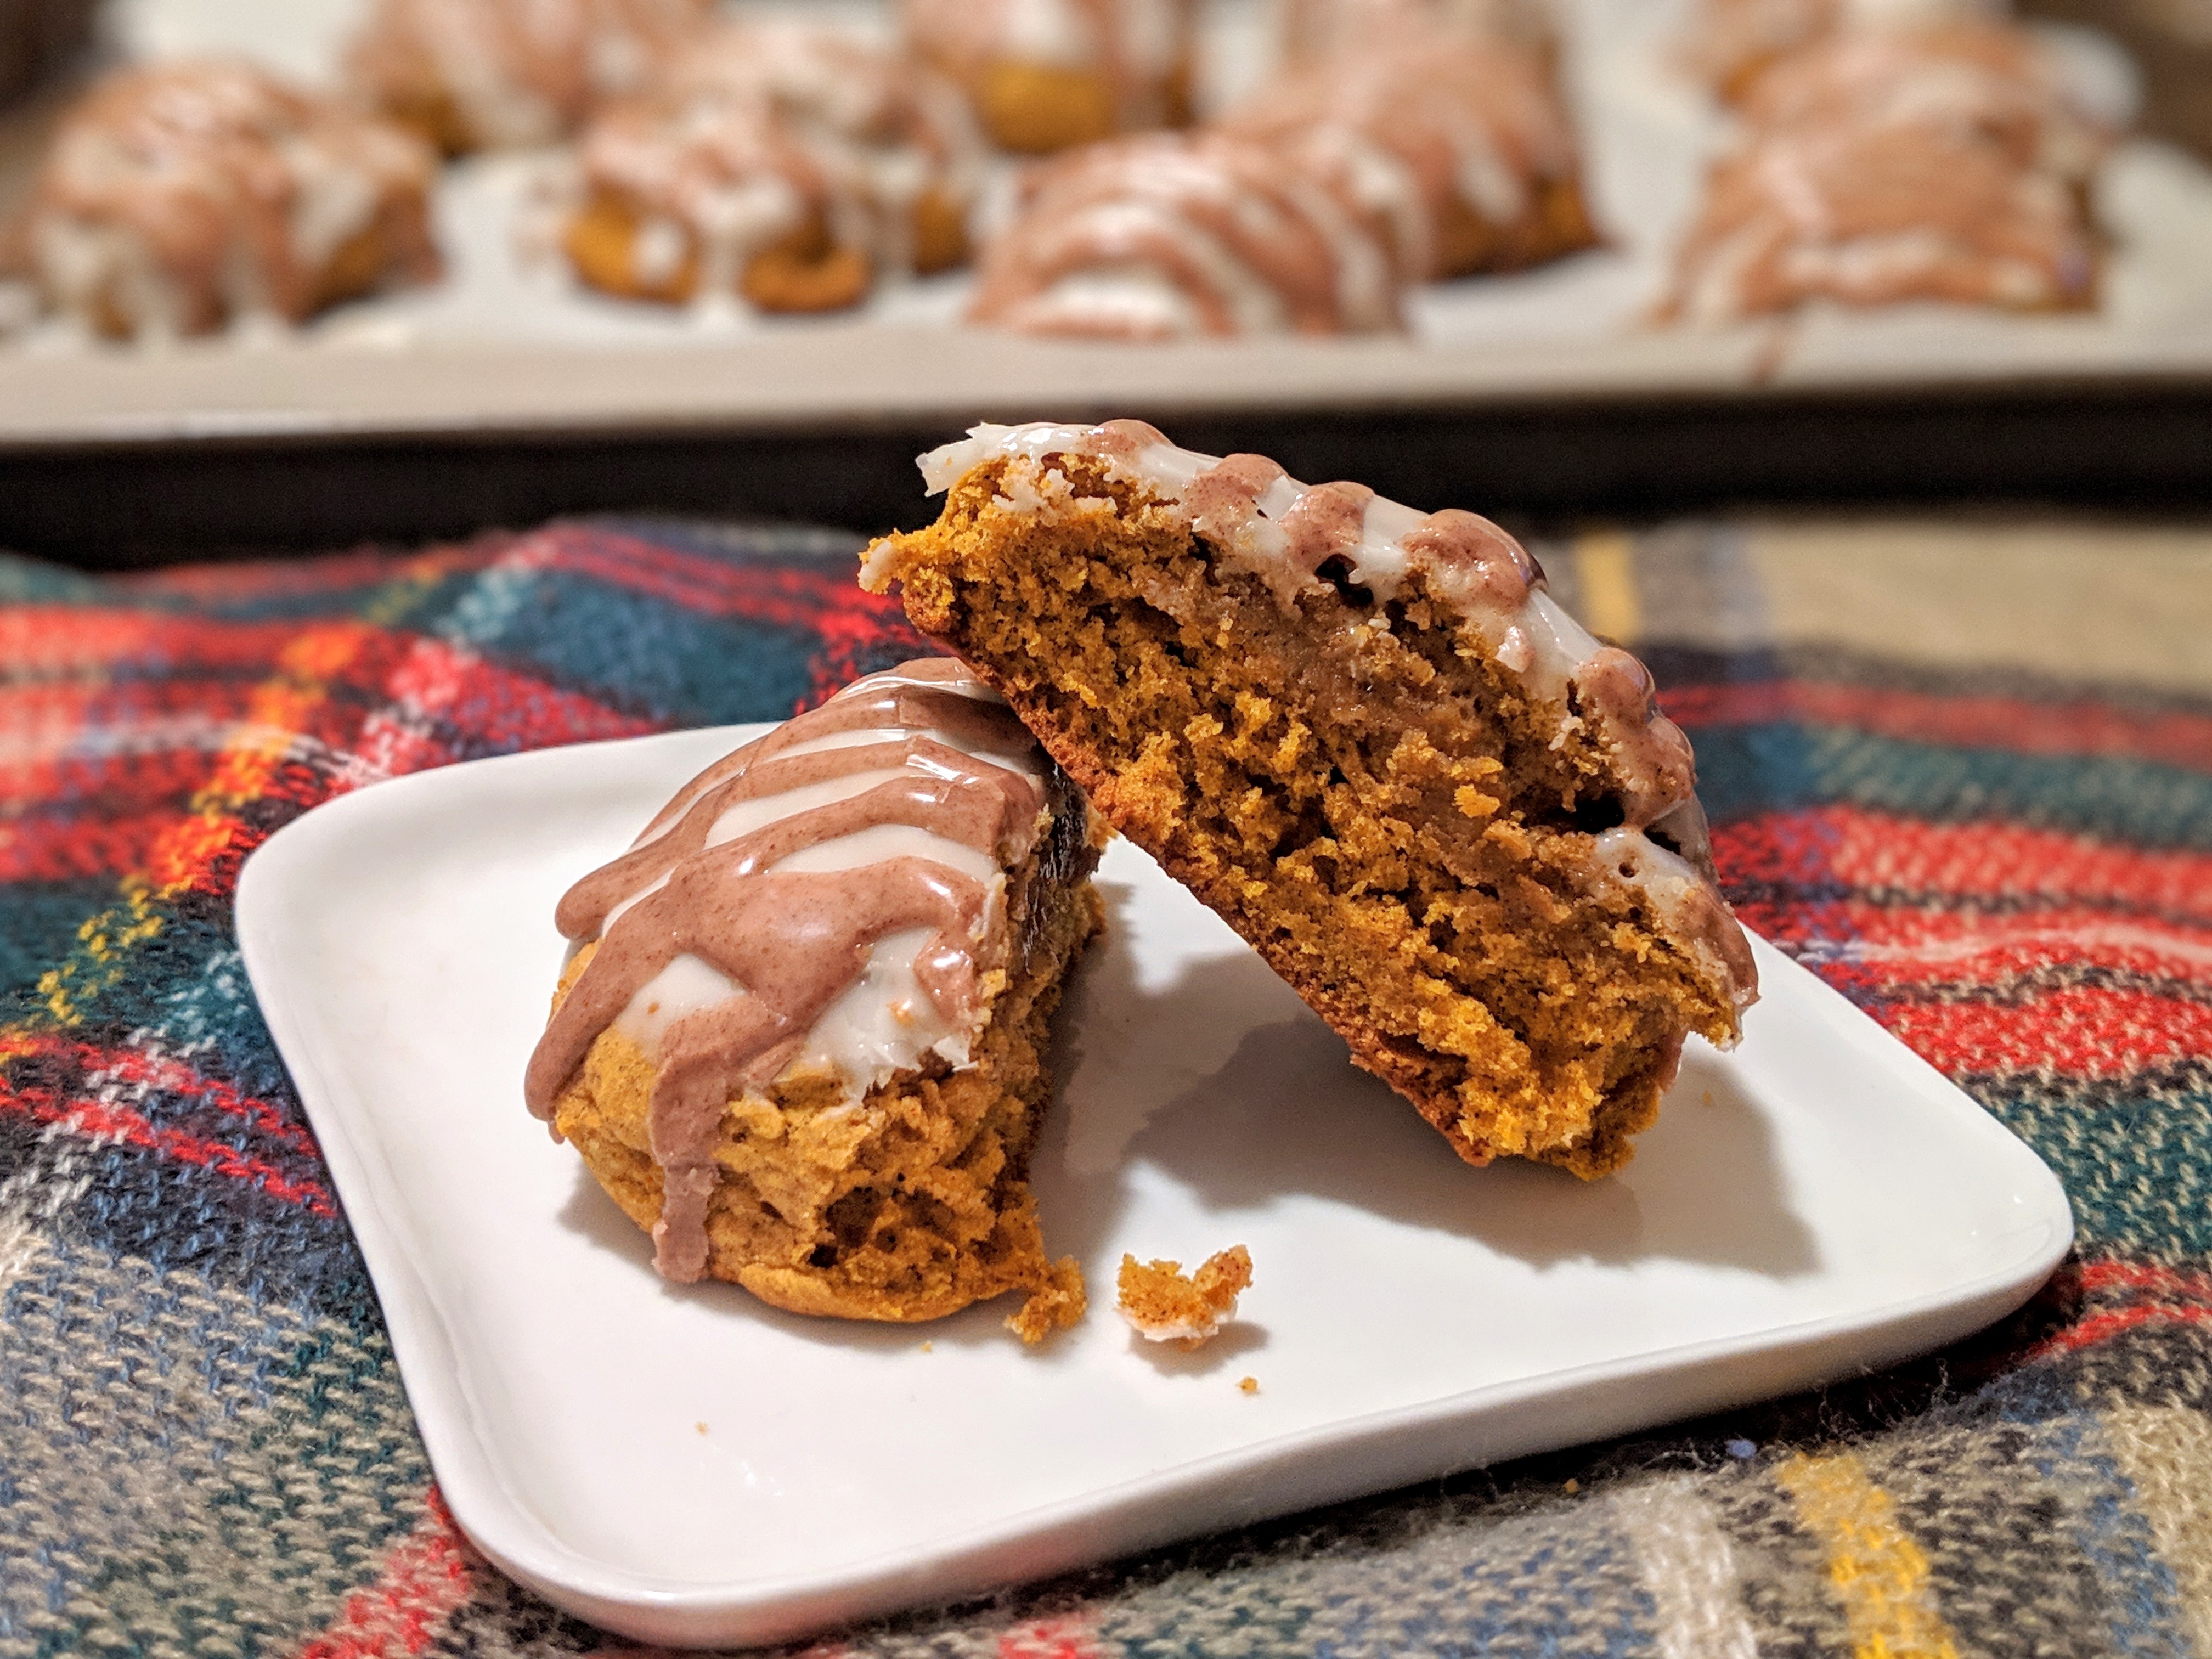
    Sure, the pumpkin cream cheese muffin is great, but it’s no scone. For me, that was my fall indulgence (sorry, PSL); the snack that ushers me into sweater weather. Copycat Starbucks Scones Photos: Candace Braun Davison

    Given my love of the scone—and how often I’d head to the ‘Bucks, only to find out it’s sold out—I took matters into my own hands, deciding to make a copycat pumpkin scone, glaze and all. First, I started by researching what was out there. And after seeing half the recipes online, I knew I needed a few shortcuts. Because, well, I’m lazy. And I had a newborn at home, so any project that used to take me 30 minutes to do now takes approximately 3 full days. So my only shot at actually enjoying scones is to take a few liberties, and you know what? You can’t taste the difference. Scout’s honor.

    Copycat Starbucks Scones recipe

    How We Modified a Pumpkin Scone Recipe to Make It Easier (and No-Knead)

    I used Damn Delicious’s recipe as the base, then started adapting it from there. I don’t have time to knead dough, and even with a liberal flouring of my hands and every surface, it was still a little too sticky to work with, so I simply used a cookie scoop instead of carefully rolling and cutting the dough into triangles. Different shape, same flavor and texture. And fewer things to clean. I also eliminated some of the spices, in favor of Pumpkin Pie Spice, and bumped up the brown sugar, because that caramel-y sweetness really makes the treat stand out.

    Easy Starbucks-Inspired Pumpkin Scones Recipe

    Try it yourself: 

    Shortcut, Copycat Starbucks Pumpkin Scones

    Ingredients

    • FOR THE SCONES:
    • 2 c all-purpose flour
    • 1 tsp baking soda
    • 1/4 tsp salt
    • 1 tsp cinnamon
    • 1 1/2 tsp pumpkin pie spice
    • 1/2 c packed brown sugar
    • 1 stick cold butter, cut into cubes
    • 1/2 c pumpkin puree
    • 3 tbsp milk
    • 1 large egg
    • 1 tbsp vanilla extract
    • FOR THE GLAZE:
    • 1 c powdered sugar
    • 1 1/2 tbsp milk
    • 1/2 tsp vanilla extract
    • FOR THE PUMPKIN SPICE DRIZZLE:
    • 1 1/3 c powdered sugar
    • 1 tbsp milk
    • 1/2 tsp pumpkin pie spice

    Instructions

    1. Preheat oven to 400 degrees F.
    2. Make the Pumpkin Scones: In a large mixing bowl, combine flour, baking soda, salt, cinnamon, pumpkin pie spice and brown sugar. Add cubes of butter, using your hands (or a stand mixer with the paddle attachment, set to low speed) to mix it in, forming a lumpy, sand-like mixture.
    3. In a separate bowl, combine pumpkin puree, milk, egg and vanilla extract. Slowly add to the dry mixture, mixing until a thick dough forms. Use a cookie scoop or large spoon spritzed with cooking spray (or canola oil, or butter) to scoop out large, golf ball-sized blobs of dough. Place on a parchment-lined baking sheet about 2 inches apart, using your hand to smoosh them down a little.
    4. Bake for 10-11 minutes. If you gently press the top of the scone, it should be firm but springy to the touch (the cake pushes down but springs back up afterward). Set aside to cool.
    5. Make the Glaze: Combine the powdered sugar, milk and vanilla extract. You may need to add more powdered sugar, a spoonful at a time, until the glaze is as thick as Elmer’s Glue. Dip the cooled scones into the bowl of glaze, coating the tops entirely. (I just flip them upside down and dip them into the glaze, like you would frosting a donut.)
    6. Make the Pumpkin Spice Drizzle: Combine ingredients in a small bowl. Like the glaze, you may need to add a little powdered sugar if it’s too runny. Or add a spoonful of milk at a time, stirring in between additions, to loosen it up so it’s easy to drizzle. (I like a glue-like consistency, which I pour into a Ziploc bag, snipping off one end so I can draw nice, clean lines.) Zigzag the drizzle atop each cooled scone to garnish it. Let scones sit for about 5 minutes, so the drizzle can harden a bit, before serving.
    https://www.lifebetweenweekends.com/easy-copycat-starbucks-pumpkin-scone-recipe/

    Editor’s Note: This recipe debuted in November 2018. It has since been updated for you to enjoy today (and to ensure it still holds up!).

  • How to Take Box-Mix Brownies to the Next Level

    How to Take Box-Mix Brownies to the Next Level

    Editor’s Note: I originally published this post on August 10, 2015. Five years, a couple cookbooks and hundreds of recipe tests later, I can say the same tricks hold true. I’ve tried all kinds of from-scratch brownie recipes and box mix baking hacks (instant coffee, pudding mix, all…meh). If you prefer fudgy over cakey sweets—without spending a ton of money on ingredients (I’m not about to melt $8 bars of chocolate here)—these simple findings hold true. Without further ado…

    how to make boxed brownies taste fudgier

    Growing up, friends would freak out over my mom’s chocolate chip brownies. They’d practically beg me to ask her to make them, and years later, when we started experimenting in the kitchen, I started getting calls asking to spill our family’s secret.

    So here goes:

    We used a Martha White brownie mix, doctored with a few heaping handfuls of semisweet chocolate chips.

    Yes, that’s it.

    A few friends refused to believe it. Some bought the mix, made it at home, and swore we were hiding some big secret from them.

    Chopped mint Oreos + Andes mints? Yes, please!

    We weren’t. It really was a box mix. It all came down to four things, as my mom showed me:

    1. The right box mix. Quality cocoa powder is key. Martha White’s mix isn’t sold anymore, but out of all the box mixes I’ve tried, nothing compares to Ghirardelli Dark Chocolate Brownie Mix. It’s my new Martha.
    2. Under-mixing. Never take an electric mixer or whisk to the batter. Just fold in the oil and eggs with a rubber until the lumps of brownie mix are broken up.
    3. Under cook. Bake to the minimum time suggested, and pull them out right away. If the batter jiggles in the center when you go to pull it out, it could use a few more minutes, but otherwise, turn off the oven and let that baby cool!
    4. Cook at a lower temperature. Cooking the brownies at 325 degrees F, for a few minutes longer than the minimum (if the package calls for the standard 350), can result in denser, fudgier brownies.
    5. For chewier brownies with a richer flavor, use melted butter instead of vegetable oil. It’s a technique I tested at PureWow in April 2022, and wow! The results surprised me.
    6. For the gooiest, moistest brownies, use milk instead of water in the box mix. The extra fat goes a long way in making the brownies taste like fudge.
    7. Let it cool. Give the brownies at least 30 minutes to set, so they’re not molten goo when you try to cut into them (not that there’s anything wrong with that, per se!)
    8. Add a mix-in. The right ones can completely change the brownie’s flavor.

    The Best Mix-Ins to Improve the Flavor of Box Mix Brownies:

    • Bite-size pieces of store-bought cheesecake
    • Salted caramel sauce swirled on top
    • Crushed banana chips
    • Chocolate-covered pretzels
    • Nutter Butters
    • Rolos
    • A layer of Ghirardelli caramel-filled squares
    • Chopped Milky Way Midnight (or Milky Way Marshmallow) bars
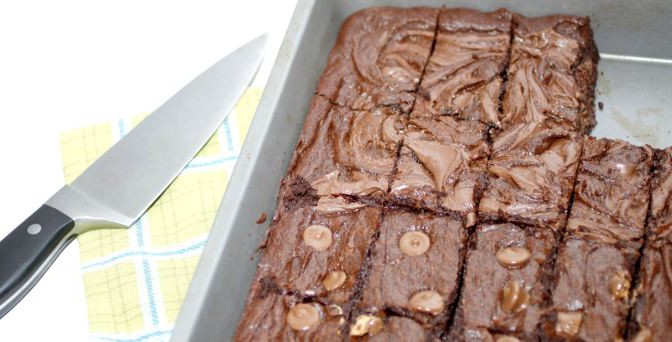
    • Nutella swirl
    • Mini M&Ms
    • Dark chocolate peanut butter cups
    • Peanut butter (just dollop a bit on top and swirl with a knife)
    • 1 cup peanut butter mixed with 1/4 cup powdered sugar (for a more Reese’s-like texture)
    • 1 cup cream cheese mixed with 1/4 cup powdered sugar, for a cheesecake-like topping
    • Marshmallow Fluff
    • Cookie dough
    • Chocolate chunks or chips
    • Golden Oreos (or any flavor, really)
    • Andes Mints
    • Chopped Kit-Kats
    • Pecans
    • Pistachios
    • Cashews
    • Rainbow cookies
    a stack of chewy, fudgy brownies using bread flour
    Photos: Candace Braun Davison

    Life Between Weekends may earn a commission from affiliate links that appear in this post.

  • Easy Sugar Cookie Blossoms

    Easy Sugar Cookie Blossoms

    Peanut butter blossoms are a classic bake sale (or holiday cookie swap) treat—but they’re a no-go at most schools. Sure, you could swap out PB for Sunbutter, or make them with an oatmeal cookie base, but if you want something that will really let the Hershey’s Kiss shine, make these sugar cookie blossoms.

    They’re just as easy as the original; just use your favorite store-bought sugar cookie dough (or go all out and bake your favorite from-scratch recipe). Roll ’em in sugar, let them bake, and wait a couple minutes before popping on the Hershey’s Kisses.

    Bitten sugar cookie blossom, revealing the gooey inside of the Milkalicious Hershey Kiss atop it
    Photos: Candace Braun Davison

    How to Take These Sugar Cookie Blossoms to the Next Level

    I like using filled chocolate Kisses, like the ultra-creamy Hershey’s Milkalicious variety, just to give these treats some added oomph. They’re a little more prone to melting than the traditional Kiss, due to their gooier interior, which is why it’s worth letting the cookies cool for three to four minutes before popping them on. Just don’t wait until the cookies have fully cooled; they may not stick to the dough then!

    I wouldn’t fault my chocoholics out there for topping the whole thing with a chocolate drizzle either. (I’ve been tempted myself.)

    platter of sugar cookie blossoms, topped with Hershey's Kisses

    Sugar Cookie Blossoms

    An easy riff on peanut butter blossoms, featuring a mellow base and a Hershey's Kiss core.
    Prep Time 10 minutes
    Cook Time 10 minutes
    5 minutes
    Total Time 25 minutes
    Course Dessert
    Cuisine American
    Servings 2 dozen cookies

    Equipment

    • 1 Baking sheet
    • 1 sheet parchment paper
    • 1 small bowl or shallow dish
    • oven mitts
    • spatula

    Ingredients
      

    • 2 packages sugar cookie dough (we used Sweet Loren's)
    • 2 tbsp granulated sugar
    • 24 Hershey's Kisses

    Instructions
     

    • Preheat the oven according to the cookie package's instructions. Line a baking sheet with parchment.
    • Roll cookie dough into one-inch balls. (If using break-and-bake dough, roll each piece into a ball.)
    • Pour sugar into a small bowl or shallow plate. Roll each dough ball in the sugar, coating it entirely. Bake the cookies according to the package's instructions. As the cookies bake, unwrap the Hershey's Kisses and set aside.
    • Let the cookies cool for three to four minutes. Top each with a Hershey's Kiss in the center; it may melt slightly, but they'll solidify once the cookies fully cool.
    Keyword cookies

    This post contains affiliate links, which help fund the operation of this website.

Optimized with PageSpeed Ninja