Category: Desserts

Recipes for cookies, cakes, brownies, fudge and other treats that are easy to make yet still impressive

  • Pastelitos, aka the Best Super Bowl Dessert for Buccaneers Fans

    Pastelitos, aka the Best Super Bowl Dessert for Buccaneers Fans

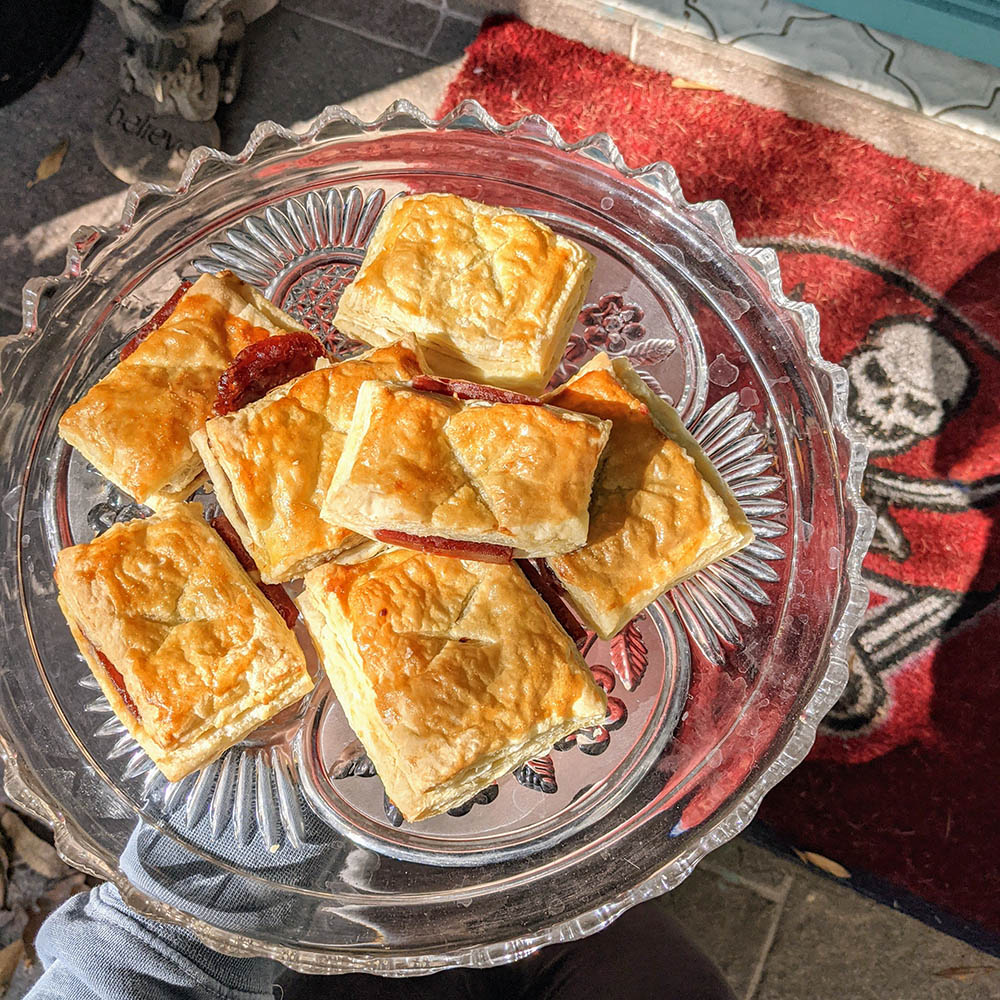
    Certain foods are synonymous with Tampa Bay: Cubanos, Bloomin’ Onions (Tampa is the birthplace of Outback, after all), grouper sandwiches, strawberry shortcake straight from Plant City. They’re must-haves when you’re in the Bay, but there’s one treat that doesn’t get nearly enough attention, and it really, truly should. I’m talking about pastelitos de guayaba y queso. These flaky hand pies are oozing with guava and cream cheese, which first-timers have described as “a cross between a cranberry-fig pie and a cheese Danish.”

    It’s a traditional Cuban dessert, reflective of the vibrant Cuban culture that infuses Ybor City and the surrounding Tampa Bay area. And if you’ve grown up in Hillsborough or Pinellas County, it’s a treat that tastes like home. So, in honor of Tampa Bay hosting the Super Bowl this year—and the Buccaneers making it to the big game, the first in the NFL to enjoy such a home-field advantage—I wanted to try my hand at making them.

    This six-ingredient recipe is a simplified take on pastelitos, based on a combination of how friends have made them and a little internet research. I added a little lemon and sugar to make the filling a bit more cheesecake-y, though many recipes I saw online while researching the dessert called for spreading straight cream cheese on the pastry. Riff on this however you please!

    Next time, I might try sprinkling coarse sugar on top of the pastry, post-egg wash, just to add a little crunch (and sweetness).

    guava and cream cheese pastelitos

    Guava and Cream Cheese Pastelitos

    These easy guava and cream cheese pastries pay homage to the Cuban pastelitos sold in Ybor City in Tampa Bay.
    Prep Time 10 minutes
    Cook Time 20 minutes
    Total Time 30 minutes
    Course Dessert
    Cuisine Cuban
    Servings 12

    Equipment

    • Oven
    • Baking sheet
    • Mixer

    Ingredients
      

    • 1 (8-ounce) package cream cheese, softened
    • 1/2 lemon
    • 1 tbsp sugar
    • 1 (17.3-ounce) package frozen puff pastry, thawed two sheets total
    • 1 (14.1-ounce) package guava paste
    • 1 egg, beaten

    Instructions
     

    • Preheat oven to 400 degrees F.
    • In a mixing bowl or the bowl of a stand mixer, combine cream cheese, the juice of the lemon half and sugar. Beat to combine, about 1 minute.
    • Spread out one sheet of thawed puff pastry on a parchment-lined baking sheet. Slather the cream cheese mixture on the puff pastry.
    • Slice guava into quarter-inch pieces. Cover the cream cheese-topped puff pastry with pieces of guava paste. Top with the other sheet of puff pastry, creating what looks like a massive puff pastry sandwich. Cut into 12 squares. Score the tops of each square with an X (or any design of your choice).
    • In a small bowl, crack an egg and beat it until pale yellow. Brush the top of the puff pastries with the egg wash. Bake for 20 minutes, or until the tops are golden brown.
    Keyword cream cheese, guava, pastelitos, pastry, puff pastry
  • How to Make Baby Yoda-inspired Cupcakes

    How to Make Baby Yoda-inspired Cupcakes

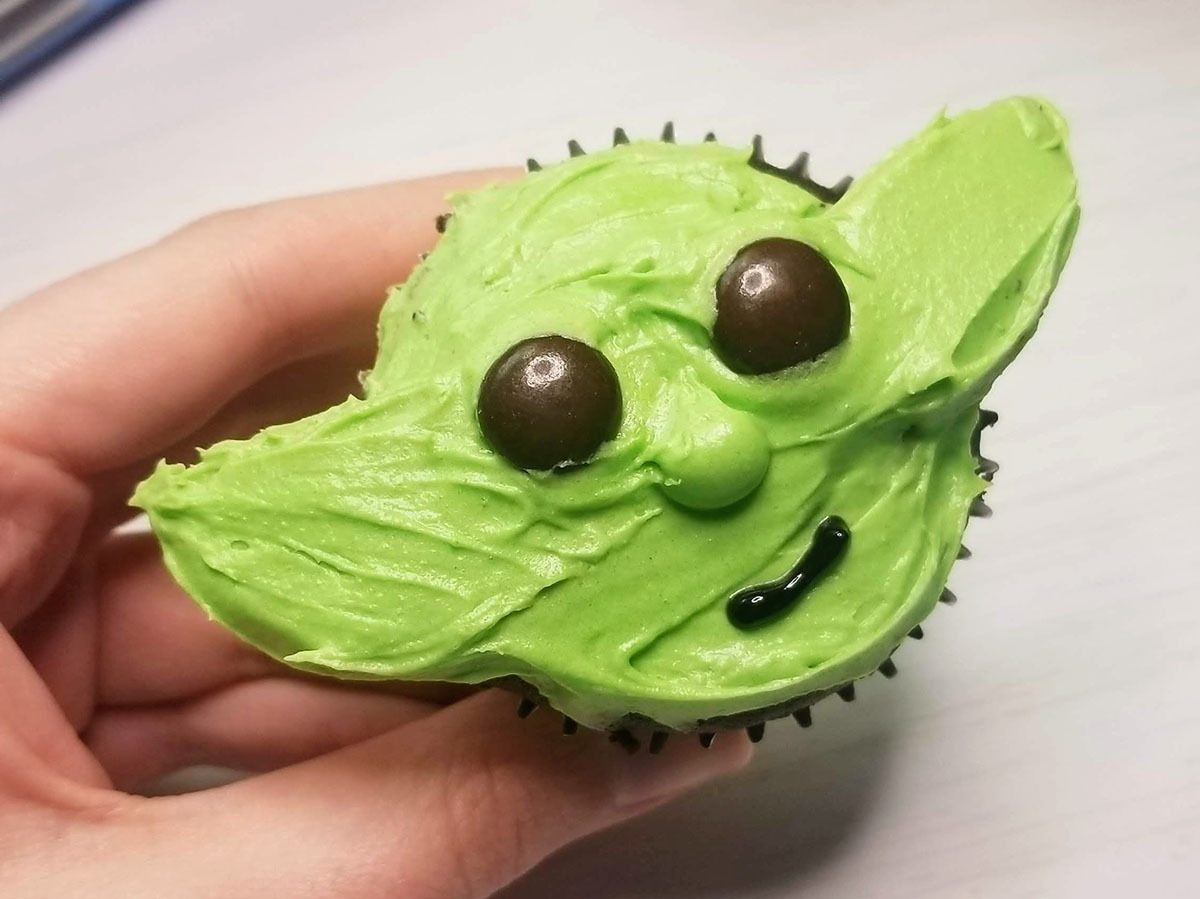
    Wait, so you’re not hosting a watch party for one and making all kinds of Grogu-inspired treats every Friday, when a new episode of The Mandalorian hits Disney+? Huh. Strange. Well, these Baby Yoda cupcakes may just convince you to start. They’re ridiculously cute—and also ridiculously easy to make (like maybe even easier than the Sesame Street and Winnie the Pooh cupcakes).

    Baby Yoda Cupcakes Tutorial - How to Make The Child Cupcakes
    Photos: Candace Braun Davison

    You can use any cupcake flavor or recipe as the base (though I’m partial to chocolate), and from there, the hardest part is breaking Oreos in half to form The Child’s ears. Seriously.

    What You’ll Need to Make Baby Yoda-Inspired Cupcakes:

    • 1 (16-ounce) container vanilla buttercream frosting
    • 4 to 6 drops green food coloring
    • 12 chocolate cupcakes, baked and cooled
    • 6 Oreos, halved and cream removed
    • 24 brown M&M’s
    • black gel icing

    How to Decorate ‘Em:

    1. Add food coloring to buttercream frosting, a few drops at a time, stirring in between, until it becomes a pale green.
    2. Spread a thin layer of green buttercream frosting atop a cupcake. Take one Oreo half and carefully break it in half lengthwise, forming two semicircles. Place them along the top half of the cupcake, forming Baby Yoda’s ears. (They’ll protrude slightly on either side of the cupcake.) Spread more green buttercream on the cupcake, covering the Oreo ears. Add a dewdrop-sized dollop right in the center to form Baby Yoda’s nose.
    3. Gently press two brown M&M’s just above the nose, M-side down, to form The Child’s eyes. Use black gel icing to draw his mouth. Repeat with remaining cupcakes.
  • How to Make Candice Kumai’s ‘Selena and Chef’ Recipes

    How to Make Candice Kumai’s ‘Selena and Chef’ Recipes

    Just when it seemed like we’d all binged every show created on the planet during quarantine (doesn’t Tiger King seem like a lifetime ago?), HBOMax debuted the gem that is Selena and Chef. The series, filmed during isolation, features singer/actress Selena Gomez learning to cook via video chat with a different chef each week. Only three episodes have dropped so far (a new one is released each Thursday), but the breakout star has been…Selena’s rainbow knife set. And Candice Kumai, wellness writer and six-time cookbook author.

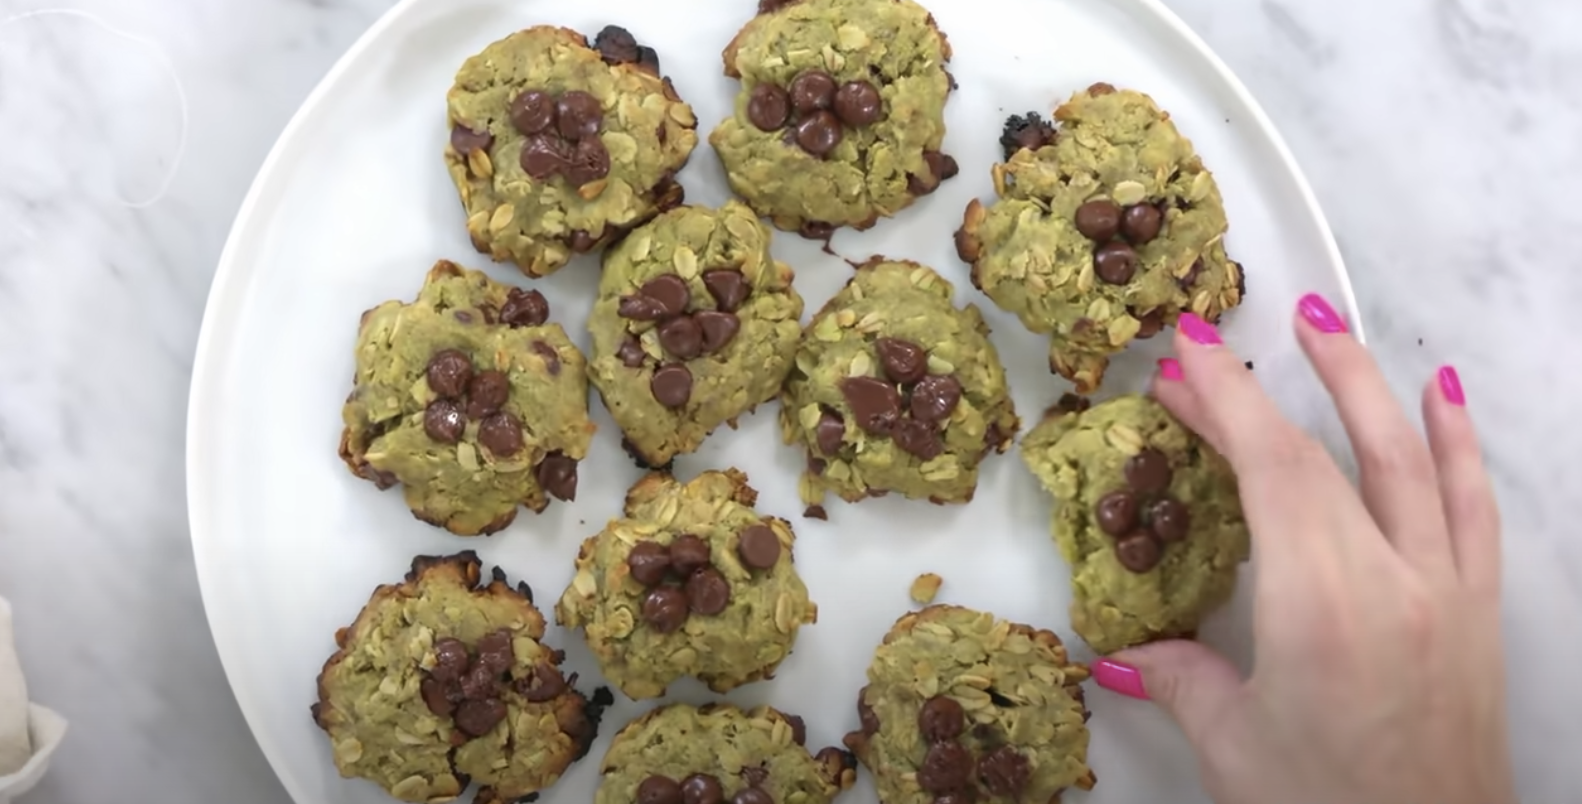
    Kumai’s known for her healthier spins on craveworthy recipes, and her episode with Gomez is no different. In it, she teaches the Rare singer to make Spicy Miso Ramen Soup and Matcha Chocolate Chip Cookies. And she shared the exact ingredients on Instagram, so you can make them at home while watching the episode.

    Selena and Chef Recipes: Spicy Miso Ramen Soup

    If you don’t make ramen or dabble in Japanese cuisine regularly, you’ll probably have to head to the store to pick up a few of these ingredients. (A lot of it you can actually order through Amazon, like togarashi, mirin and red miso paste.) The recipe itself is pretty straightforward, and Kumai encourages you to eyeball measurements when cooking (not baking): chopping vegetables, sauteing them in sesame oil to soften them, adding in the liquid ingredients, letting it all simmer and seasoning it to your taste. Cooking the noodles is one of the final steps, before you add the soup and toppings.

    Selena and Chef Recipes: Matcha Chocolate Chip Cookies

    Instead of your typical creaming butter and sugar, like most cookie recipes require, Kumai has Gomez mash and combine her substitute for the fat–bananas and coconut oil–then mix in the sugar. Similar process, same end result. You’re basically whipping air into the butter and sugar, which gives the cookies some structure, puffing ’em up so they don’t fall flat. Leavener–in this case, baking soda–also helps with this. Kumai’s shared the full recipe on her website, which you can check out here.

    I don’t know about you, but I know what I’ll be making this weekend.

    Life Between Weekends earns an affiliate commission from purchases made through this post. It helps offset the costs of web hosting.

  • How to Make Winnie The Pooh-Inspired Cupcakes

    How to Make Winnie The Pooh-Inspired Cupcakes

    During the first few weeks of quarantine, I got really into decorating pop culture-inspired cupcakes. To the point that some of my friends probably contemplated staging an intervention, but it was my small attempt at bringing a little joy to people’s feeds—while also entertaining myself in my downtime.

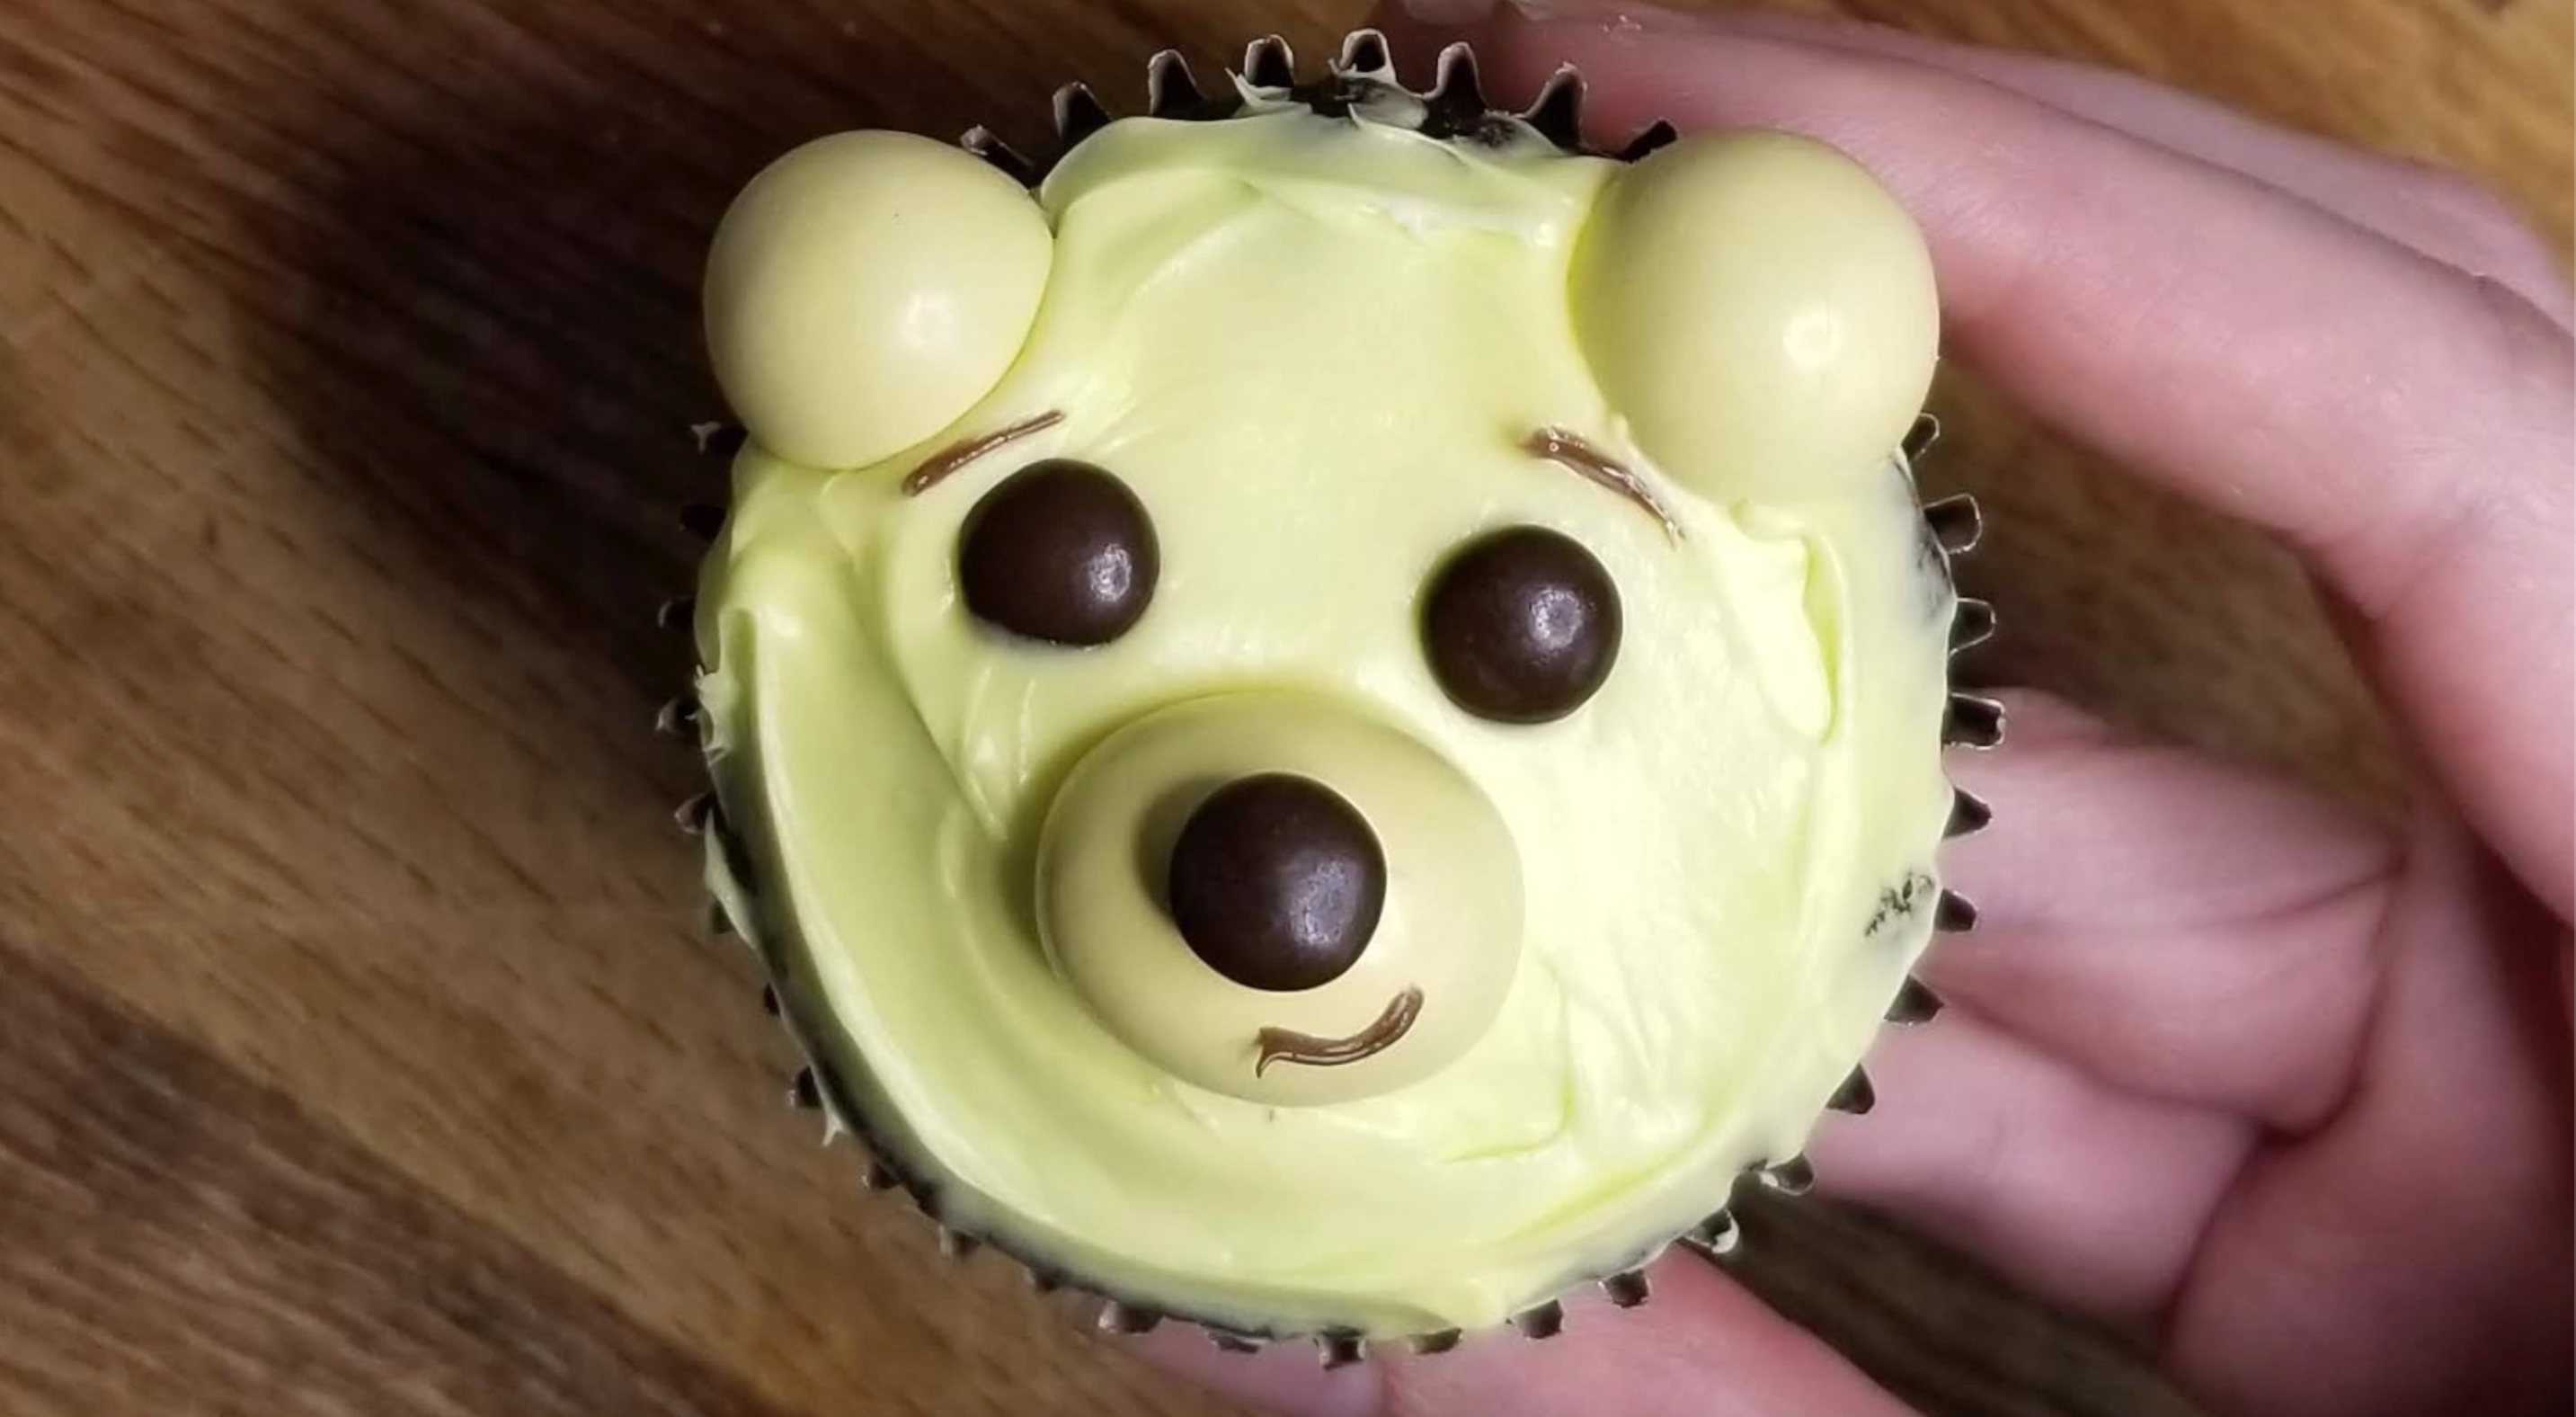
    That’s why you’re suddenly seeing so many posts featuring Peppa Pig, Elmo and Cookie Monster treats. And now, Winnie the Pooh. I made the cupcake just after Easter, when I had bags of Hershey’s Eggs lying around—which formed the bear’s snout—but you could easily use peanut M&M’s, dying your frosting a bolder shade of yellow instead of the pastel I used.

    Whatever you do, if you make one of these treats, tag @lifebetweenweekends, @candacebd (or @betweenweekends on Twitter), so we can see them too. Those little moments of connection go a long way in these isolating days.

    Winnie The Pooh-Inspired Cupcakes

    So easy, kids of all ages can get in on the fun! (But first, a disclaimer: I have no affiliation with A.A. Milne or Disney; these are just a fan tribute to the classic character.)
    Course: Dessert
    Keyword: cupcakes, disney, kids, winnie the pooh
    Servings: 18 cupcakes

    Ingredients

    • yellow food coloring
    • 1 16-ounce container vanilla frosting
    • 18 baked chocolate cupcakes, cooled
    • 36 yellow Hershey's Eggs or peanut M&Ms
    • 48 brown M&M Minis
    • 1/4 cup chocolate frosting (or 1 tube black gel frosting)

    Instructions

    • Add 5-7 drops of yellow food coloring to the vanilla frosting, stirring until combined. Gradually add 2-3 drops at a time, stirring until mixed, until the frosting matches the color of the Hershey's Eggs or Peanut M&M's, depending on which one you're using. (Hershey's Eggs are more of a pastel yellow, so the frosting will need less dye to match.)
    • Cover the top of the cupcake with yellow frosting. Place one Hershey's Egg/Peanut M&M lengthwise in the lower third of the cupcake, forming the snout. Cut another one in half, placing each half cut-side down on the top edge of the cupcake, forming the ears.
    • Place two brown M&M Minis just above the snout to form the bear's eyes. Dab a tiny dot of yellow frosting on the snout, then stick a brown M&M Mini atop it, creating Pooh's nose.
    • Using a toothpick, swipe a little chocolate frosting over the eyes to form eyebrows, and another just below the nose to create Pooh's smile.

    Notes

    One medium-sized bag of Peanut M&M’s—or full-size bag of Hershey’s Eggs—should have enough yellow treats to complete this project. A medium-sized bag of M&M Mini’s should have enough brown M&M’s.
  • These Sesame Street-Inspired Cupcakes Are the Perfect Afternoon Project

    These Sesame Street-Inspired Cupcakes Are the Perfect Afternoon Project

    Keeping little kids entertained can be an exercise in endurance. Your mind’s constantly spinning, trying to come up with ways to entertain that aren’t screentime, screentime, screentime (or involve endless cleanup). These Sesame Street-inspired cupcakes are a perfect afternoon activity—or birthday surprise—to keep the kids busy. Plus, they’ll eat up some of the mess, so everybody wins! As long as they don’t color the walls in frosting or anything.

    Of course, I’m not affiliated with Sesame Street or HBO or PBS in any way; this is purely a fan tribute, using all everyday, basic items, so the average person (or kiddo) can easily DIY ’em. (That’s also why they look a lot like the Times Square knockoff version of your favorite monsters, rather than 100 percent spot-on. I tried, OK?! Hahaha.)

    How to Make Elmo-Inspired Cupcakes:

    What You’ll Need:

    • 6-8 drops red food coloring
    • 16 ounces vanilla buttercream frosting
    • 18 baked chocolate cupcakes, cooled
    • 18 orange mini M&Ms
    • Red sanding sugar
    • 36 mini marshmallows
    • Black gel frosting

    How to Decorate Them:

    Check out the video above for a quick rundown of what to do. You can use store-bought frosting or make it from scratch, but either way, I recommend dying the frosting red, even though you’re dipping it in red sanding sugar. That way you don’t wind up with white patches poking through.

    No sanding sugar? You can draw light strokes in the frosting with a fork to get a textured, furry look, just like we did with the Cookie Monster cupcakes below.

    How to Make Cookie Monster-Inspired Cupcakes:

    What You’ll Need:

    • 6-8 drops blue food coloring
    • 16 ounces vanilla buttercream frosting
    • 18 baked cupcakes, cooled
    • 18 marshmallows
    • Black gel frosting
    • 9 Oreos

    How to Decorate Them:

    Check out the video above for a quick rundown of what to do. You can make this project even easier by using candy eyes instead of a squished marshmallow, but that’s your call.

    No matter how you go about them, we hope you enjoy them!

    Psst: Noticed that rogue Peppa Pig in the photo at the top of this post? We’ve got a tutorial for those cupcakes too. Oh, and if these videos look familiar, you may have noticed I also shared the demo with PureWow.

  • Mini Chocolate Chip Banana Bread Loaves

    Mini Chocolate Chip Banana Bread Loaves

    It all started, as so many of my over-the-top recipes over the years have, with a ridiculous bout of wordplay: SpongeBread SquarePan. I had started a pop culture cupcake-decorating party for one amid all of this social distancing, taking requests from Instagram followers to create cupcakes that looked like the characters from shows we were all binge-watching. (Or forced to binge-watch, based on our kids’ demands.)

    Peppa Pig cupcakes led to Elmo ones, which led to Baby Yoda, then Sailor Moon…and then, one day, I thought about SpongeBob. He didn’t seem right for a circular cupcake at all. And then I noticed three very brown bananas on the kitchen counter. Within seconds, “SpongeBread SquarePan” got into my head.

    Spongebob Squarepan - Spongebob Banana Bread Dessert
    Photo: Candace Braun Davison

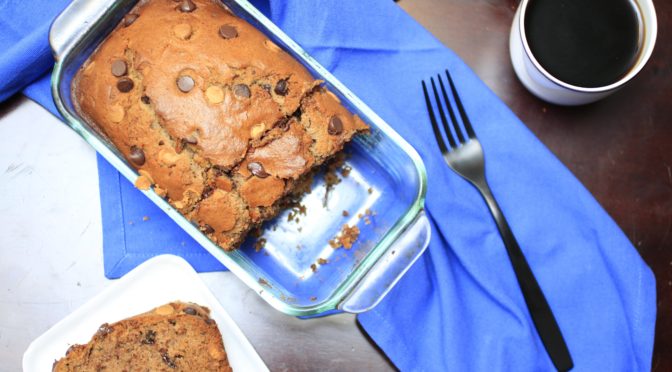
    On their own, this mini chocolate chip banana bread recipe—adapted from IWashYouDry.com‘s dish—is absolutely delightful. It’s a dense cake, thanks to all of the butter and banana, and I admit I go completely overboard with the chocolate chips, but it’s so worth it. You don’t have to go all out, adding Nutella pants and vanilla buttercream, gel frosting and M&M facial features, but if you’re stuck inside with time to kill, why not? Then you can make like SpongeBob, stare into those lil’ banana bread faces and announce “the gang’s all here!”

    Photo: Nickelodeon

    Note: I use a mini loaf pan, like this, which turns your typical banana bread batter (enough to fill a 9-inch by 5-inch pan) into 10-11 mini loaves when filled 2/3s of the way up.

    Chocolate Chip Banana Bread Mini Loaves

    Chocolate Chip Banana Bread Mini Loaves

    The only thing better than chocolate chip banana bread is mini chocolate chip banana bread. These loaves, adapted from IWashYouDry.com's recipe, are totally craveworthy.
    Prep Time 15 minutes
    Cook Time 22 minutes
    Course Dessert
    Cuisine American
    Servings 8

    Ingredients
      

    • 3 bananas (medium-sized)
    • 1 stick butter melted
    • 1/2 cup sugar
    • 1 egg beaten
    • 2 tsp vanilla extract
    • 1 1/2 cups flour
    • 1 tsp baking soda
    • 1/2 tsp salt
    • 1 1/2 cups chocolate chips

    Instructions
     

    • Preheat oven to 350 degrees F.
    • Using an electric mixer, whip bananas until they're pureed. Add melted butter, sugar, egg and vanilla, beating for about 1 minute, or until combined. Add flour, baking soda and salt, mixing until combined. Fold in chocolate chips.
    • Spray mini loaf pans with cooking spray (or coat bottom and sides with butter). Fill each pan about 2/3s of the way up with batter. Bake 22-25 minutes, or until a toothpick inserted into the center of a loaf comes out clean (with just a few crumbs or melted chocolate, not batter). The banana bread doesn't brown like typical recipes, so don't worry if it's a light tan color rather than a dark golden color. The toothpick test is the best way to know if it's done.

    Notes

    Enjoy!
    Keyword banana bread, breakfast, chocolate chips, easy baking
  • Spiced Rum Chocolate Chip Cookies

    Spiced Rum Chocolate Chip Cookies

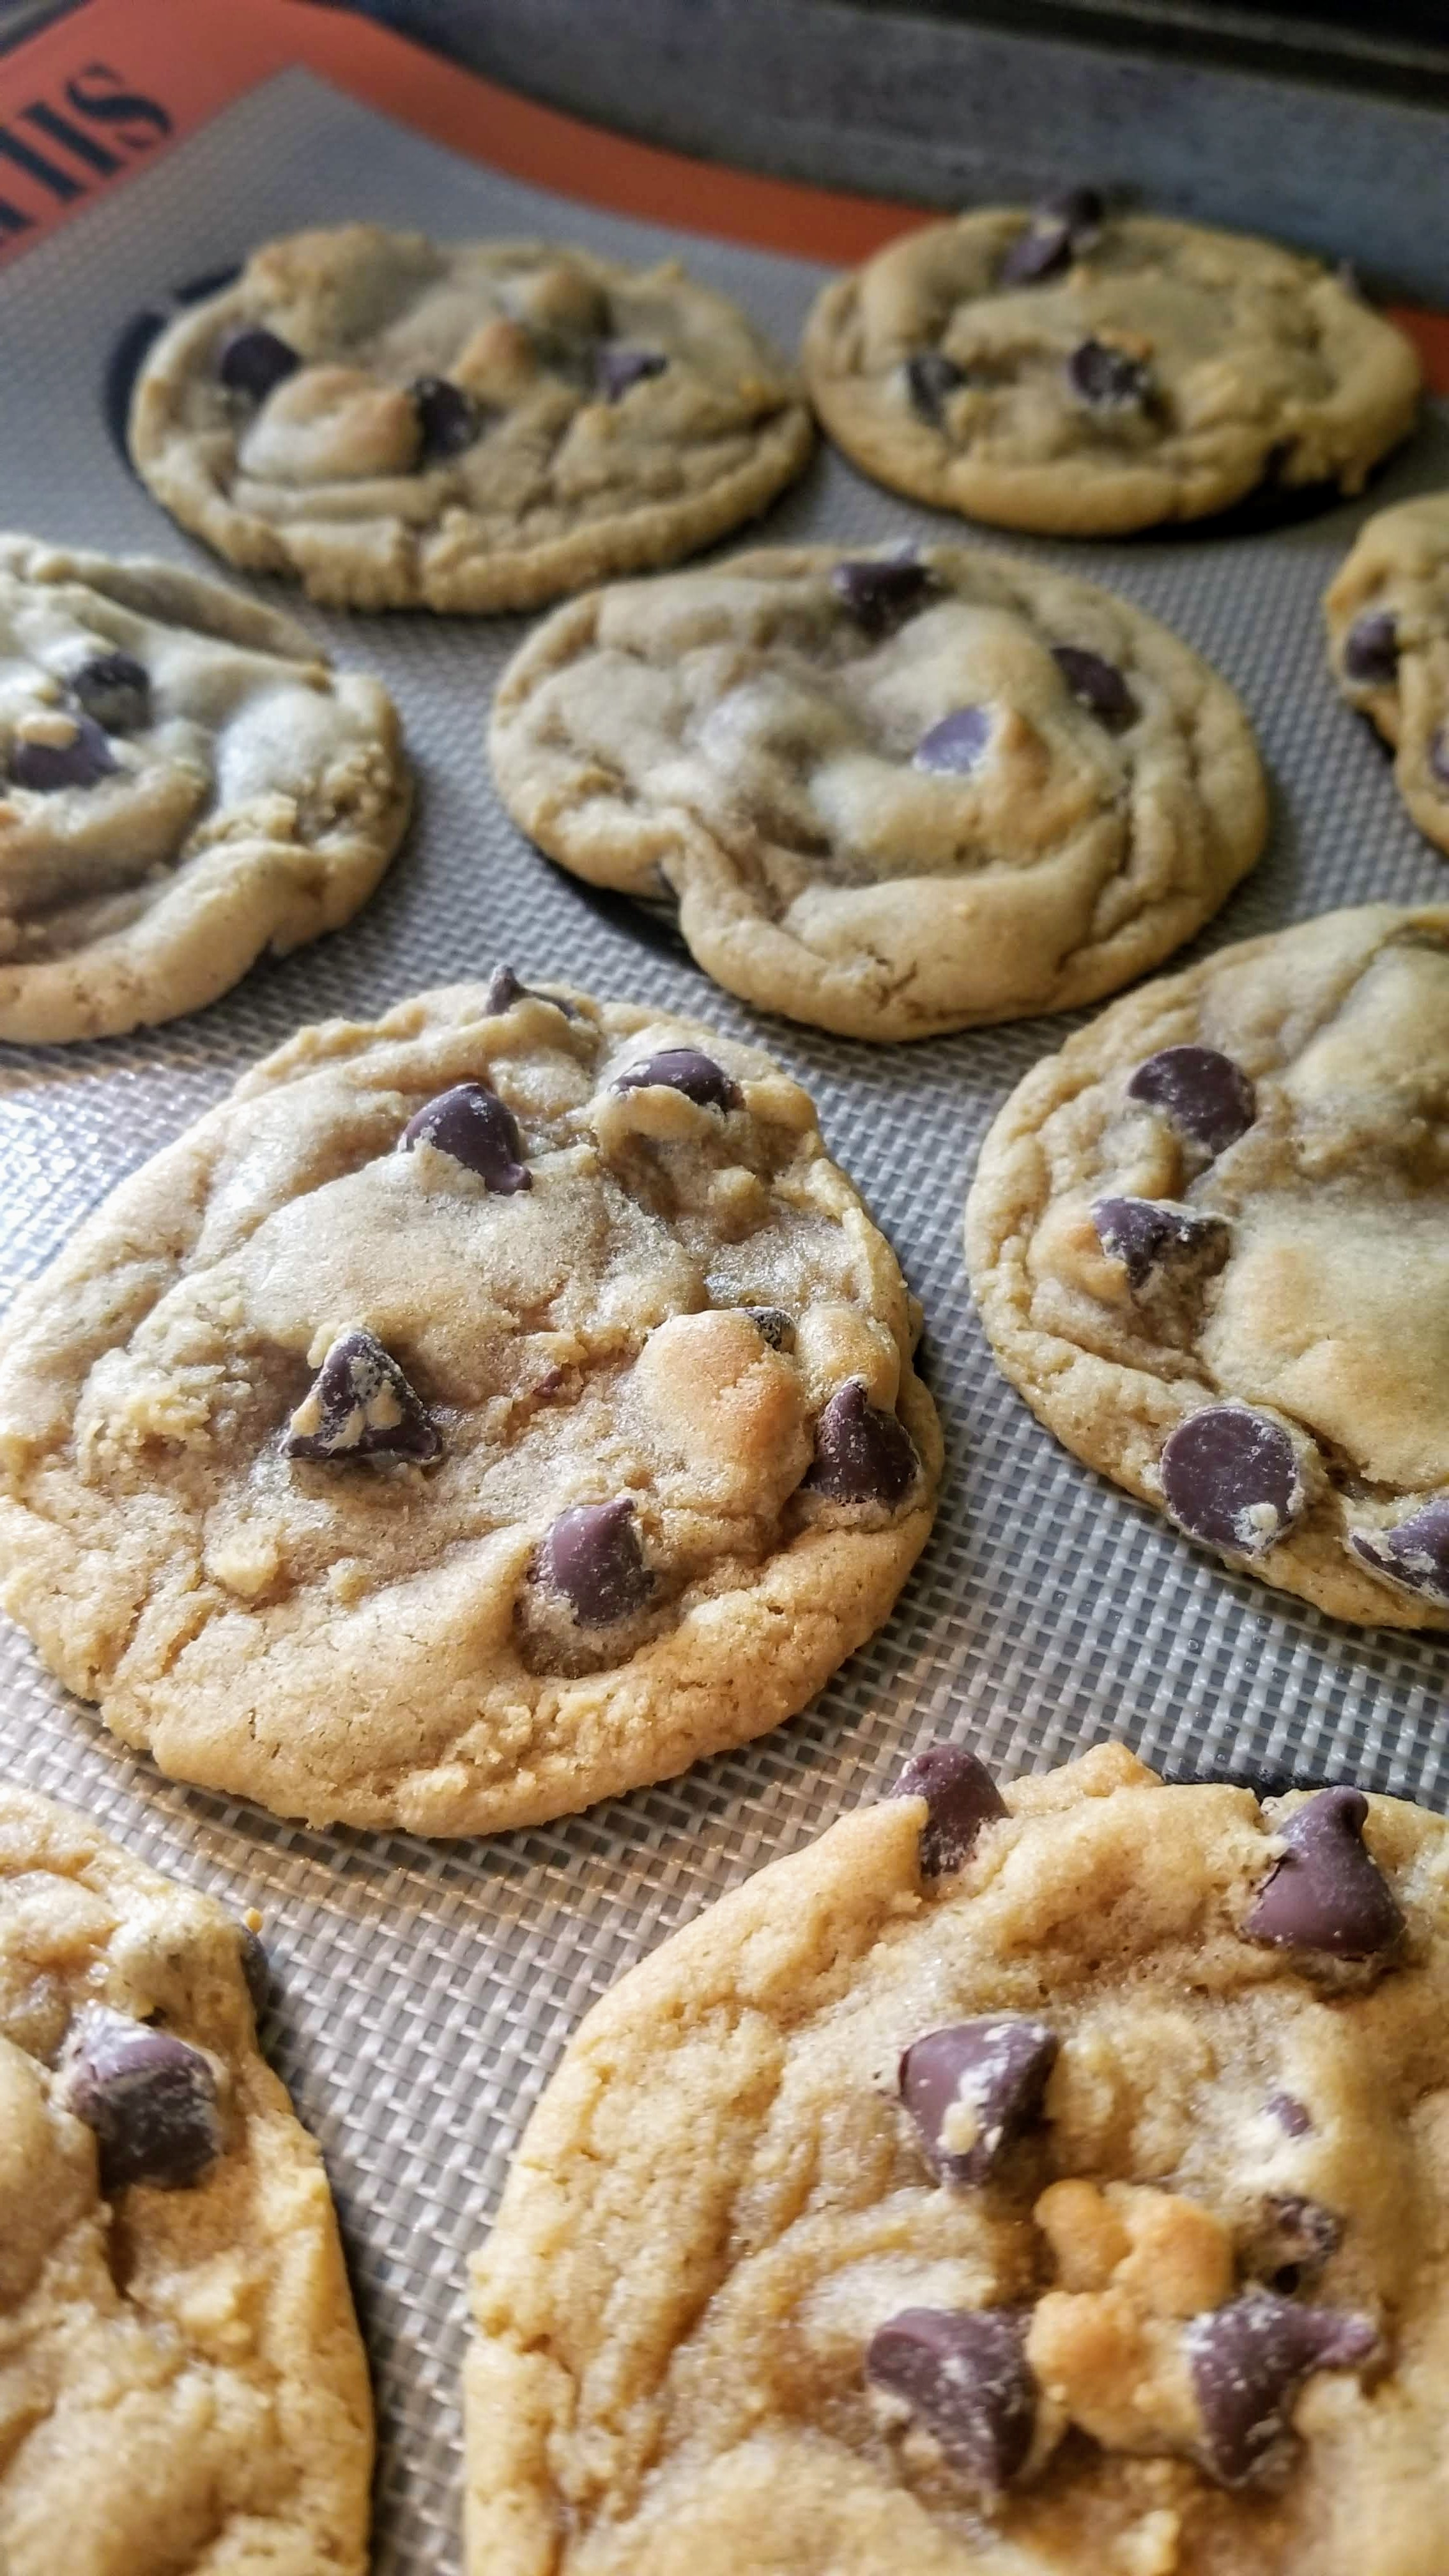
    It all started when I ran out of vanilla extract. I’ve always been a firm believer that good-quality vanilla’s the secret to a killer chocolate chip cookie. (Well, that and plenty of brown sugar to get that caramel-y flavor.) When I ran out late Friday night, I wasn’t in the mood to load up the baby and head to the store, so I improvised. What could give my cookies that depth of flavor without overwhelming the batch? Spiced rum.

    spiced rum chocolate chip cookies recipe

    This recipe calls for a full tablespoon of rum, just so there’s a tiny hint of spice to it. The alcohol burns off while cooking, so you don’t have to worry about keeping these cookies out of kids’ reach, too. But you may want to keep them out of grasp for entirely selfish reasons — they’re almost too good to share.

    spiced rum chocolate chip cookies recipe
    spiced rum chocolate chip cookies recipe

    Spiced Rum Chocolate Chip Cookies

    Inspired by Joanna Gaines’s chocolate chip cookie recipe — and a lack of vanilla extract — I got to experimenting…and wound up with a total crowd-pleaser. 
    Prep Time 10 minutes
    Cook Time 10 minutes
    Total Time 20 minutes
    Servings 24

    Ingredients
      

    • 1 stick butter, softened
    • 2 cups brown sugar
    • 1 tbsp spiced rum
    • 2 large eggs
    • 2 1/2 cups flour
    • 1 tsp baking soda
    • 1 tsp salt
    • 2 cups semisweet chocolate chips

    Instructions
     

    • Preheat oven to 350 degrees F.
    • In a large mixing bowl, beat butter and brown sugar until it forms a light paste, almost like the texture of a body scrub. Add rum and eggs, mixing until combined.
    • In a separate bowl, combine flour, baking soda and salt. Slowly add the flour mixture to the sugar-butter mixture, stirring until a thick dough forms. Fold in chocolate chips.
    • Place roughly 1-inch balls of dough onto a baking sheet about 2 inches apart. Bake for 8-10 minutes, or until the cookies are lightly golden. Let cool for a few minutes before devouring.
    Keyword cookies
  • Birthday Cake Monster Cookies

    Birthday Cake Monster Cookies

    This whole experiment started because I bought one too many cake mixes. I know, I know — who does that, and when is it ever a problem?! The thing is, since it’s just Nate and me at home, there isn’t much of a need for an entire vanilla cake. Plus, I’m less of a cake person, and more of a fudgy brownies and cookies person. So, as the box kept taunting me from the back of the pantry each time I’d go in to grab an ingredient, I finally decided to do something about it.

    Cake Mix Monster Cookies (Photos: Candace Braun Davison)
    Cake Mix Monster Cookies (Photos: Candace Braun Davison)

    Cake mix cookies are nothing new, but they’re often a little too sweet for my tastes. I’d stumbled upon Betty Crocker‘s Cake Mix Monster Cookies and got excited, because the oats and peanut butter looked like they could offset some of the sweetness. It took some tinkering and riffing — Betty’s recipe calls for more brown sugar than I’d like, and I used Reduced Fat Jif (which isn’t as runny as traditional peanut butter), so I had to increase the water in the recipe to make up for it.

    Cake Mix Monster Cookies (Photos: Candace Braun Davison)
    Doughn’t you want some?

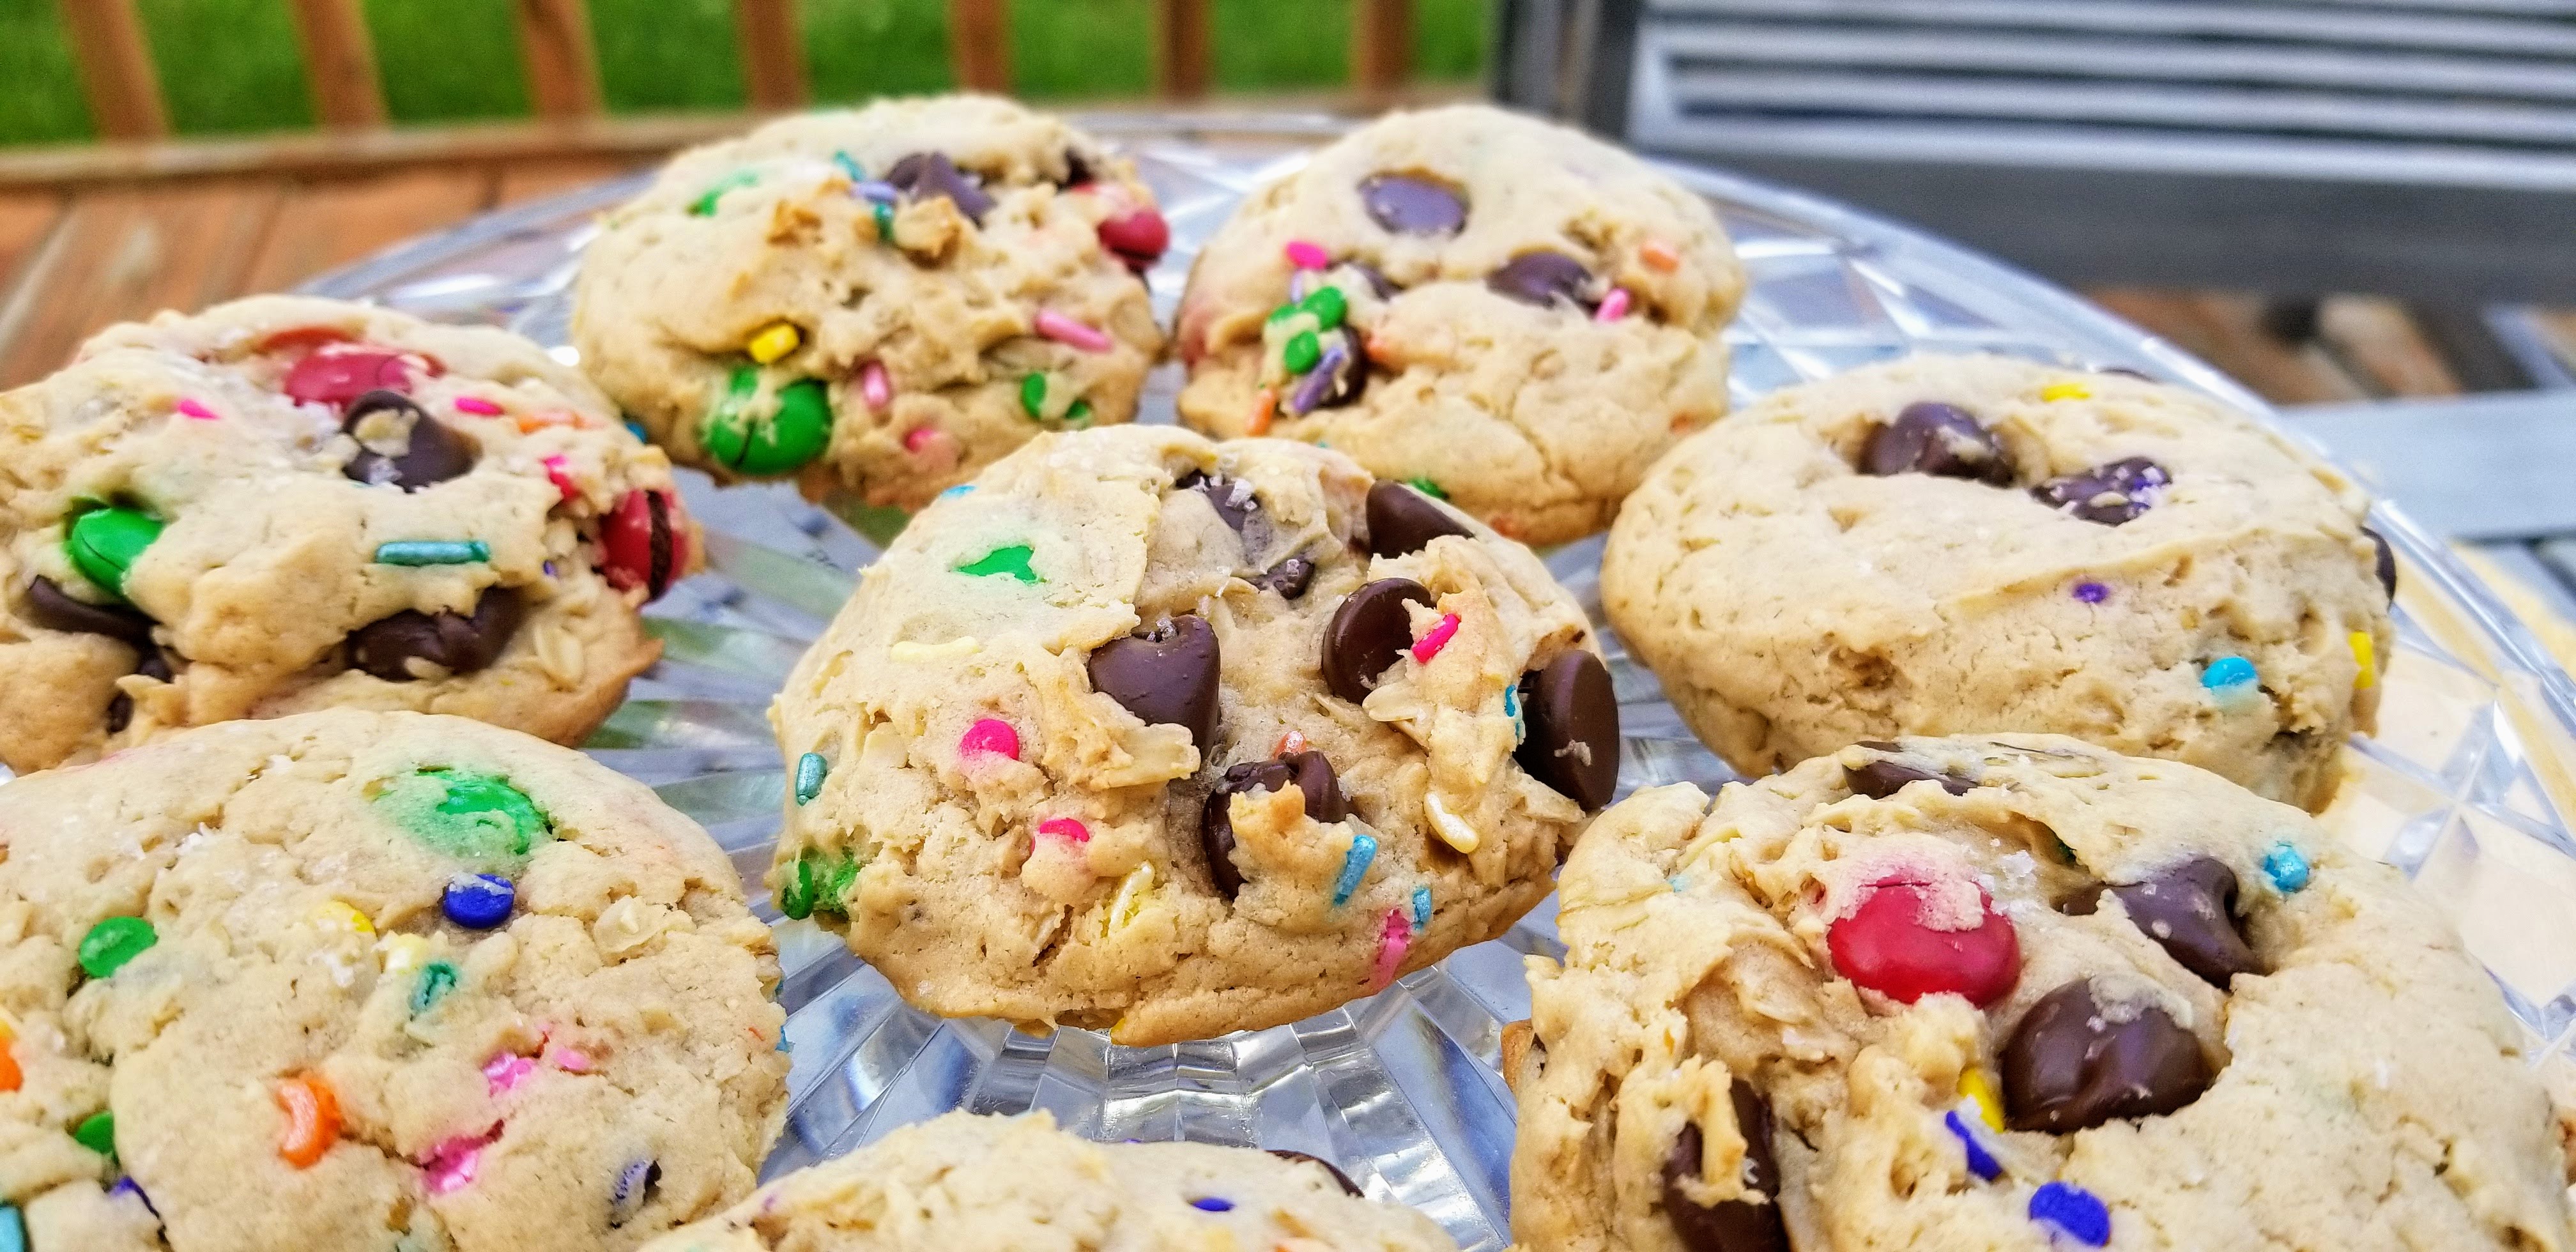
    The end result was a pillowy, slightly peanut buttery treat that’s bursting with gooey chocolate chips and tastes like cake batter. Imagine Cold Stone Creamery’s Birthday Cake Remix Cookies, only in cookie form. I’m not joking.

    Cake Mix Monster Cookies (Photos: Candace Braun Davison)

    A little underbaked and warm out of the oven, these are extra divine. The sprinkle of flaky sea salt on top is a must, particularly if you want to balance out all that sugar. (Salty-sweet fans, you get me!)

    Try it for yourself, and let me know what you think!

    Crazy Easy Cake Mix Monster Cookies

    Ingredients

    • 1 box vanilla cake mix (or yellow cake)
    • 1/3 c packed brown sugar
    • 1 stick butter, softened
    • 1/2 c creamy peanut butter
    • 1/4 c water
    • 1 egg
    • 1 c quick-cooking oats
    • 1/3 c M&M’s
    • 2/3 c semisweet chocolate chip cookies
    • 1/3 c rainbow sprinkles
    • 1 tsp flaky sea salt

    Instructions

    1. Preheat oven to 350 degrees F.
    2. In a large mixing bowl, beat cake mix, brown sugar, butter, peanut butter, water and egg. Stir in remaining ingredients, except sea salt.
    3. Spoon 1-inch balls onto a parchment-lined baking sheet, placing each one about an inch apart. Lightly sprinkle the tops of the cookies with sea salt (optional).
    4. Bake for 12-14 minutes, or until the cookies have puffed up and the edges are very slightly golden. (NOTE: These cookies will not brown like typical chocolate chip cookies. They’re more like sugar cookies in that respect.)

    https://www.lifebetweenweekends.com/crazy-easy-cake-mix-monster-cookies/

  • Coconut Oil Chocolate Chip Cookies

    Coconut Oil Chocolate Chip Cookies

    Even when I think I’ve found the perfect chocolate chip cookie, I’m always looking for a fresh riff on the recipe. I’ve tried them with oats, molasses, cream cheese, bananas, straight-off-the-back-of-the-chip bag (and I mean every chip bag), all kinds of mix-ins, the 24-hour refrigeration method, even the latest smack-the-pan-before-baking technique. So, when I ran out of butter, I immediately started thinking of alternatives — and realized I had a perfectly good jar of coconut oil on hand. Coconut oil chocolate chip cookies it is!

    Coconut Oil Chocolate Chip Cookies (Photo: Nathan Davison)
    Coconut Oil Chocolate Chip Cookies (Photos: Nathan Davison)

    There are all kinds of purported benefits to cooking with the fat — it can help curb your appetite, build muscle, aid in weight loss, and prevent Alzheimer’s, according to Eat This, Not That — though nutritionally, it’s pretty much a draw with butter. As much as I’d like to believe these are superfood cookies, they’re not — but they are really, ridiculously good. (Yes, they do have a coconut-y taste to them; it’s kind of like eating a Samoa, minus the stringy texture of shredded coconut.)

    Coconut Oil Chocolate Chip Cookies (Photo: Nathan Davison)

    Air Fryer Coconut Oil Chocolate Chip Cookies:

    I’ve been on an Air Fryer kick lately, so I decided to test the recipe there first. I’m happy to report you definitely can bake cookies in it, and in half the time it takes to bake them in the oven. Two caveats, though: (1) you can only bake about 3-4 at a time, and (2) If you put parchment paper under them, the edges of the paper will curl up and distort the shape of the cookie, resulting in an ugly-yet-tasty treat. You’ve been warned.

    Air Fryer Coconut Oil Chocolate Chip Cookies (Photo: Nathan Davison)
    Expectations vs. Reality: Air Fryer Cookies

    Additionally, while Philips says you can use parchment paper in the AirFryer, it should be just big enough to hold your cookies without covering the whole tray — air needs to circulate around the cookie, so you can’t block it. You should also never cook with parchment paper in the Air Fryer without food on top of it, weighing it down. Otherwise, it can get sucked into the heater and burn up. More on that here, and if you try this, do so at your own risk.

    Oven-Baked Coconut Oil Chocolate Chip Cookies:

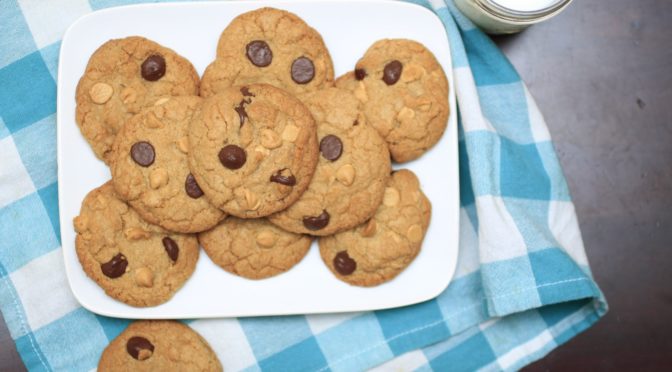
    These cookies bake evenly, turning lightly golden with very little spread. I made mine half peanut butter chips, half dark chocolate chips, but you do you.

    Coconut Oil Chocolate Chip Cookies (Photo: Nathan Davison)

    Coconut Oil Chocolate Chip Cookies

    Ingredients

    • 1 c all-purpose flour
    • 1/2 tsp baking soda
    • 1/2 tsp salt
    • 1/3 c virgin coconut oil
    • 1/2 c packed light brown sugar
    • 1/3 c granulated sugar
    • 1 large egg
    • 1/2 tsp vanilla extract
    • 2/3 c dark chocolate chips
    • 1/3 c peanut butter chips (optional)

    Instructions

    1. Preheat oven to 375 degrees F.
    2. In a medium-sized mixing bowl, combine flour, baking soda, and salt. Set aside.
    3. In a large mixing bowl, combine coconut oil and sugars. Use an electric mixer to beat until a crumbly, wet dough forms. Add egg and vanilla, beating until combined. It’ll look like a loose, caramel-colored brownie batter at this point.
    4. Turn mixer to low and gradually beat in flour mixture, stirring just until combined. Fold in chocolate and peanut butter chips.
    5. Bake for 10-12 minutes, or until the cookies are lightly golden.

    https://www.lifebetweenweekends.com/coconut-oil-chocolate-chip-cookies/

  • Don’t Knock It ‘Til You Try It: Moon Dust Banana Bread

    Don’t Knock It ‘Til You Try It: Moon Dust Banana Bread

    Lately, I’ve been feeling a little woo-woo. Not quite hunting-down-Bigfoot-while-wearing-tin-foil-hats, but more like, I’m into trying new things, no matter how bizarre they might seem. It’s good to be open minded, right? So, when a box of Moon Dust — the very stuff raved about on Gwyneth Paltrow’s lifestyle site, Goop — crossed my desk, I kept it on the shelf for eight months. Then, randomly yesterday (maybe because I was wearing a rose quartz necklace, which is supposed to purify and open my heart, though I bought it just because it was cute, TBH), I decided to open up the stuff.

    Moon Dust (Photo: Candace Braun Davison)

    Moon Dust isn’t quite as mystical as it sounds, though the packaging definitely lives up to the title (as well as the slogan, “cosmic in a cup”). The supplements are basically a blend of ground roots and herbs, formulated to boost a certain area of your life, be it glowing skin (the beauty blend), your quality of sleep (that’s where dream dust comes in) or even your libido (ahem, sex dust). Its claims aren’t reviewed by the FDA, so I’m taking it with a grain of salt, but I decided what the heck.

    Moon Dust Banana Bread (Photo: Nathan Davison)

    It’s typically downed as a drink, stirred into 8 ounces of water, coffee, nut milk, or tea, or blended into a smoothie. But the blends are a little too earthy for my palate, so I decided to stir some into banana bread. After all, the “Cosmic Cooklet” that comes with the set suggests turning it into pancakes, chocolate bark, and ice cream, so why not improvise further?

    I was going for a chocolate-y banana bread, so I eliminated the Beauty and Spirit Dust from testing, since they primarily contain goji berry. Dream Dust, Power Dust (alchemized to “support success and harmony,” according to the packaging), and Sex Dust complemented the banana bread’s flavor profile better. Use whatever you’re into, though — if we’re going strictly on flavor — the Sex Dust is the one to use. It’s loaded with ground cacao, giving the banana bread a richer color and a slight, dark-chocolatier flavor.

    Moon Dust Banana Bread (Photo: Nathan Davison)

    While Sex Dust is meant to “ignite and excite your sexy energy” (that’s exactly what’s written on the package, okay?), people attribute all kinds of benefits to the main ingredients. Its main ingredient, Ho Shou Wu, is often used for treating high cholesterol, kidney problems, insomnia, and dizziness, according to WebMD. The site’s quick to admit more research is needed to substantiate those claims though. (It’s worth noting that Goop distanced itself from the benefits the Brain and Action Dust supposedly gave people after the Advertising Self-Regulatory Council requested backup of that info in 2016. On the flip side, two herbalists told Racked the dusts aren’t just a mishmosh of ingredients that sound impressive; the blends reflect a “deep understanding of Chinese medicine.”)

    Moon Dust Banana Bread (Photo: Nathan Davison)

    Sex Dust is primarily a blend of ground Ho Shou Wu, cacao, maca powder, and other extracts, which give it a slightly chocolatey, somewhat mushroom-meets-earthy flavor. When used in banana bread, it balances out the sweetness of the banana (even taming the flavor of underripe bananas), but after serving a batch to a crowd, nobody turned into a randy Austin Powers. Or felt any different whatsoever. That could be because the dose in this recipe is too small, some might argue; or maybe baking the bread reduced its effects. It DID, however, add a little cocoa flavor that played up the dark chocolate chips and coconut oil quite nicely, resulting in a moist, decadent banana bread.

    This recipe works just as well without Moon Dust, though people certainly got WAY more excited to try it when the dust factor was involved. You could easily substitute a teaspoon of cocoa powder for a similar chocolate-y flavor, minus the reported, um, benefits. It’s your call.

    Moon Dust Banana Bread (Photo: Nathan Davison)

    If you’re up for trying it, you can pick up a box of Moon Dust on Amazon*.

    Moon Dust Banana Bread

    Ingredients

    • 2 c all-purpose flour
    • 1 tsp baking soda
    • 1/2 tsp salt
    • 1 1/2 tsp Moon Dust (Sex Dust for chocolatey flavor)
    • 1/2 c coconut oil, melted
    • 1 c sugar
    • 2 large eggs
    • 1/4 plain Greek yogurt
    • 1 tsp vanilla extract
    • 3 ripe bananas, mashed
    • 2/3 c dark chocolate (or carob) chips
    • 1/3 c peanut butter chips (optional)

    Instructions

    1. Preheat oven to 350 degrees F.
    2. In a medium-sized bowl, mix flour, baking soda, salt, and Moon Dust. Set aside.
    3. In a large mixing bowl, combine coconut oil, sugar, eggs, Greek yogurt and vanilla extract, beating with an electric mixer until combined. Beat in bananas. Gradually add flour mixture, stirring to combine.
    4. Fold in chocolate and peanut butter chips.
    5. Pour batter into a well-greased loaf pan (9″x5″). Bake for 55-60 minutes, or until a toothpick inserted into the center comes out mostly clean, with just a few crumbs.

    https://www.lifebetweenweekends.com/dont-knock-it-til-you-try-it-moon-dust-banana-bread/

    *This post contains affiliate links, which means we receive a small commission for any sales generated through Amazon, which funds future posts.

  • These ‘Swamp Thing Brownies’ Will Be The Hit Of Your Halloween Party

    These ‘Swamp Thing Brownies’ Will Be The Hit Of Your Halloween Party

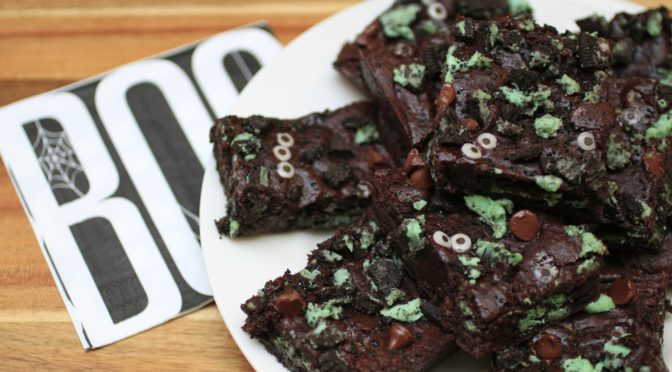
    There are so many reasons to love these brownies: They’re stuffed with Oreos. They’re like Thin Mints in fudgy dessert form. They’re topped with googly candy eyes. They’re delightfully kitschy and absurd. And you can’t fail at making them.

    To be honest, these Swamp Thing Brownies happened serendipitously. I had a package of mint Oreos, and they were too dangerous to keep around, just sitting on my shelf, tempting me. I needed to turn them into a dessert I could share with the masses. And I also happened to have a pack of candy eyes lying around.

    Swamp Thing Brownies

    I started brainstorming what I could do with them, and naturally, I thought of one of my favorite twists on the cookie: stuffed in brownies. It seemed natural. Given the green creme filling and the candy eyes — and the fact that it’s late October — a monster-y riff seemed all too necessary. Mandatory, even.

    Swamp Thing Brownies

    I went with Alice Medrich’s cocoa brownies recipe, modifying it ever so slightly to be even less sweet. It’s dense and fudgy, but on the more semisweet end of the spectrum, so it balances out the intense sweetness of the Oreo cookies. You can easily use boxed-mix brownie batter though. No judgment here.

    Swamp Thing Brownies

    Feel free to experiment a little with the toppings, too. I went with black sanding sugar, semisweet chocolate chips, candy eyes and crumbled mint Oreos, but modify things as you see fit. There are no rules here, as long as it tastes good — and looks mildly creepy.

    Swamp Thing Brownies

    Swamp Thing Brownies

    Ingredients

    • 10 tablespoons unsalted butter (1 stick plus 2 tbsp)
    • 1 cup sugar
    • 3/4 cup unsweetened cocoa powder
    • 1/4 tsp salt
    • 1 tsp vanilla extract
    • 2 cold eggs
    • 2/3 c flour
    • 16 mint Oreo cookies, plus 3 crumbled cookies (less than 1 pkg)
    • 1/4 cup semisweet chocolate chips
    • 1 package candy eyes
    • black sanding sugar

    Instructions

    1. Preheat oven to 325 degrees F.
    2. In a medium saucepan, melt butter over medium-low heat, stirring occasionally. Once melted, add sugar, cocoa powder, vanilla extract and salt, stirring to combine. Remove from heat once combined and glossy. Crack each egg and add one at a time, beating to combine.
    3. Add flour, stirring in just until combined, about 35-40 strokes.
    4. Pour half of the batter into a greased, 8″x8″ pan. Top with a layer of Oreos, then cover with remaining brownie batter. Top batter with crumbled Oreos, semisweet chocolate chips and candy eyes.
    5. Bake for 20-22 minutes, or until a toothpick inserted into the center comes out mostly clean. Sprinkle with black sanding sugar. Let cool before serving.

    https://www.lifebetweenweekends.com/swamp-thing-brownies/

  • How to Make a Diet Coke Cake (or Any Soda Can Cake, Really)

    How to Make a Diet Coke Cake (or Any Soda Can Cake, Really)

    I can’t be the only one who’s suddenly wanted to make a Diet Coke cake, right? Right?! Well, give me a second to explain myself.

    I can’t blame Duff Goldman or Cupcake Wars or even Food Network in general for my unbearable desire to get in way over my head (or go full-on kitsch) when it comes to baking. It’s always been who I am.

    As a kid, I’d turn bundts into volcanoes, with rivers of red buttercream “lava” for my brother’s birthday. I’d shape a sheet cake into a guitar for my sister, or a replica of the Daytona 500 for my Dad. Once, a failed checkerboard cake transformed into a pink and white castle for my cousin’s birthday, though my proudest moment, without a doubt, was the time I concocted a massive Grave Digger monster truck for my youngest brother, Carson, for his fourth birthday (complete with donut “tires” and Milano cookie tombstones, of course).

    A close second would be this anti-gravity cereal & milk cake:

    Photo: Nathan Davison
    Photo: Nathan Davison

    Real talk here: None of these cakes look remotely professional, and sometimes, they’re so homemade they’re borderline Cake Wrecks, but hey, being able to laugh at your misshapen masterpiece is half the fun. Often, the fails are even more memorable (and enjoyable) than the real thing.

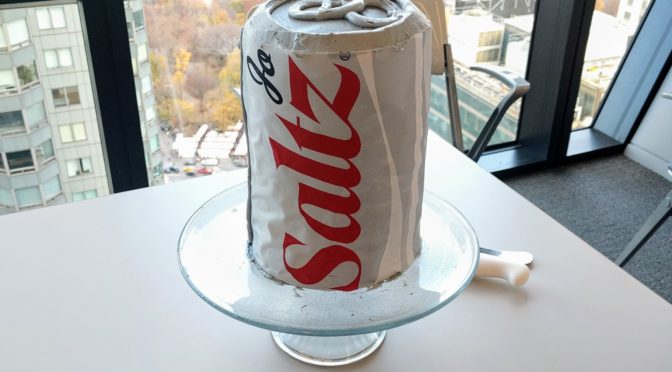
    That’s why, when it came to making my Diet Coke-obsessed boss’s birthday cake, I immediately knew I had to make a gigantic soda can, customized with her name on it, despite my total lack of artistic skills. I had a set of five, 6-inch cake pans, and I enlisted a coworker to Photoshop a design that looked like the Diet Coke can label, only using my boss’s name. I sent the label to a local bakery to have it printed on two sheets of edible frosting — which you can do at many bakeries, as well as most Walmart and Sam’s Club bakeries, for about $5-$15.

    (more…)

Optimized with PageSpeed Ninja