Category: Fun

Add a little more joy to your weekday with posts designed to bring out the fun in your life, featuring things to do, easy party ideas, games and more

  • The 13 Days of Halloween Costumes & Party Ideas Returns on Sept. 30

    The 13 Days of Halloween Costumes & Party Ideas Returns on Sept. 30

    I love unusual Halloween costume ideas—and any excuse to throw a themed party—so it’s no surprise that during my college years, sharing the most over-the-top celebrity-inspired costumes and All Hallows Eve-themed treats became my thing.

    Back then, I hosted the 13-day series on Collegiate Cook, a site devoted to sharing easy recipes for university students. It didn’t really fit the food blog vibe, as costumes became the breakout hit, so I brought it to Life Between Weekends. Every fall, I start seeing searches swell for things like Olivia Rodrigo’s Sour ‘fit, ‘Matilda’-inspired looks and absolutely anything Taylor Swift-related. I’m psyched to report that the series is coming back for 2024, launching on Monday, Sept. 30.

    Every day for the next 13 days, you can head here for a new recipe, decorating or costume idea, all to ensure your Halloween is the best one yet. I’ll be sharing brand new ideas, as well as updating old favorites to ensure they have the latest products and pricing (and ensure everything is in stock).

    Last-minute things to do on Halloween
    Photo: Nathan Davison

    Until then, here are some ideas to get you psyched for Spooky Szn:

    Lead Photo by Candace Braun Davison

  • The 4 Best Candle Making Kits for Beginners (Tested, with Photos)

    The 4 Best Candle Making Kits for Beginners (Tested, with Photos)

    Like yoga or baking, making candles has become a kind of stress relief for me. I’ve made dozens of scents over the past four years, and the hobby helped me bounce back from burnout, as I tested new fragrance blends, vessels and soy waxes.

    Buying all the supplies and testing out candles out can be costly—especially if this is just an occasional craft project—so if you’re getting started, I highly recommend trying an all-in-one candle-making kit before buying pounds of products. Through trial and error, I’ve tested a bunch, and there are a few I’ve found are truly worth the spend. So, *drumroll please,* here are the best candle making kits I’ve tested in 2024.

    best candle-making kits: banter & bliss's amazon candle kit features jars, wax, wicks and more to create four candles
    Photo: Amazon/Candace Braun Davison

    1. Banter & Bliss Candle Co. Minimalist & Modern Candlemaking Kit

    Best Overall Candle Making Kit

    • Type of Wax Included: Coconut Soy Wax
    • Number of Candles It Makes: 4 candles (7 oz. each)
    • Shipping Cost: $7

    This kit is an incredible value. For just $42, you have just about everything you need to make four 7-ounce candles. (That’s like TJ Maxx candle prices!) You could actually use this set to invite a few friends over and host your own candle making party. The only things missing are a pouring pitcher and thermometer, which are a solid investment if you think you’ll make more candles down the road, and you can tack them on for an extra $19.

    The coconut-soy wax blend holds fragrances easily, and you can customize your kit to include any one of the two-scent combos (Blue Volcano fans will want to check out the Sugared Mango & Grapefruit Mangosteen duo!), as well as your preferred candle color (if white feels too plain for your tastes) and jar color.

    best candle-making kits: paddywax candle kit includes blue bubble glass jar, wax, wick, thermometer and wick holder
    Photos: Candace Braun Davison

    2. Paddywax Candle-Making Kit

    Best Scents & Aesthetic

    • Type of Wax Included: Soy Wax Blend
    • Number of Candles It Makes: 1 candle (12 oz.)
    • Shipping Cost: Free

    Want a kit that already comes with a digital thermometer? This kit has you covered, along with a wick, wick sticker, and just enough wax and fragrance oil to fill one (very on-trend) 12-ounce bubble glass jar. You can choose from one of four scents, though I’m partial to Pacific Moss & Mist. It’s beachy without being over-the-top sea salt and coconuts.

    The instructions are pretty easy to follow, though I used my pour pitcher to create the double boiler, rather than pour the wax into a bowl and place that over a pot of boiling water. (I don’t recommend making candles in bowls you’ll later cook and eat out of.) The resulting candle has a great hot throw, easily filling a bathroom or bedroom, and it looks professional. It does have some tunneling, suggesting the wick isn’t big enough for the vessel, but otherwise, it’s great.

    NOTE: It seems Paddywax is phasing out these kits, though you can still find them on Amazon and in select HomeGoods and Barnes & Noble stores (for now).

    best candle-making kits: siblings candle bag includes wax with the fragrance already infused and a wick; you need your own vessel, like this brass jar
    Photos: Siblings/Candace Braun Davison

    3. Siblings No. 13 Candle Set

    Best for Total Newbies (and Eco-Conscious Shoppers)

    • Type of Wax Included: Coconut Blend Wax
    • Number of Candles It Makes: 1 candle (12 oz.)
    • Shipping Cost: Free shipping on orders $60+

    Siblings makes one of my favorite candle scents of all time—No. 13, a cozy blend of palo santo, marshmallow cream and burnt sugar—but they have several others to choose from, if that’s not your style. All of their kits are low-effort, low-mess: You simply tear open the bag, pull out the wick, candle care label, wick holder and instructions, then pop the bag of fragranced wax in the microwave. As it melts, you put the wick into a heat-safe vessel of your choosing (or you can buy their reusable Forever Vessels), using the included popsicle stick with a hole in the center to keep the wick in place.

    Once melted, you pour the wax into the vessel and wait for it to cure, or firm up. That’s it.

    Makesy's candle making kit for beginners, including a pour pitcher, fragrance, soy wax and two 9-ounce containers
    Photos: Candace Braun Davison

    4. Makesy Candle Makers Starter Kit

    Best for Aspiring Entrepreneurs and Serious Crafters

    • Type of Wax Included: Soy Wax
    • Number of Candles It Makes: 2 candles (9 oz. each)
    • Shipping Cost: $11

    If you’ve seen Makesy on Instagram or YouTube, their aesthetics probably got to you. The brand’s marketing is top notch, drawing you in with their gorgeous packaging and materials. But it can be intimidating to just start ordering pounds of wax and everything else from them—plus, it adds up fast. That’s why this Starter Kit is so awesome—it’s packed with the essentials to get you started, all housed in a large pouring pitcher you can reuse afterward.

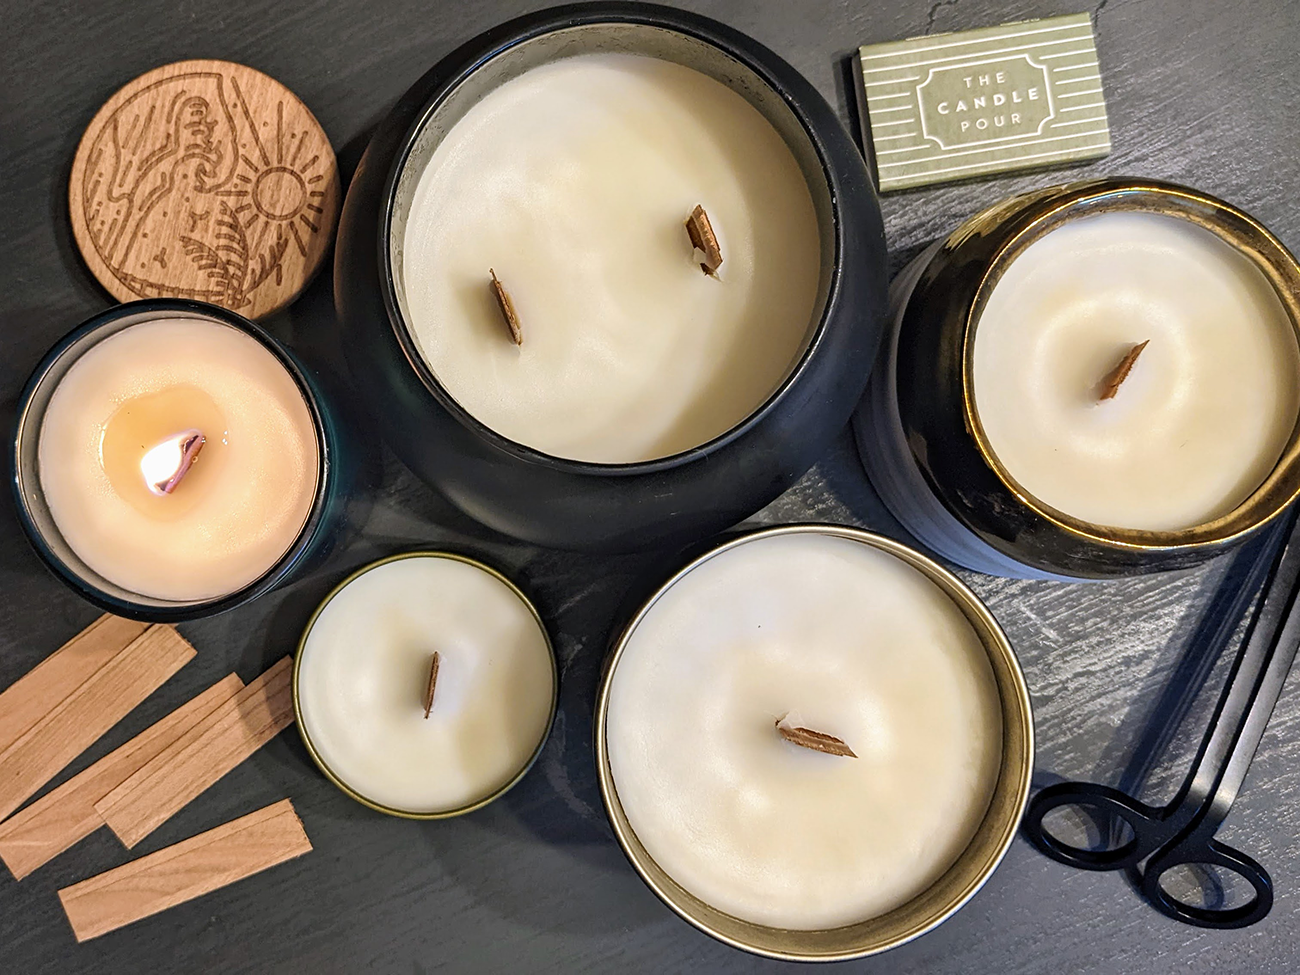
    The kit comes with everything you need to make two nine-ounce, wooden wick candles in sleek matte black and gold metal tins (which look so much chicer than “metal” might suggest). And it features one of their most popular fragrances, Vanilla Gelato & Waffle Cone. The scent is a bit milder than the other kits, and there’s been some tunneling with the wax, but all in all, it makes gorgeous candles that will have you dreaming of opening your own Etsy shop. Or maybe that’s just me.

    I purchased my kit from Michaels, but it seems they’ve been discontinued there, though you can still buy them at Hobby Lobby.

    What Else Do You Need to Make Candles?

    Ready to get more involved with your candle making? I suggest following Tiana Coats, Memory Box Candle Co. and Standley Handcrafted on YouTube, and perhaps investing in the following extras:

    • Pouring pitcher, $20, Amazon — This one holds up to 4 pounds of wax, so you can make larger batches of candles at a time. (I have a 1-pound pitcher, and it gets tedious refilling it to make more than one candle at a time.)
    • Meat/candy digital thermometer, $7.50, Amazon — A candy thermometer works well for checking to see if your wax is the right temperature to add in fragrance oil, and a digital one will give you a read much faster than the traditional kind.

    FAQ: Is It Cheaper to Make Candles Than Buy Them?

    Yes—with a caveat. The cost per candle tends to be cheaper, especially if you’re buying ingredients in bulk, but you have to factor in the initial costs of the supplies you’ll need, and if you delve beyond using a kit into creating your own blends, the cost of testing those blends to find your signature recipe (or ratios of wax, fragrance oil and the right wick/vessel for them).

    Pin This Story for Later:

    This post originally ran in March 2023, but has since been updated as new kits have been tested, and to ensure all links are working and the information provided remains accurate.

  • 5 Things Worth Hunting Down from Bath & Body Works’s 2024 Halloween Line

    5 Things Worth Hunting Down from Bath & Body Works’s 2024 Halloween Line

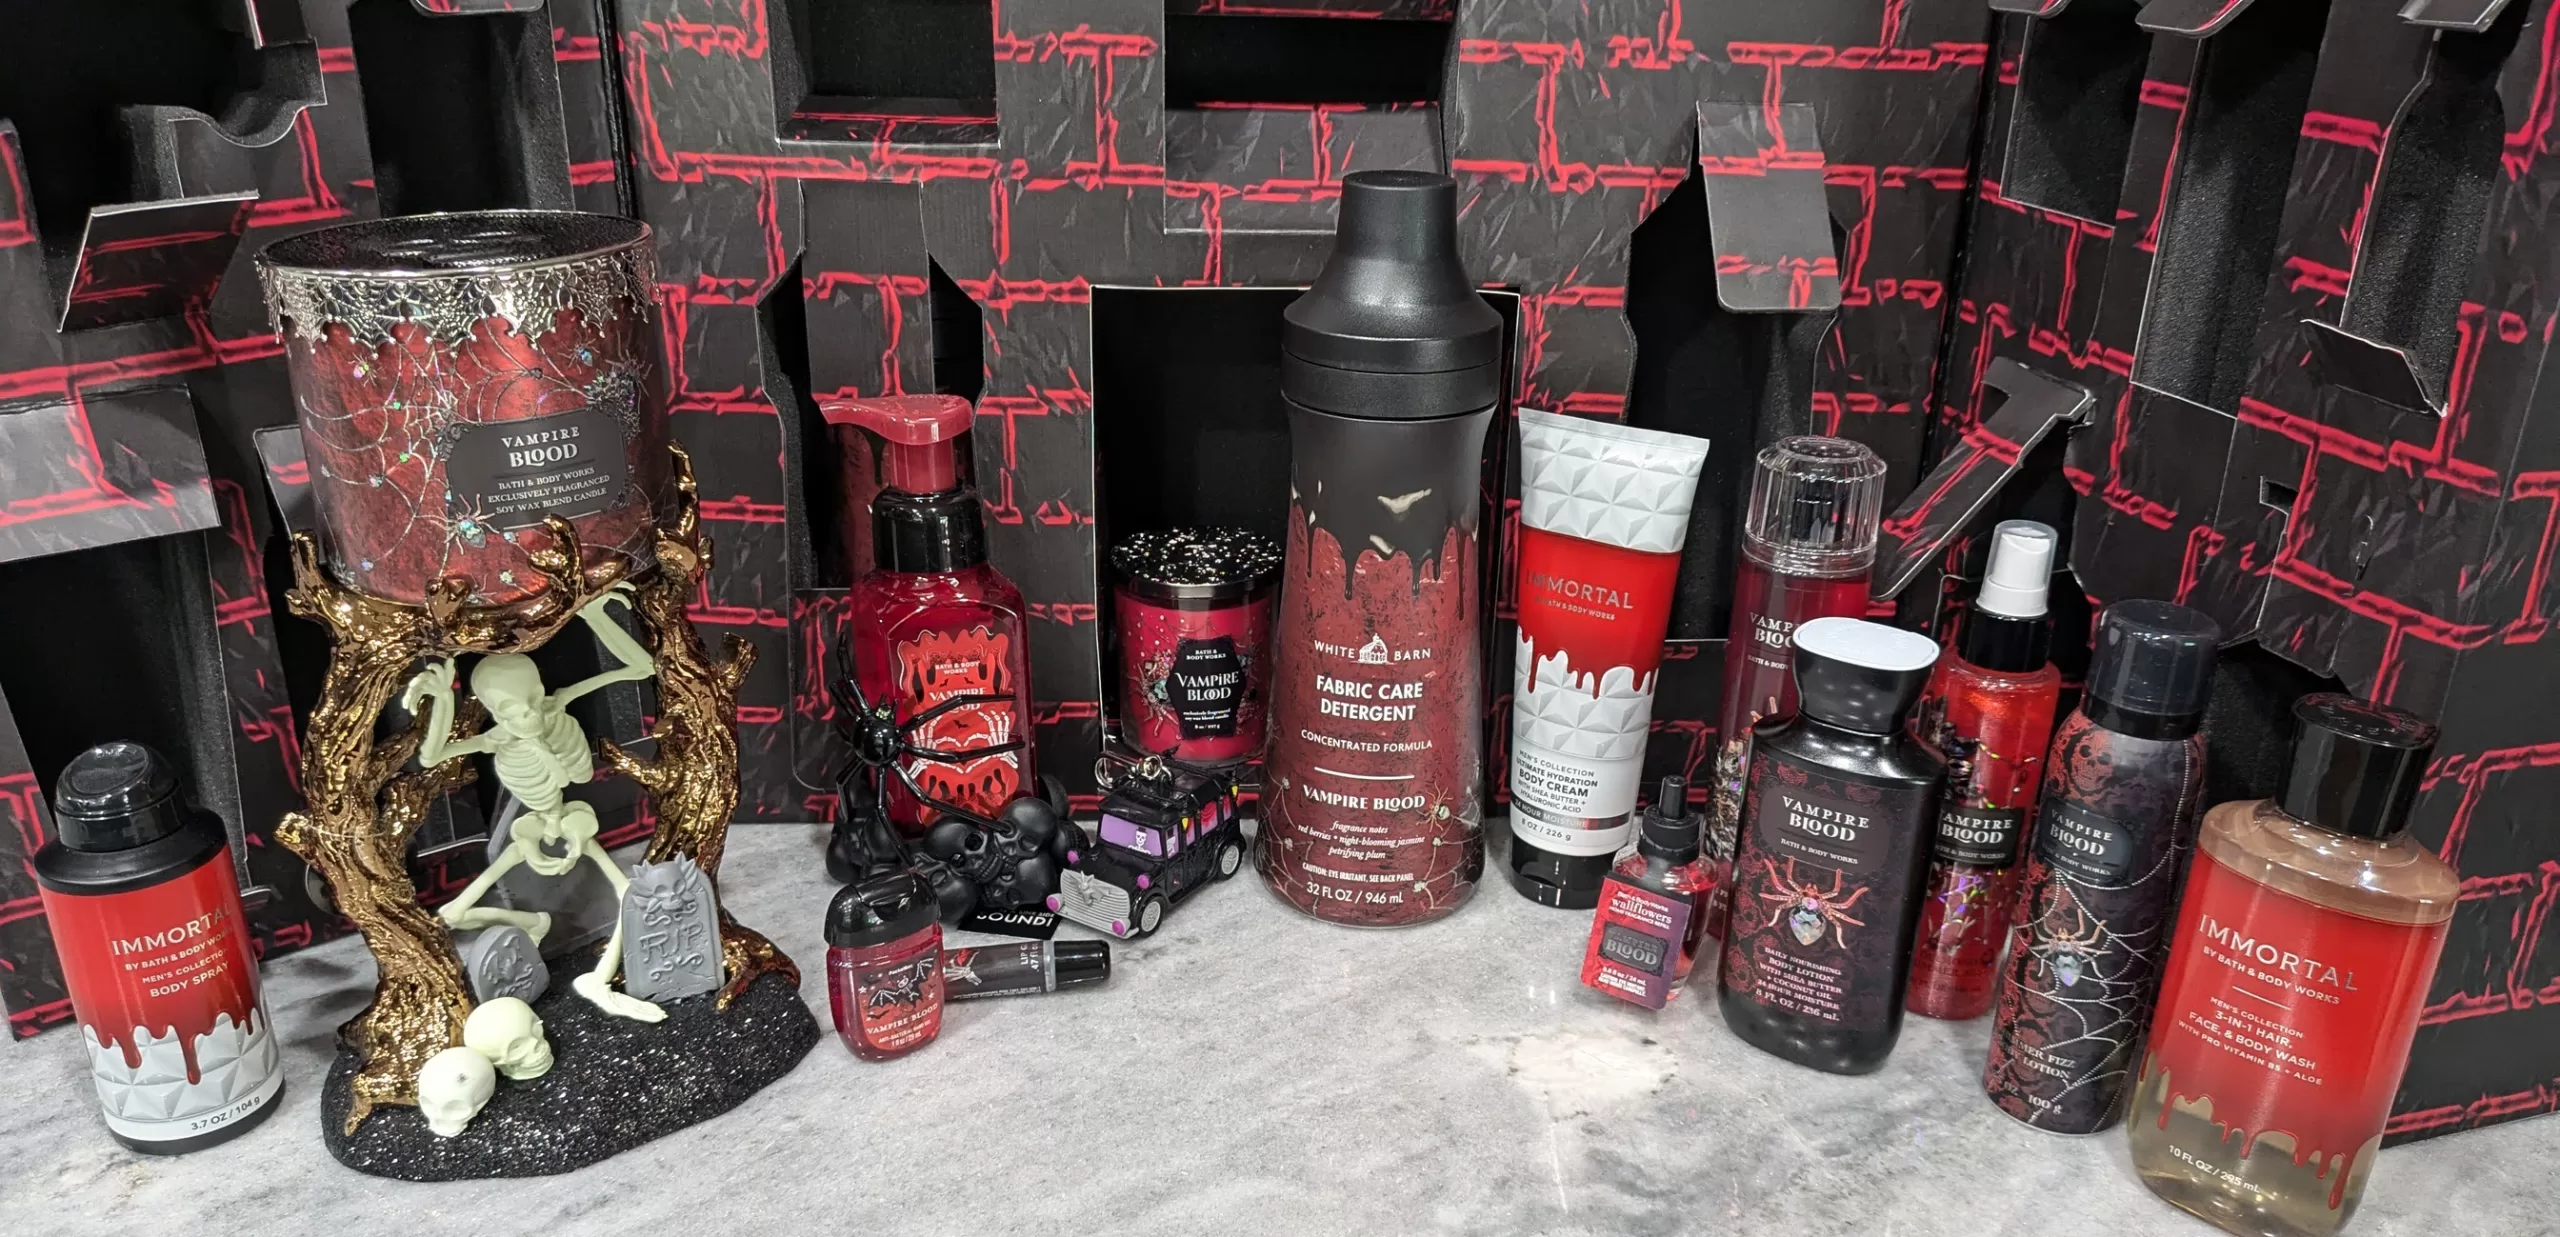
    We may be weeks from the official start of fall, but not at Bath & Body Works. The home and body care brand just released its 2024 Halloween lineup, and after getting a first look—and test*—of all the new scents, lotions, candles and accessories, I have to say: I’ve never been more impressed with…a fragrance plug-in. And laundry detergent. And a candle holder. Seriously.

    Most of Bath and Body Works’s Halloween scents are…meh, in my opinion. They’re very sweet and seem more befitting a Limited Too body spray roundup than a three-wick candle, but to each their own. Vampire Blood has a sweet berry scent that’s nice; but still, for Halloween, I’d rather see musky, woodsy and sultry/smokey scents. (The closest they get, it seems, is the Wicked Vanilla Woods scent; more on that in a sec.) Though, admittedly, skewing too musky/smokey feels a little out of the brand’s wheelhouse, so I see why they’re playing it safe.

    Bath and Body Works's 2024 Halloween lineup, featuring Immortal and Vampire Blood scents
    Photos: Candace Braun Davison

    The decor and accessories, however, just keep getting better. Here’s proof.

    The Best of Bath & Body Works’s Halloween Lineup, After Trying (Ahem) Everything

    the bath and body works halloween 2024 wicked vanilla woods 3-wick candle
    Photo: Bath & Body Works

    5. Wicked Vanilla Woods 3-Wick Candle

    Amberwood and pink pepper add a little spice to this vanilla candle. Bath & Body Works is known for its killer throw (both hot and cold), which can really fill a room. What I love even more, though, is the vessel, which is an elevated-yet-edgy deviation from BBW’s typical style: the label isn’t as in-your-face, with the focus more on the gleaming gold vessel, topped with an intricate gold snake lid that feels oh so Reputation-coded, for my Swifties out there.

    the bath and body works halloween hearse projector plug-in
    The hearse from the 2024 Halloween line. (Photo: Candace Braun Davison)

    4. The Wallflower Projector Plugs

    The Wallflowers Fragrance Plugs are like Febreze or Glade plug-ins, only with better scents (both in terms of fragrance blends and how well they fill the room) and overall plug-in designs. But the coolest styles, by far, are the projectors, which cast ghosts, bats or skulls on the wall. In effect, they do triple-duty as a way to scent the room, an All Hallows Eve decoration and a nightlight.

    The major con? Bath & Body Works’s Halloween Wallflower Plugs come with a steep price tag: It costs $33 to $40 for the projector style, if you don’t snag one on sale. (So far, no word on upcoming sales, though the company is known to love discounting an entire category of products on any given day.) Sure, you could probably get a few years’ use out of it, but it’s still way more than the ordinary Wallflower Plug, which costs about $15.

    the bath and body works halloween wallflower projector, turned on during the day and night
    How the projector plugs look IRL, at day and night. (Photo: Candace Braun Davison)

    But still! For anyone who goes all out on Halloween, the cost may be worth it (it’s a drop in the bucket to buying a 12-foot-tall, LED-eyeballed skeleton, after all). My favorite from this year’s lineup? Why, that’d be the Spooky Hearse ($40), but if you’re more of a fall person, there’s also a sweet house that projects leaves onto the wall.

    bath and body works dancing skeleton candle holder, tested and reviewed
    Photo: Candace Braun Davison

    3. The Candle Holders

    Last year’s designs were pretty great (I love the color-changing crystal ball), but this year’s feature finer details and aren’t as bulky overall. My favorite is the Dancing Skeleton, which glows in the dark remarkably well, though it immediately sold out. You can find it on eBay for a markup—I’ve seen a few around $50 to $55, compared to the $40 retail price. The Stranger Things tentacle holder is another great option, and it’s still in stock—and way, way less than the jaw-droppingly pricey, $275 haunted house luminary. Why?!

    vampire blood detergent from bath and body works's halloween line

    2. Vampire Blood Laundry Detergent

    I know, I know—laundry detergent isn’t sexy, but in this case, it kind of is? Hear me out: Vampire Blood is a sweet berry scent that’s overpowering as a candle or Wallflower plug-in, but in smaller doses, like when you’re doing laundry or washing your hands? It’s delightfully delicate.

    The detergent keeps selling out, but it surprised me with how gentle the scent was (without disappearing completely) and how powerfully it got rid of stains and left clothes feeling fresh. That isn’t usually the case with fragrance-forward detergents, though I’ll warn you: It’s easy to go through a bottle fast. (If you can’t snag Vampire Blood, I’d recommend Flannel for a fall scent that’s crisp, woodsy and a little musky.)

    bath and body works vampire blood foaming hand soap from the halloween line
    Photo: Bath & Body Works

    1. Vampire Blood Foaming Soap

    As for the soap, I’m a sucker for Bath & Body Works’s foaming soaps. They lather well, the pumps are reliable (whereas some brands get stuck halfway through a single use), there are refills available and the scents are powerful yet never chemical-y. Just be sure to stock up when there’s a five-for-$27 sale.

    What’s your take on the BBW Halloween line? LMK your thoughts via Instagram DM (@lifebetweenweekends).

    *The brand generously sent me the cardboard mansion shown above, filled with products from the Vampire Blood and Immortal line. The products were free, but this was not a paid promotion and coverage was not expected. Previously, I have bought and sampled several scents, and I visited Bath & Body Works to compare this year’s lineup to the ones I’ve bought in the past to come to these conclusions.

  • How to Customize a Stadium Bag: 5 Fun Ideas (Even If You’re Not at All Crafty)

    How to Customize a Stadium Bag: 5 Fun Ideas (Even If You’re Not at All Crafty)

    Just because stadiums require a clear, 12″ by 6″ by 12″ bag to tote your essentials in doesn’t mean it has to be an eyesore. There are a few easy ways to customize a clear stadium bag to make it something you actually look forward to wearing, and I’ll prove it. (Psst: If you haven’t found the right clear tote just yet, here are 10 cute stadium bags to consider.)

    What You Must Keep in Mind Before Customizing the Bag:

    First, it’s worth checking with the venues you frequent the most to see if they have any specific policies you’ll need to adhere to. The NFL has established a few requirements for the stadiums its teams play in, which are a solid set of guidelines to follow as you DIY your bag.

    Beyond being 12″ by 6″ by 12″ in size, your stadium bag must meet the following requirements:

    • It should be clear plastic, vinyl or PVC (fanny packs, backpacks and other styles are OK, as long as they fit the size requirements)
    • Buckles, grommets, stickers, patches and other decorative elements can’t conceal part of the bag
    • You can have a logo—such as your monogram or another design—but it can only appear on one side of the bag and cannot exceed 4.5″ tall by 3.5″ wide
    two-tone uppercase monogram letter stickers
    Photo: Amazon

    1. Add Your Monogram

    No DIY skills? No problem. Amazon sells monogram stickers that you can customize with the colors you like, as well as sporty, varsity letter-esque fabric ones. It doesn’t get easier than that. (Just make sure your final design isn’t larger than the 4.5″ logo size requirement.)

    customizing a stadium bag using cricut vinyl
    Photo: Candace Braun Davison

    2. Stick on a Vinyl Phrase—or Social Handle

    If you have a Cricut machine, you can use the Cricut Design Space app to create a phrase that nods to wherever you’re headed—be it a concert or baseball/football game—or simply shows off your Instagram handle. (The latter isn’t just a shameless plug; should something happen and you lose your bag, you’ve made it a little easier for people to track you down.)

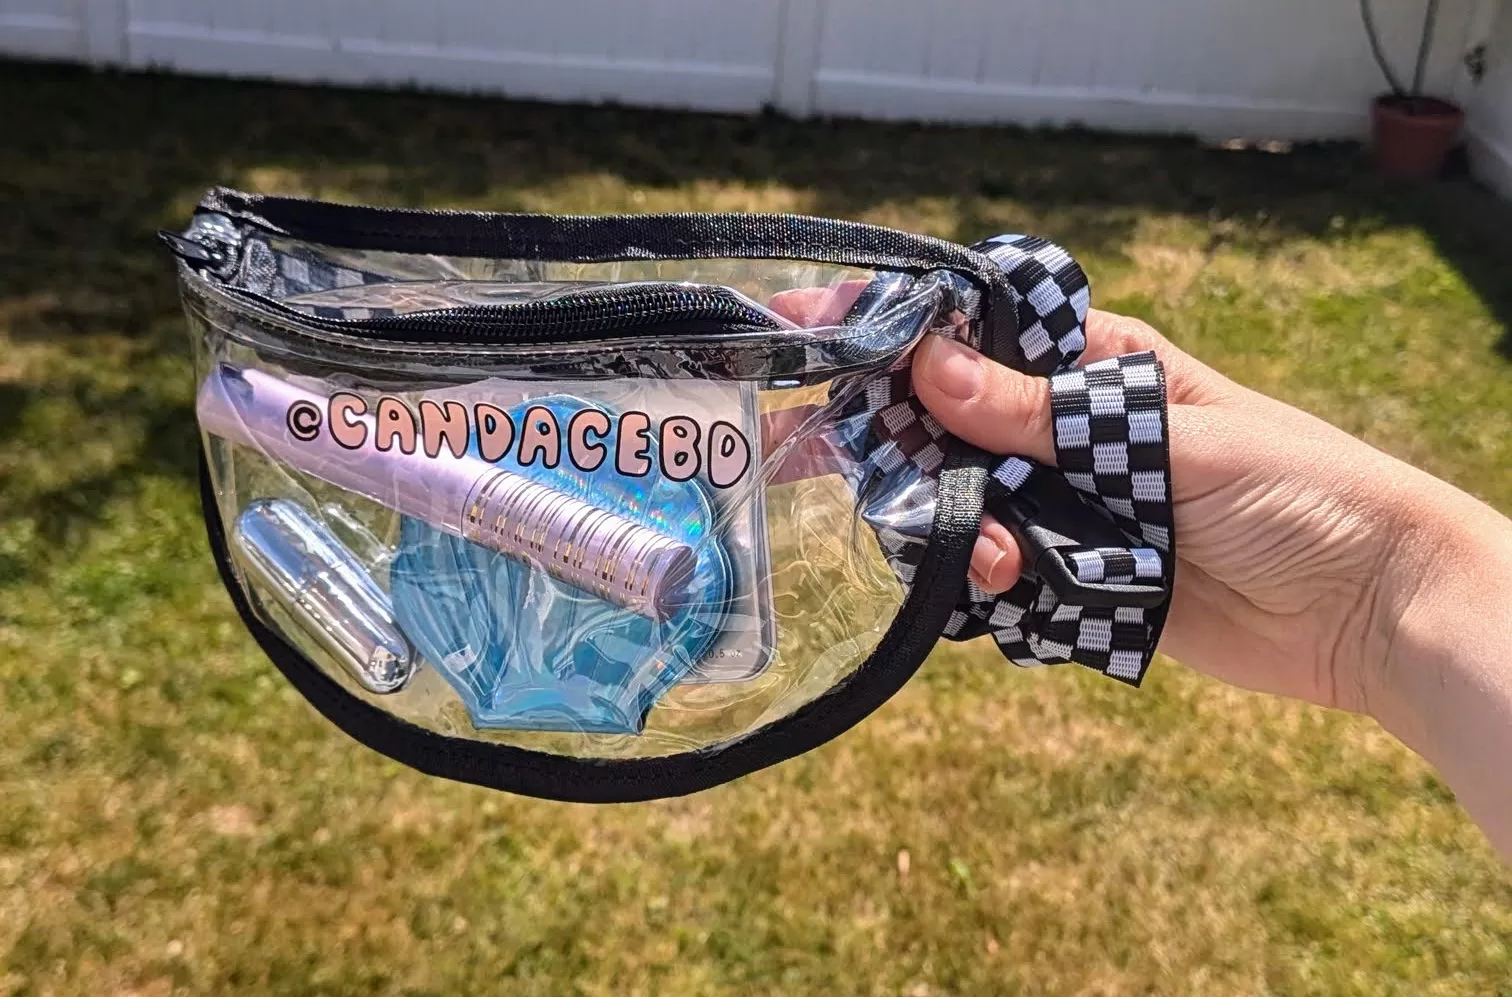
    To create this design, I used Cricut permanent vinyl, cutting out my handle in pale pink—ensuring it was just under the 4.5″x3.5″ requirements by the NFL—and an outline of the text in black, then I weeded out the design and applied the first layer before adding the outline on top. Easy!

    beaded bag straps featuring football team phrases like "sooners," "who dat" and "hotty toddy"
    Photo/Vendor: BklynLndn/Etsy

    3. Swap Out Your Strap

    Depending on your bag’s style, you may be able to trade out the strap for a guitar or camera bag style (Etsy has a bunch of beaded ones that nod to specific schools and teams), or even a fun chunky acrylic chain strap, like this pastel rainbow number.

    chenille stickers for stadium bags, luggage and phones in smiley face, lightning bolt, plane, star, castle and heart designs
    Photo: Amazon

    4. Try a Chenille Sticker

    Instead of a monogram or vinyl phrase, you can get in on the chenille sticker trend with a fuzzy design that’s more aligned with your style. Rainbow? Smiley face? Heart? Cinderella’s Castle? Amazon’s loaded with options.

    5. Insert a Fun Zippered Pouch

    While you want your bag to be easily scannable by security, you may not want every personal item on display. Or just jumbled around loose in the bag. The NFL allows one non-clear bag, provided it does not exceed 4.5″ by 6.5″, that you can wear as a wristlet or carry it inside the clear bag. A tiny zippered pouch or wallet—like this confetti-coated number from Packed Party—will reduce the visual clutter in your bag, creating a more streamlined look.

  • Review: Is It Worth Spending $50+ to Visit the Museum of Ice Cream in NYC?

    Review: Is It Worth Spending $50+ to Visit the Museum of Ice Cream in NYC?

    There’s no shortage of things to do in New York City, but when it comes to touristy attractions, the Museum of Ice Cream is a serious draw for any Instagram-wielding sweet tooth. Especially if you have kids. Or it’s a rainy day—or winter—and you’re looking to spend a few hours indoors. But, after years of being inundated with built-for-selfie ‘experiences,’ is the Museum of Ice Cream worth it? Particularly when tickets can cost more than $50 apiece?

    No—it’s not. Unless you can snag a deal, and you head there with a game plan. Let me explain.

    museum of ice cream slide and sprinkle pool
    Photos: Candace Davison

    First, a Quick Breakdown of What the Museum of Ice Cream Even Is

    It’s not a museum in a traditional sense—in fact, the company calls it an “experium,” as it’s more a place to play, wander and explore. The multi-story building features a series of rooms with varying degrees of games and dessert-inspired art installations. Some you can spend just a few minutes in, snapping a quick pic and moving along (like the banana room, which is largely just a bunch of plastic bananas dangling from the ceiling). Others are more involved, like the arcade area, where you can play a ice cream-inspired takes on Skee-ball and What-a-Mole.

    There is a museum-ish component, in that one room offers memorabilia and fun facts about ice cream, but that’s it in the sense of traditional museum-style artifacts on display.

    multi-story slide in museum of ice cream

    What You Should Know Before Visiting the Museum of Ice Cream

    1. Save Money (and Avoid Crowds) with a Weekday Morning Visit

    Tickets are typically cheaper mid-week, especially in the morning, when the museum first opens. (I’ve seen it as low as $37 per person.) You may not think you want ice cream at 10 a.m., but did you know that now through the end of 2024, you can enjoy all-you-can-eat mini pink bagels stuffed with cream cheese ice cream and rolled in everything seasoning? How’s that for a breakfast of champions?

    (It’s called the Ice-a-Bagel, as part of a partnership with famed NY bagel joint Ess-a-Bagel. Yes, I’ve tried it, and yes, it’s better than you think. The bagel’s a little stiff, but it’s basically a chewier version of a cold everything bagel, only with a creamier, meltier filling.) Which leads me to my next point…

    pretend pink subway car in museum of ice cream

    2. Come Hungry

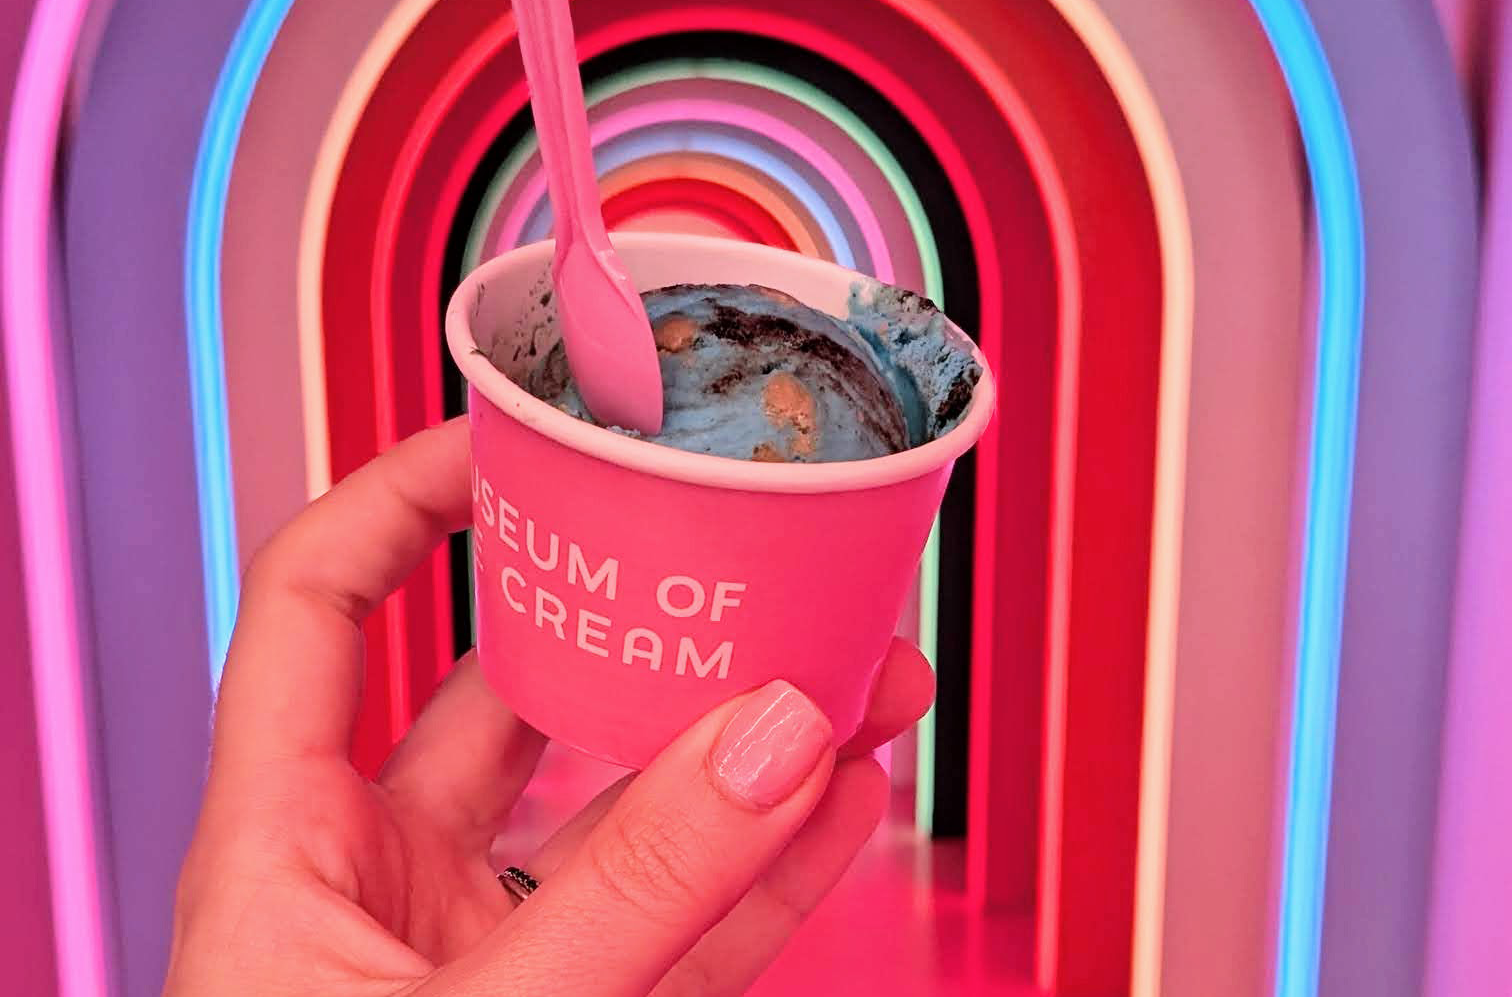
    The Museum of Ice Cream offers unlimited ice cream during your visit, and there are multiple stations throughout the roughly 20,000ish-square-foot space. You’ll find things like pink vanilla soft serve swirled into sugar cones, pink popsicles, cookie dough- and Oreo-studded Cookie Monster ice cream and berry-based sorbets. During my June 2024 visit, they also served the aforementioned Ice-a-Bagel and cotton candy. Just maybe balance things out with plenty of water and something savory (and, ideally, vegetal) afterward.

    3. Tour the Museum of Ice Cream at Your Own Pace

    The brand says it takes about 90 minutes to experience the museum, but you could easily spend two to three hours there. It’s a go-at-your-own-pace event for the most part, save for the sprinkle pool (which, yes, is a regularly sanitized pool filled with oversized sprinkles, much like a ball pit). I wouldn’t bore yourself by overstaying in certain rooms, unless you want to get artsy with your photography skills (ahem, faux-subway train, banana room and ethereal clouds room). But! The arcade and playground rooms are worth taking a little extra time in, as well as the room that details the history of ice cream (including Carvel’s signature Fudgie the Whale).

    sprinkle pool view from the slide

    4. The Sprinkle Pool Has Changed

    If you visited the Museum of Ice Cream pre-COVID, you probably remember tiny rainbow sprinkles that looked almost identical to the real-deal ones. Today’s sprinkles are pink and red, and they’re larger than the size of your hand, more like pill-shaped ball pit balls—or hollowed Bala weights—than before. It’s still a fun sensory experience, albeit in more of a Honey, I Shrunk the Kids way.

    5. Ditch the Stroller and Bring the Baby Carrier

    Children under 2 are allowed in for free, but strollers aren’t allowed in the exhibits, so you may want to bring a baby carrier to avoid wrangling a squirmy kid the entire time. Unless your kids are like mine and screamed their heads off the second they slid into a Líllébaby or the like, in which case it may be best to wait until they can walk…but still snag free admission.

    pink vanilla soft serve ice cream in a sugar cone

    6. Don’t Skip the Slide

    You may think you’re too old for the two-story twisty slide. Or that once you’ve tried one slide, you’ve tried them all. Just go for it. You’ll be handed a sack to slip your feet into and hold onto as you go down, which helps you get great speed going down. Even at 5’11”, I didn’t feel claustrophobic or too big to zip down, and it wound up being the highlight of the visit. So stop playing cool for three minutes and enjoy it.

    7. Follow Your Whims

    There’s a certain pull in these experiential spaces to zip from room to room, always rushing toward what’s next. And getting frustrated by all the people around you as you wait for your turn playing Whack-a-Cone or taking that perfect selfie in the rainbow LED hallway or whatever catches your eye. You have time; give yourself time. In fact, while everyone else heeds that call to dash onto the next thing, lingering can give you just the space you need to enjoy each element of the museum without the jostling.

    The Verdict:

    At $52+ a ticket, the Museum of Ice Cream is pricey for a two-hour-ish diversion. However, tickets can be as low as $37 apiece, depending on when you go (again, weekdays FTW!), and it doesn’t feel that out of range when you compare the prices of other Only-in-NYC—or, OK, Only-in-NY-or-Other-Major-Cities Attractions, such as:

    I can’t say I’d go every month, or even every year—in fact, it’d been five years in between my visits—but when I do, I enjoy my stay. And come back wanting to install a sprinkle pool in the basement. Maybe that’s just me though.

  • Where to Buy Clear Stadium Bags Right Away (Including 10 Cute Picks)

    Where to Buy Clear Stadium Bags Right Away (Including 10 Cute Picks)

    Ah, the dreaded stadium bag: Most arenas, concert venues and football stadiums require you to stuff your belongings into a clear, plastic bag. And often, they’re cheesy. Or bulky. Or so flimsy they fall apart in no time. It’s enough to make you admit defeat and cram your cell phone and credit card in your bra—but it doesn’t have to be. There are—dare I say it?—actually cute stadium bags that won’t clash with your Eras tour outfit (or wherever you’re headed, for that matter).

    Check the Venue’s Bag Size Requirements First

    Stadium policies differ, but in general, the bag shouldn’t exceed 12 inches by 6 inches by 12 inches in size, and it can have a logo on one side only (limited to 4.5 inches tall and 3.5 inches wide), according to NFL standards. Any decorative elements, like buckles or grommets, can’t conceal part of the bag.

    With that criteria in mind, I searched for cute stadium bags that seemed durable and wouldn’t kill your budget (or be obnoxious to carry). And I noted which ones you can buy and pick up today, since this kind of tote is usually the last thing on your mind before game day/concerts/etc. Here are my favorite finds.

    10 Cute, Clear Stadium Bags You Can Buy Today

    a clear stadium bag with white trim and a patterned guitar strap
    Photo: Amazon

    1. KlaOYer PVC Crossbody Bag

    • Dimensions: 7″ x 5.5″ x 2.5″
    • Available for In-Store Pickup? No, but you can get Prime one-day shipping, depending on where you live

    Let’s get straight to the details: The wide guitar strap won’t dig into your shoulder, the messenger style is easy to zip open and close, and—bonus—it comes with a spare strap, in case you want something less flashy. (Plus, there are a few colors and styles to choose from.)

    iridescent stadium bag with belt strap
    Photo: Kendra Scott

    2. Kendra Scott Clear Iridescent Belt Bag

    • Dimensions: 7.7″ x 2″ x 4.7″
    • Available for In-Store Pickup? Yes

    A shimmery finish makes this bag stand out, and the belt bag style will keep your essentials close at hand—while keeping your hands free. Some reviewers complain it’s a bit stiff, and if you have a bulkier phone or wallet (like me, a Pixel Fold owner), you may need something a bit roomier.

    amazon stadium bag with black trim and straps
    Photo: Amazon

    3. Halemat Stadium Bag with Chain Link Strap

    • Dimensions: 7.8″ x 3.9″ x 7″
    • Available for In-Store Pickup? No, but you can snag Prime one-day shipping, depending on where you live

    With two strap options and plenty of colors to choose from (including a mellow lilac and an in-your-face neon green), this bag is all kinds of customizable, not to mention statement-making.

    backpack-style stadium bag with black straps
    Photo: Amazon

    4. Clear PVC Convertible Satchel

    • Dimensions: 11.8″ x 9″ x 3.5″
    • Available for In-Store Pickup? No, but you can score Prime two-day shipping

    Oh, you like to mix things up? And you want a bag that gets as close to the max size as possible? This is just the bag. It can convert to a backpack, crossbody or satchel style, and it’s large enough to hold a book (just in case you’re the type who prefers to read pre-show than pregame), in addition to your essentials.

    glam cream and gold strap on a clear stadium bag
    Photo: Amazon

    5. Missnine Clear Stadium Bag

    • Dimensions: 9.5” x 2.9” x 7.1”
    • Available for In-Store Pickup? No, but you can snag Prime shipping on Amazon

    It’s boho yet neutral, so it’ll go with anything. Plus, the front pocket as a magnetic closure for easy access. Just note that if you find yourself with a really strict security guard, they might give you grief over the buckle. However, you can easily see around it, and it’s smaller than the NFL’s logo size requirement.

    cute barrel stadium bag with black handles
    Photo: Amazon

    6. Moetyang Clear Purse

    • Dimensions: 8.7″ x 3.5″ x 5.2″ (small) or 10″ x 3.8″ x 6.3″ (medium/large)
    • Available for In-Store Pickup? No, but you can snag Prime one-day shipping, depending on where you live

    Available in two stadium-approved sizes, this bag stands out in a sea of square, clear purses. It’s cute, it’s fun, it’s got a shoulder strap in case you don’t want to carry it in the crook of your elbow all night. What’s not to love?

    beis cute stadium tote with tan strap
    Photo: Béis

    7. Béis Clear Stadium Tote

    • Dimensions: 12″ x 5.9″ x 10.5″
    • Available for In-Store Pickup? No

    After testing out the Béis diaper bag, I get the hype surrounding Shay Mitchell’s accessory brand. Her design team really thinks of everything, so I’m not surprised this drop sold out almost immediately. It’s practically the max size you can sneak into an arena (with a 9.7-liter capacity), the shoulder strap is removable and there’s an interior pocket, so you can keep your phone or wallet separate.

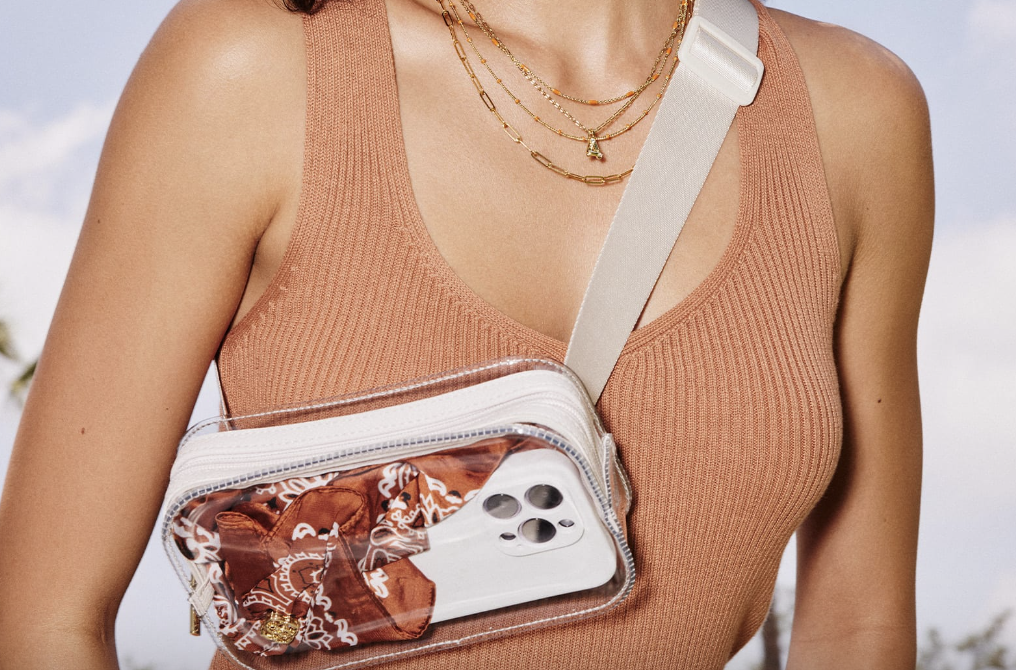
    rainbow pride stadium bag from target
    Photo: Target

    8. Pride Transparent Mini Crossbody Bag

    • Dimensions: 7.5″ x 4.6″ x 8.6″
    • Available for In-Store Pickup? Yes

    OK, so with its translucent stripes of color, this bag may be the closest to pushing the limits of a “clear” bag, but you can see through it and it is within regulation sizes. I love that it boasts the colors of the Pride flag. Talk about a statement-maker.

    silver-trimmed clear stadium bag that can fit sunglasses and other necessities
    Photo: Amazon

    9. Vefungyan Clear Purse

    • Dimensions: 6.9″ x 6.9″ x 3″
    • Available for In-Store Pickup? No, but you can snag Prime shipping via Amazon

    You may only bust out a stadium bag a couple times a year, and if so, this budget-friendly pick is a good way to get the job done without dropping much money on a bag. The PVC is a bit thinner than some of the other styles featured (it’s 0.6 mm), though it features a top handle and adjustable shoulder strap, and it’s pretty roomy, given the size restrictions.

    a clear camera bag that doubles as a stadium bag from target with tan trim
    Photo: Target

    10. Universal Thread Camera Crossbody Bag

    • Dimensions: 6″ x 8″ x 3″
    • Available for In-Store Pickup? Yes

    Leave it to Target to hit on two trends at once: clear stadium bags in a camera bag style. And for less than $30. Plus, you can order it for curbside pickup and have it ready to take with you to a concert or game in two hours flat. This is how the bullseye brand winds up taking all my money.


    Lead photo: Kendra Scott

    Note: This article originally ran in April 2023. It has since been updated to reflect the latest styles and prices, with some options swapped out as older picks (such as Howdy Honey and Altar’d State) were no longer in stock.

  • The Béis Diaper Backpack, Reviewed: Is It Worth It?

    The Béis Diaper Backpack, Reviewed: Is It Worth It?

    When it comes to diaper bags, I’m a cheapskate—I’ll admire the Dagne Dovers, Petunia Pickle Bottoms and Posh Peanuts of the world, but it’s hard for me to spend on a bag that stows my kids’ diapers—and will likely be used for two years or less. (In my mind, it’s much easier to justify spending on a purse, which I convince myself I’ll use for years and years…though after two years, I’m usually jonesing for something new. The logic doesn’t check out.)

    While I’ve been committed to using the Huhu Diaper Backpack for long trips (its adjustable inner compartments, sturdy sides and easy-open top actually make TSA agents stop and compliment it), I needed something smaller day to day. I’d tried Skip Hop, Target and Kibou when my daughter was little, but when my son arrived, those were too beat-up (or had been sold online). I was given the Béis Diaper Backpack, and I honestly didn’t expect to love it as much as I do. I never expected to write a post here about it, but I actually want to use it after my diaper-changing days are over. Here’s why.

    inside the beis diaper backpack, showing how it holds diapers, wipes, baby food and more
    Photos: Candace Braun Davison

    The Béis Diaper Backpack Pros:

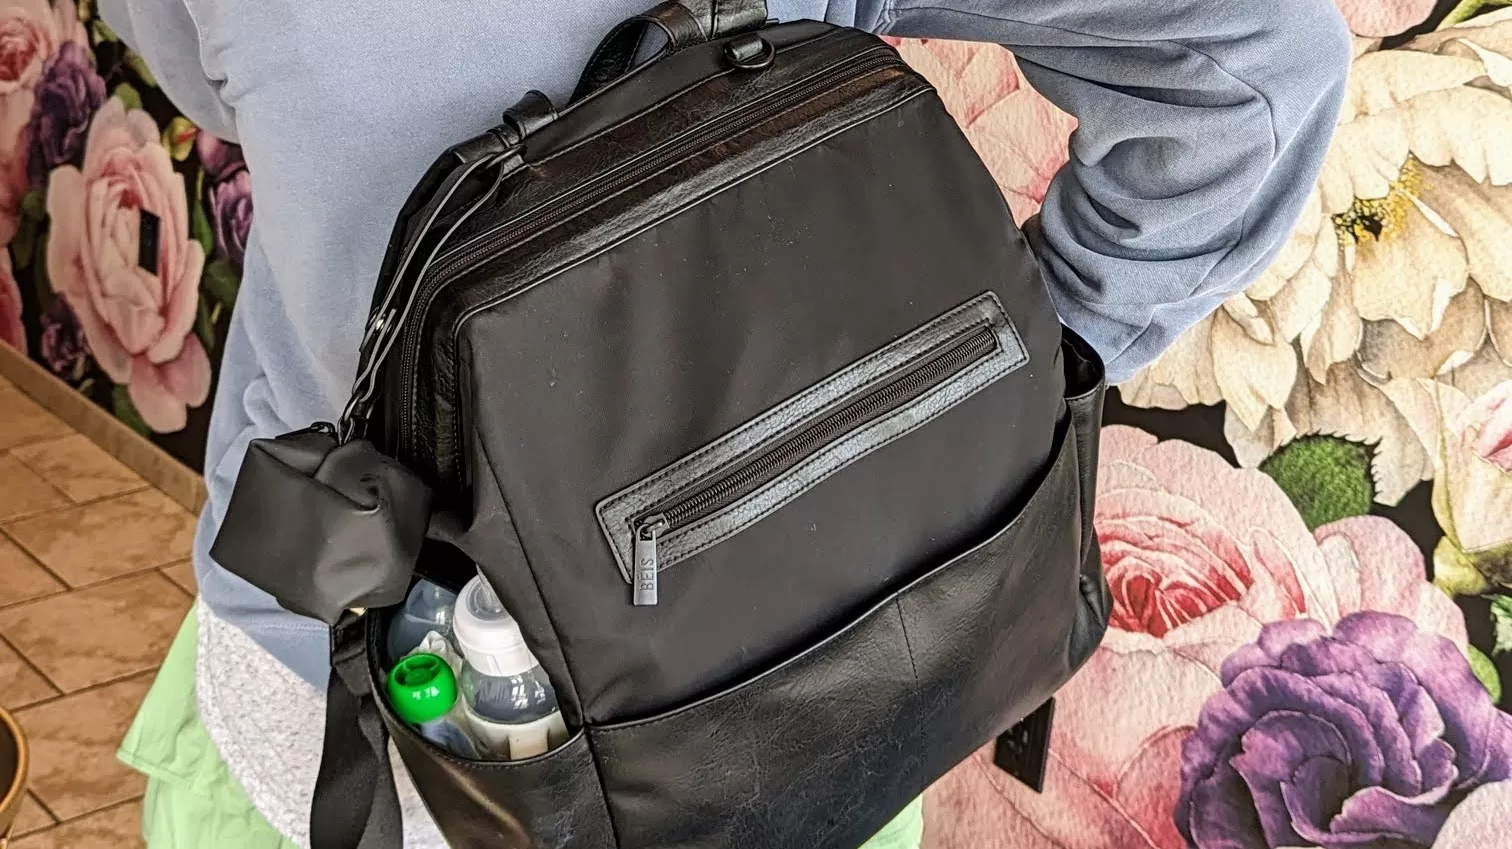
    1. It’s spacious without being bulky. I can fit a full pack of wipes, three bottles, a formula dispenser, changing pad, four to five diapers, two changes of clothes, my wallet/cell phone/keys, a teether, a bag with pouches, reusable placemats, a bib and spoons, diaper cream, hand sanitizer—phew, are you tired of reading this yet?—a toy or two and a sun hat, without fighting to zip it closed.
    2. The pockets are wide enough for larger bottles (like Tommee Tippee’s). I can’t tell you how many bags—Huhu included—that feature pockets too small to comfortably fit wide bottles, or squish the silicone ones so they leak. Béis features roomy, wide pockets, so you can easily stow bottles, wipes, diapers or your phone in a moment’s notice, without having to fight to get to that one pocket that fits your needs.
    3. A pacifier bag is included—as is a silicone teether! There’s also a chain to hold your keys, so they don’t sink to the bottom of the backpack.
    4. There’s a trolley pass-through, so it can easily hang onto the handle of a roller bag when you’re traveling, making it one less thing to worry about as you dash through the airport.
    5. The odor-proof bag is great for holding a spare change of clothes—or holding the end result of a blowout diaper, should you need to. It looks like a chic, rubbery clutch too.
    6. It’s comfortable. The straps are cushy and wide and don’t dig into my shoulders, even when the bag is fully loaded and bogged down.
    back of the beis diaper backpack, showing its straps

    The Bag’s Cons:

    1. The included changing pad is a bit flimsy, which is often the case with diaper bags. I typically use Dock-a-Tot’s diaper clutch anyway, which fits nicely inside.
    2. There’s an insulated pocket inside for bottles, but I wish that section was larger, so I could fit two or three bottles there at a time.

    The Verdict: Is It Worth It?

    Yes! It’s survived all kinds of spills, drops and potential snags without a scuff. It holds everything I need and then some, and aesthetically, I like its look. It’s actually convinced me to take a closer look at Béis’s other products. Right now, though, I love this bag so much I can see myself using it long after my diaper-toting days have ended.

  • Siblings Candles, Reviewed: What You Should Know Before Buying a Kit

    Siblings Candles, Reviewed: What You Should Know Before Buying a Kit

    Getting into candle making can seem daunting, especially when you start researching it online: calculating fragrance loads; choosing the right wax, wick and vessel for the optimal burn; triple-checking melt temperatures. But what if it could be easy? And the end result was higher quality than half the stuff you find in stores?

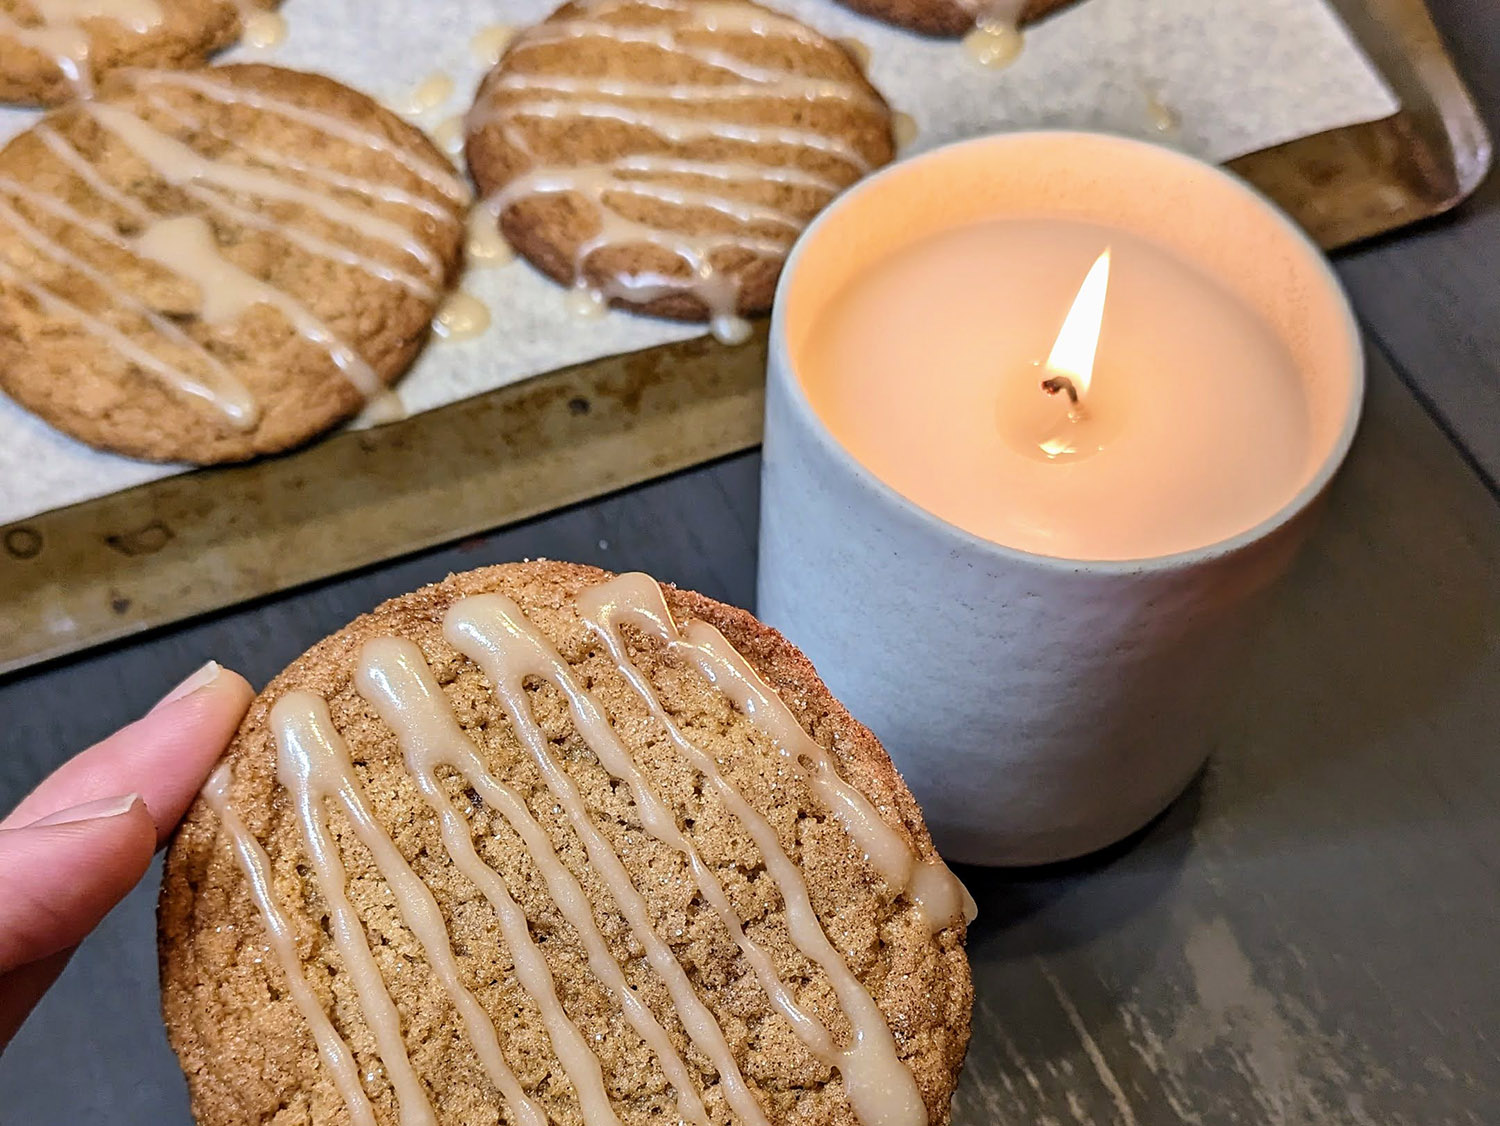
    That’s what got me into Siblings candles two years ago—the eco-friendly kits are practically foolproof to use. I’ve made five different scents so far—and loved one so much I’ve reordered it (along with a trio of other varieties). I even got so into its Butternut Bakery collab—the perfect-for-fall Spiced Maple Butter Cookie candle—that I made the cookies the candle was based off of…and wound up loving the candle even more than the treat. Which, for a sweet tooth like me, says a lot.

    But given that each kit makes a single 12-ounce candle—and costs $29, about what you’d spend on a premade luxury candle—is the novelty, or the argument for sustainability (since you’re theoretically reusing a jar to make it) enough to justify the cost?

    Here’s my take, after making my own candles from scratch for four years and testing all kinds of kits.

    Photos: Candace Braun Davison

    What I Love About Siblings Candles:

    First, there’s the smooth, clean burn of the coconut blend wax (which I find produces less soot than other waxes, something others have backed up). Second, the elegant-yet-unexpected scent blends and third, the brand’s commitment to sustainability. It encourages reusing vessels, instead of throwing them out every time you burn through a candle, and the packaging for the kit is compostable. Plus, Siblings works with the reforestation and conservation company, Pachama, to be carbon neutral.

    What You Should Know Before Buying:

    As tempting as it is to buy a bundle and save, if you’re not likely to burn through the candle quickly, you’ll want to make sure to leave the kit in a cool place. I’ve found that some bags I’ve left in my basement got a yellow-ish discoloration, after a hot day caused the wax to melt, fuse the wick and wick-steadying popsicle stick to it, forcing me to pick it out later.

    Also, the level of satisfaction you get out of pouring your own candles may vary here. With Siblings, it’s a quick win, much like baking from a cake mix, where you don’t have to weigh ingredients or calculate fragrance load (I’ll share the exact steps below). But for some, it may feel too simple, like you’re taking a “semi-homemade” shortcut. So, if you’re the type who feels like they’re cheating if they don’t bake cookies from scratch—versus the break-and-bake kind—skip this kit. If you’re okay with skipping some of the science-y bits, proceed!

    How Do You Make a Siblings Candle?

    It’s by far the easiest, most straightforward candle kit I’ve tested.

    1. You take out the wick, warning label and wick holder, then microwave the bag of wax in a microwave-safe bowl for about 2 minutes.
    2. While the wax melts, you can peel the sticker off the wick and insert it into the middle of your vessel, adding the warning/care label to the bottom. Keep the wick centered using the included wick holder—basically a popsicle stick with a hole in the middle for the wick to go through—and carefully pour the hot wax into the jar. Let it sit for at least 2 hours to cure, though I like to leave mine overnight to really let things set.
    3. Remove the wick holder and trim the wick to a quarter-inch above the wax. (Which, BTW, you should be trimming the wick after each burn—something many of us rarely do, but it makes a huge difference in how sooty the candle burns!)

    What Should I Put the Candle In?

    In terms of vessels, you could use a cleaned-out candle jar that’s roughly 3 inches in diameter and can hold more than 10 ounces of wax, per the brand. But Siblings honestly has some of the most beautiful, durable vessels around, so it might be worth splurging for one of theirs that you can use over and over again, since you know it’s designed and tested for this wax and these temperatures. Absolutely do not put it in anything plastic, wooden or that could easily tip over. (Siblings offers more guidance on this on its FAQ page.)

    I use the Brass Forever Vessel, which is no longer sold, and as part of the Spiced Maple Butter Cookie bundle, I received—and tested—the limited-edition ceramic Forever Vessel in a Speckled Cream glaze. It’s elegant and looks delicate yet still feels sturdy.

    How Much Are Siblings Candles?

    The kit to make a single candle costs $29, though you’ll have to supply your own vessel. You can save a few bucks ($3, exactly) if you order a three-scent bundle, or if you buy a Forever Vessel and scent bundle.

    The 3 Best Siblings Candle Scents

    3. Butternut Bakery x Siblings Spiced Maple Butter Cookie — check out the full review below, but basically, if you want to make your kitchen smell like a cinnamon-y pancake breakfast without having to flip a flapjack, this is for you.

    2. No. 13: Palo Santo, Marshmallow Cream, Burnt Sugar — AKA the most sophisticated roasting-marshmallows scent to ever exist. I credit the palo santo for adding smokiness and woodiness to balance out the sweet.

    1. No. 10: Yuzu, Shiso Leaf, Black Tea — Black tea amps up the lime and citrus in this scent, which has an incredible cold and hot throw. It’s like a Michelin-starred chef reimagined Froot Loops; there’s a nostalgic, fruity note to it that’s not quite tropical—more like fruity candy—only upscale. Like the Sugarfina of fruity sour candy. It’s invigorating and yet…soothing?


    Siblings’ Spiced Maple Butter Cookie, Reviewed:

    Curious about the Butternut Bakery collab specifically? Its cold throw alone can make a room smell like Christmas morning, without having that cloying, faux-gingerbread odor most holiday candles have. Here’s a full breakdown of the scent.

    The Pros:

    • Great cold and hot throw, meaning it doesn’t even have to be lit to offer a gentle, cinnamon-y scent
    • The scent is cinnamon-forward, with a light maple and vanilla flavor
    • It’s fast and easy to make
    • Includes a recipe for Spiced Maple Butter Cookies from Butternut Bakery

    The Cons:

    • You need to supply your own vessel, unless you buy one (which can be pricey—they range from $45 to $48 apiece)
    • Cinnamon notes may be too strong for some; reminded one person of a “cinnamon broom you get around the holidays,” though others said it reminded them of Christmas cookie decorating parties or cinnamon rolls

    The Verdict: Is the Siblings Spiced Maple Butter Cookie Candle Worth Buying?

    Yes, both for yourself to get into the holiday spirit, and as a holiday gift for a friend. It’s the kind of low-effort craft that’s great for feeling cozy (and productive) on a chilly winter morning—without making a mess or requiring pro-level DIY skills or equipment.

    You can buy the Spiced Maple Butter Cookie Candle by itself or with a Forever Vessel as a bundle through Siblings.co.

  • 60 Genuinely Fun Things to Do on a Rainy Day (or When Ennui Grips You)

    60 Genuinely Fun Things to Do on a Rainy Day (or When Ennui Grips You)

    Maybe it goes back to the idea that we all want what we can’t have, but it seems like on the afternoons when there’s a torrential downpour, that’s when I desperately want to spend the afternoon at the park, or the beach, or simply walk around the block in circles, causing my neighbors to question my sanity.

    For those days when I’m blanking on what to do instead (and I can’t stand the idea of spending the whole afternoon binge-watching TV), I’m going to turn to this list of things to do on a rainy day. But honestly, they’re just as useful on a sunny day, when you feel out of sorts, ramshackled by ennui…just plain bored.

    60 Things to Do on a Rainy Day

    (more…)

  • 30 Zoom Scavenger Hunt Ideas for People of All Ages

    30 Zoom Scavenger Hunt Ideas for People of All Ages

    You asked, I updated: Here are even more Zoom scavenger hunt ideas! Scroll on for how to play and what to search for.

    Tons of virtual party ideas have popped up to liven up the typical Zoom and Google Meet calls with far-flung friends and family, but my favorite has been the Zoom scavenger hunt. You can use any video chat service—Facebook Messenger/Rooms, Microsoft Teams, Meet, Skype, FaceTime and so on (Zoom’s just become the most commonly used one, thanks to its fun backgrounds and other features).

    It’s one of those icebreakers that’s low-stress, so even the most introverted in the crowd isn’t panicking to come up with an answer, and the rules are easy to follow. Plus, it gets everyone moving. Want in? Here’s everything you need to know.

    How to Host a Virtual Scavenger Hunt:

    The game works very similarly to a traditional scavenger hunt. Someone acts as the leader, calling out clues of things to find. Guests are given one minute to scour their homes, and the first person to procure the item in question gets three points (or however many you assign), and anyone else who finds an item within the 60-second timeframe gets one point. At the end of the game—whether you play five rounds or go for all 30 below—tally up the points, and whoever has the most wins bragging rights…until the next one.

    Here Are 30 Zoom Scavenger Hunt Search Ideas:

    Run out and find…

    1. Your fave midnight snack
    2. Something larger than your head
    3. The last note you wrote yourself (a to-do list, an affirmation, you name it)
    4. A plant (living or dead, fake or real)
    5. Something that reminds you of your favorite song
    6. A link to the last YouTube video you watched
    7. Candy
    8. A receipt
    9. The last text you sent someone
    10. A baby photo
    11. A VHS tape (those still exist somewhere, right?)
    12. Something tie-dye or multicolored
    13. Something from your childhood days
    14. The biggest book you can find (longest page count wins!)
    15. A craft you have never finished (or even started)
    16. Your favorite mug
    17. Something that reminds you of your parents
    18. Something that starts with the first letter of your name
    19. An item that’s older than you are
    20. A foreign coin
    21. Your go-to breakfast
    22. The softest thing you own
    23. Something with buttons on it
    24. Something that floats
    25. Something that sinks
    26. A scented candle
    27. Toilet paper
    28. A shell
    29. Something that lights up
    30. Something smaller than your fingernail

    Psst: Looking for a scavenger hunt to play this summer? I’ve got a whole list of ideas that will get you making the most of your backyard!

    Photo by Candace Davison

  • Why Don’t You…Host a Birthday Parade? (Or July 4th Parade, Or…)

    Why Don’t You…Host a Birthday Parade? (Or July 4th Parade, Or…)

    Crepe paper streamers covered my bicycle as I donned my favorite dance leotard. Nearby, a friend twirled her baton while my brother fidgeted with his helmet (which may have had an inflatable shark taped to it? I can’t quite remember). It was almost showtime, though our audience didn’t know it yet. The year was 1990-something, and my elementary school friends and I were psyched to star in our very own parade.

    We didn’t have permits. We didn’t alert the neighborhood. But we had homemade costumes, decorated bikes and scooters and plenty of enthusiasm as we marched, skipped and pedaled down the sidewalk. The idea was my mom’s, likely to get us to stop whining about being bored during summer break, and she’d alerted some neighbors and fellow parents, so they could pop outside and watch.

    We didn’t care that we didn’t have a big audience, or beads to throw out or a 100-person marching band. We just loved the chance to dress up and do something out of the ordinary, making a capital-m Moment out of a random weekday. It’s simple, yet it’s become a core memory of mine all these years later. And recently, I revived it, as my husband and daughter crafted a “float” out of an old diaper box and balloons, then danced throughout the house throwing confetti made from paper bags to an audience that stared in silent reverence, due to them being stuffed animals.

    We filmed it as a birthday tribute to my dad and sent it his way, since we live 1,200 miles away. It was silly, it was simple—and yet, it turned a typical Tuesday night into something magical.

    Photos: Candace Braun Davison

    And so, I challenge you: Sometime this year, will you create an impromptu parade?

    How to Host a Kids’ Parade at Home (or in Your Neighborhood):

    1. Host a Float-Building Party

    Save cardboard boxes, paper bags and paper towel rolls, then head to the dollar store for a cheap balloon pump, balloons, streamers, washable paint and other party supplies. Let kids go wild creating whatever they can dream up. (The easiest course of action, in my experience, is having them decorate their bikes and scooters with a pennant or streamers.)

    We added two arm straps to a large box to create a “float” for Em to wear and decorate, which she kept pretty minimalist—unless it was sponsored by Millie Moon and I didn’t know it—opting for a massive trail of balloons and a mask on a stick.

    2. Encourage Costumes

    Old Halloween costumes, mismatched clothes—anything goes. You can set a theme, such as the circus or USA (particularly if it’s timed to July Fourth), or just see what the kids pull out of their closets and throw together.

    3. Paint Faces

    Optional, yet highly encouraged, if you’re turning this into an all-day affair. (You can buy full face-painting kits on Amazon.)

    4. Invite Spectators

    Set a date and time and alert the neighborhood, inviting them to join the fun—or pull out a chair and catch the show.

    You could then turn it into a backyard party, inviting everyone over for a cookout, if you really want to take things up a notch. (After all, how often do we have Memorial Day or Labor Day off, swear we’ll do something, then wind up sitting on the couch or folding laundry? Not this year!)

    Psst: In the spirit of getting more out of each weekday, I’m thinking of making “Why Don’t You…” a recurring series, where I share a simple-yet-unexpected way to infuse your day with a little more fun. Have any ideas for the column? Want to share your take? DM me: @lifebetweenweekends.

  • How To Save A Pepto-Bismol Pink Bathroom, According to an Interior Designer

    How To Save A Pepto-Bismol Pink Bathroom, According to an Interior Designer

    What do you do with a pink bathroom?! In theory, it sounds fun, potentially chic. But, the longer I stared at my downstairs bathroom, the more the walls started closing in on me. They weren’t ballet slipper or blush; not the trendy, questionable-marketing-ploy known as “millennial pink.” They’re a little closer to Pepto-Bismol, with the color covering the floor and walls, all trimmed in black. Take a look:

    before: the pink bathroom with its original 1947 vanity and lighting
    Photo: Candace Braun Davison

    This was a huge trend in the ’50s—one we saw in many of the homes in our price range. There’s a certain charm to it, but  the challenge, though, is making it work. I’m not crazy about the pink-and-black Parisian poodle look, which I’ve seen in some redesigns. I’m not afraid of kitsch, either—the first thing we bought for the house was a flamingo shower curtain—but I also don’t want to turn the room into Margaritaville

    pink tile bathroom featuring a flamingo shower curtain
    Photo: Candace Braun Davison

    How to Update a Pink Bathroom So It’s Fresh for 2024 (and Beyond)

    Back in early 2018, I mocked up several ideas for the space (which I’ll share below), but it’s been six years! A lot has changed since then, so I turned to a pro to get an interior designer’s take on working with what you’ve got. Brittney Quinn Morgan is the founder of Brittney Quinn Interiors, a design studio based in Nashville, TN, that specializes in playful-yet-cozy spaces you’ll want to spend every minute in. Who better to weigh in?! Here’s what she had to say.

    What color combinations would you recommend for a pink bathroom? 

    “In this bathroom, I’d stick with the pink and black and white color scheme that’s already going on, but I’d really lean into the pink, introduce some gold tones via the fixtures, and add in some pops of natural green with plants.”

    Here’s what that would look like:

    Interior designer Brittney Quinn's ideas for updating a pink bathroom
    Photo montage courtesy of Brittney Quinn Interiors

    Sources: Tempaper Family of Cranes peel-and-stick wallpaper; West Elm Ellington bathroom vanity; CB2 Monaco black round wall mirror; CB2 Falazo abstract shower curtain; Globe Electric Celestia light; Allen + Roth Harlow brushed gold faucet; The Sill large Majesty palm; Anthropologie pothos plant; Flamingo soap dispenser, Amazon; Ink + Ivy Arbor striped tassel bath rug, Target

    What’s important to keep in mind to make the room feel fresh for today while preserving its character?

    “I think the biggest thing is to think about the era in which the space was originally designed, and bring in new pieces that feel cohesive with that same style and vibe — you want pieces that feel timeless, like they could be vintage and modern at the same time. Also identify the things in the space that give it that character, like colorful tile or crown molding, and find ways to highlight them,” Morgan says. That could be leaning into the pink with a coordinating wallpaper or painting the molding a bold color, for example. 

    What would you suggest for people who want a full on Palm Springs banana leaf vibe? 

    “Go for it! A retro pink bathroom is basically screaming ‘Palm Springs!’ already, so you may as well go all out if that’s your style. I think the moodboard I put together has that Palm Springs vibe without going the traditional banana leaf route, but it’d be pretty easy to turn it into the bathroom of Blanche Deveraux’s dreams with just a few changes,” she says. “Green and pink look amazing together, so swap the crane wallpaper for a banana leaf motif (if you want to splurge, Martinique is the blueprint!) — and if you really want to go the extra mile, hang a shower curtain in a fabric that matches the wallpaper.”

    She also had an ingenious tip to make the space look high-end without killing your budget:

    “For an extra luxe look, hang two shower curtains to frame the sides of the shower like you would a window.”

    I love this moodboard and Morgan’s ideas so much that it saddens me to report my pink bathroom is now pale green. (In late 2020, the tiles started bulging and popping off, and I learned the space needed to be stripped to the studs due to damage over the years—and to bring it up to code. So we wound up totally renovating the space.)

    Love Morgan’s ideas too? If you’d like to book a consultation—or see more of her work—check out her website or follow her on Instagram, @brittneyquinninteriors.


    beach art updates a retro pink tile bathroom

    In Case You’re Curious: Here’s How I Originally Updated the Pink Bathroom

    For a while, I kept things simple with a (faux) fiddle leaf fig tree, some framed beach and flamingo art and a creme-and-pink fringed shower curtain. 

    I seriously considered changing out the vanity and adding wallpaper, and back in 2018, I mocked up a few ideas. As you can see, there are mixed results.

    Here are my original ideas, courtesy of some really amateur Photoshopping. 

    1. Blush and White from Walls Need Love:

    Ah, chevron. You were everywhere in the mid-2010s, to the point that we all needed a breather from the style. Still, I like the idea of pulling in some of these colors.

    Picture:

    • Coppery finishes
    • Blush and cream tones for warmth while maintaining airiness
    • Natural wood accents

    2. A mellow take on the Hollywood Hotel banana leaf motif from Chasing Paper:

    Sadly, this style has been discontinued, but you can find some similar styles online. These feel a bit more current anyway:

    3. Leaning into a gray-and-pink scheme, with this design from Rocky Mountain Decals:

    This style has been discontinued as well (here’s a similar style from Amazon!), but I like the idea of using an oversize pattern to offset the small, 4″x4″ tiles, and bringing in grays to bridge the sharp contrast of the black trim and floor tile.

    4. Bringing in Strong Metallics with Peonies by Chasing Paper:

    The gold lines almost demand a gold (or matte black) faucet though, right?

    5. A Brazen King Flamingo Print from Walls Need Love:

    I love how the dark background ties in with the black tile accents, making the room feel a bit moodier—and more deliberately designed. Years later, I’m still into it. But I’d need to swap the vanity for sure (and hide that plunger).

    6. Bringing the Outdoors (Sorta) in with Chasing Paper’s Green Leaf print:

    More classic and straightforward, bringing in strong green tones. These days, I think I’d go with something a bit more muted, like this.

    7. Going Less Busy (But Still Colorful) with Watercolor Wallpaper from Target:

    target watercolor wallpaper in a pink bathroom

    With such small tile everywhere, I worry that wallpaper that’s too detailed might be a bit aggressive for this space. This still feels livelier—and draws the eye upward—than a solid color on the upper walls, and it could be fun for a kid’s bathroom.

    What would you do with this space? DM me your ideas; I’d love to hear them.

Optimized with PageSpeed Ninja